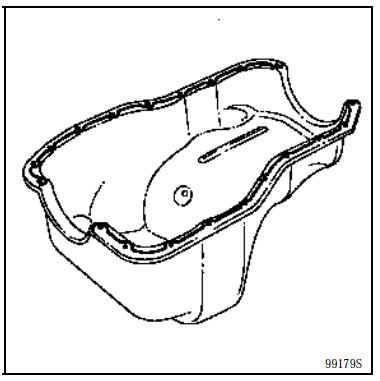
Oil sump
D7F engine
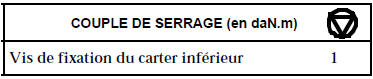
Place the vehicle on a two-post lift.
Disconnect the battery.
Drain the engine oil.
Remove:
- the oil level sensor using a 19 mm half-moon spanner,
- the engine-gearbox guard plate.
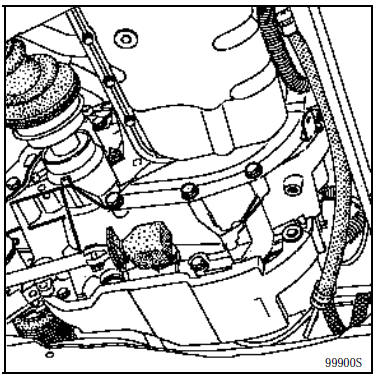
Remove the oil sump mounting bolts.
Pivot the oil sump towards the rear of the vehicle to free the oil pump strainer from the sump baffle.
Clean the mating surfaces without scraping the aluminium surfaces.
INSTALLATION
Refit in the reverse order of removal, using a new gasket.
E7J / F8Q engines
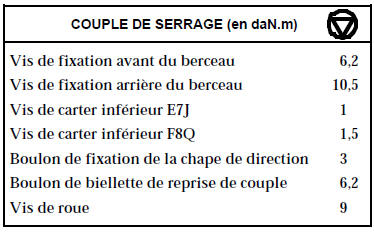
REMOVAL
Position the vehicle on a two-post lift.
Disconnect the battery.
Drain the engine oil.
Remove:
- the front wheels,
- the nut and cam bolt of the steering clevis after pushing back the boot,
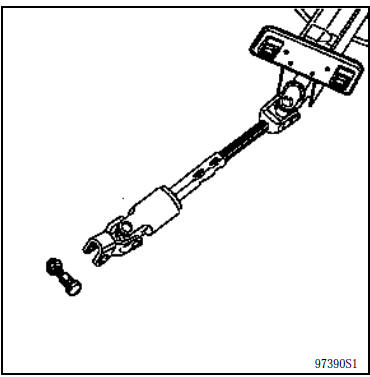
- the lower ball joint mountings and the steering mountings for the E7J engine,
- the cradle-to-body tie rods,
- the gearshift control on the gearbox side,
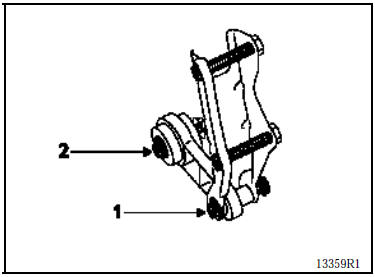
- bolt (1) and loosen, without removing, bolt (2) of the torque reaction rod,
- the lower bumper mountings,
- the exhaust downpipe for the F8Q engine.
E7J engine specifics
Remove:
- the exhaust manifold heat shield,
- the catalytic converter,
- the flywheel cover,
- the power steering pipe mountings on the cylinder block and the multifunction bracket.
All engine types
Remove:
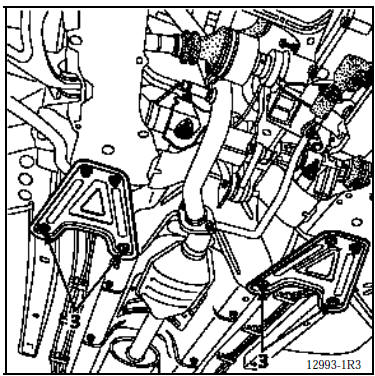
- the mounting bolts (3),
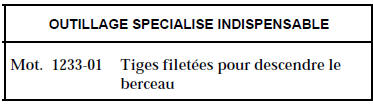
- the subframe mounting bolts, fitting the Mot. 1233-01 threaded rods as you go.
Gradually lower the subframe using the Mot. 1233-01 threaded rods until approximately dimensions X1 and X2 are reached.
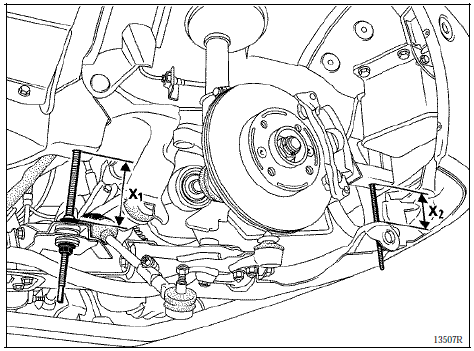
E7J Engine
X1 = 9 cm X2 = 12 cm
F8Q engine
X1 = 7 cm X2 = 9 cm
Remove the oil sump.
INSTALLATION
Clean the oil sump.
E7J Engine
Apply a bead of RHODORSEAL 5661 approximately 3 mm wide as shown in the diagram below.
Do not forget to replace the two half-moon seals on each side of the sump.
F8Q engine
Fit the new aftermarket gasket.
Refit in the reverse order of removal.
Test yourself
A quick Renault Kangoo quiz: every answer comes with an explanation and a link to the manual page.