Air conditioning
Heater resistor block
In this manual: Air conditioning
~2min read
LEFT-HAND DRIVE
Tightening torques |
|
| fixing screw of the beam reinforcement plate | 2.1 daN.m |
| heater resistor unit mounting bolts | 0.2 daN.m |
| flexible mount bolt | 0.2 daN.m |
| battery cover screw | 0.4 daN.m |

REMOVAL
- Disconnect the battery, starting with the negative terminal.
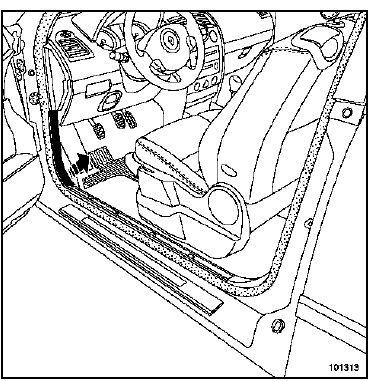
- Remove the front sill trim (front section).
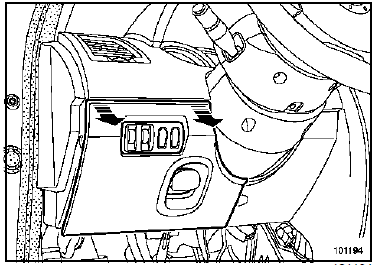
- Unclip the access hatch to the lower housing.
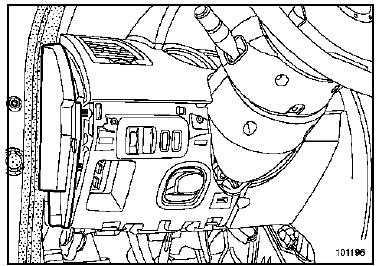
- Unclip the side cheek panel.
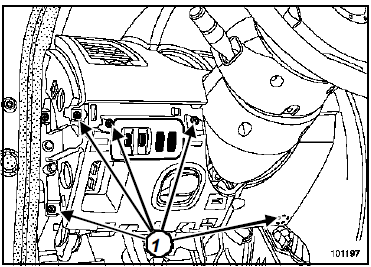
- Unclip the headlight adjustment control.
- Remove the screws (1).
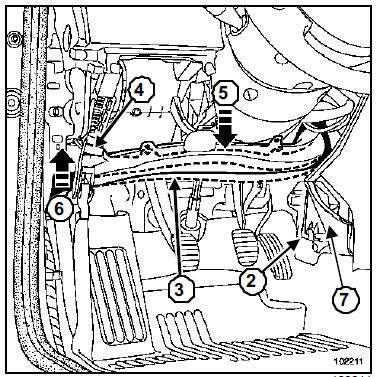
- Remove the cover (2).
- Remove the air duct (3).
- Unclip the air ducts (3) and (4).
- Fold the air duct (3) downwards (5).
- Lift the air duct at (6).
- Remove the front air distribution duct (3).
- Move aside the wiring harness secured to the beam reinforcement plate (7).
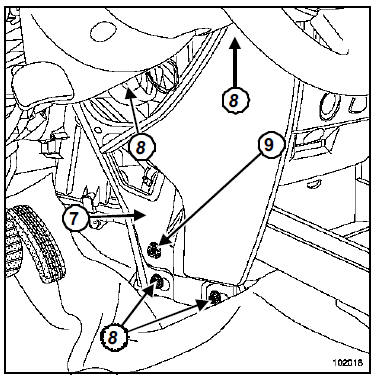
- Loosen the flexible mount (9) connecting the unit and the beam reinforcement plate.
- Remove the four bolts (8) from the beam reinforcement plate.
- Remove the beam reinforcement plate (7).
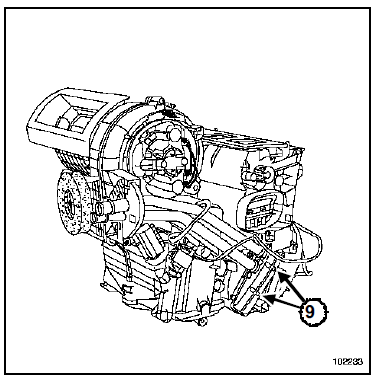
- Remove:
- the heater resistor unit connector,
- the two mounting bolts (9)
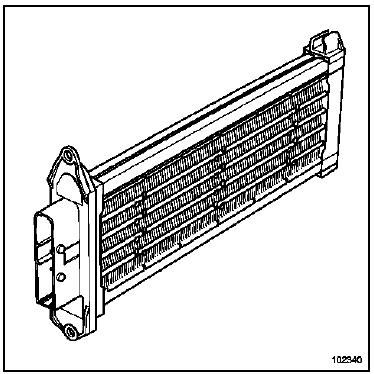
- Remove the heater resistor unit.
INSTALLATION
- Refit in the reverse order of removal.
- Reshape the air duct by working through the air outlet holes and applying pressure by hand perpendicular to the fold.
Connect the battery; carry out the necessary relearn procedures (Chapter Battery).
- Tighten to the following torques:
- the body reinforcement plate mounting screws (2.1 daN.m),
- the heater resistor unit mounting bolts (0.2 daN.m),
- the flexible mount bolts (0.2 daN.m),
- the battery cover bolts (0.4 daN.m).
RIGHT-HAND DRIVE
Tightening torques |
|
| heater resistor unit mounting bolts | 0.2 daN.m |
| battery cover screw | 0.4 daN.m |

REMOVAL
- Disconnect the battery, starting with the negative terminal.
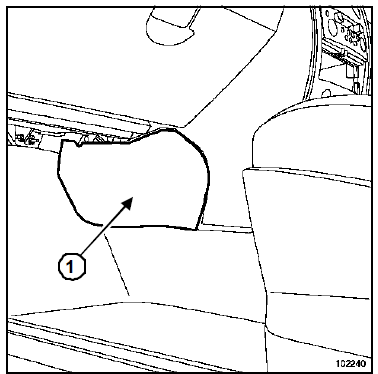
- Remove the cover (1).
- Fold back the carpet slightly to access the heater resistor unit mounting bolts.
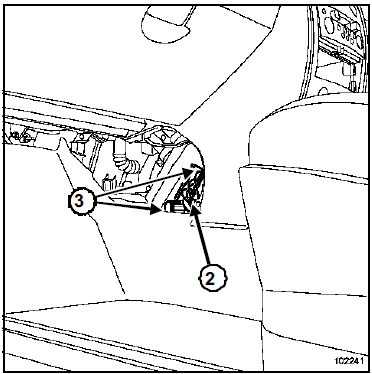
- Remove:
- the connector (2) of the heater resistor block,
- the two screws at (3) of the heater resistor block.
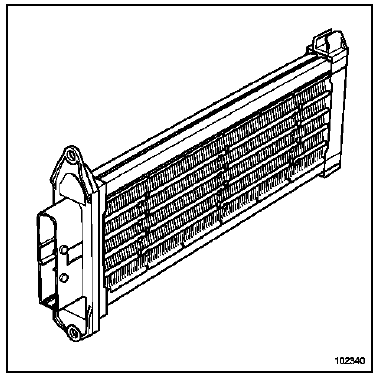
- Remove the heater resistor unit.
INSTALLATION
- Refit in the reverse order of removal.
Connect the battery; carry out the necessary relearn procedures (Chapter Battery).
- Tighten to the following torques:
- the heater resistor unit mounting bolts (0.2 daN.m),
- the battery cover bolts (0.4 daN.m).
Test yourself
A quick Renault Megane quiz: every answer comes with an explanation and a link to the manual page.
Was this page helpful?