Engine and peripherals
Air filter housing
In this manual: Engine and peripherals
~3min read
K4J
Essential special tools |
|
| Ele. 1294-01 | Wiper arm removal tool |
Tightening torques |
|
| air filter housing mounting bolt | 0.9 daN.m |

REMOVAL
- Remove the engine covers.
- Disconnect the battery.
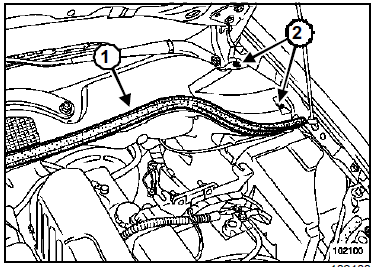
- Remove:
- the seal (1),
- the plastic rivets (2).
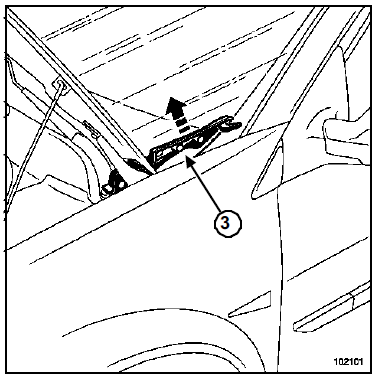
- Release the trim cover (3).
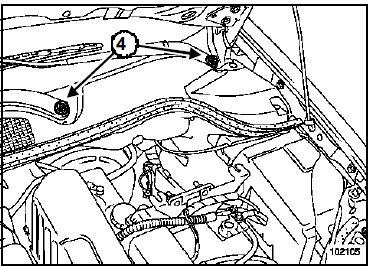
- Remove the wiper arms (4) using tool (Ele. 1294-01).
- Remove the cowl grille.
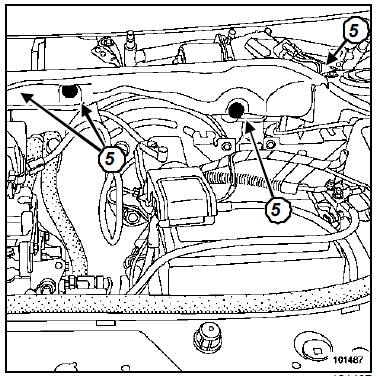
- Remove:
- the dash insulation mounting clips (5),
- the dash insulation.
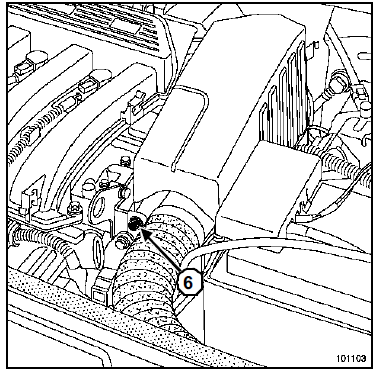
- Remove:
- the mounting bolt (6) of the air resonator,
- the air resonator.
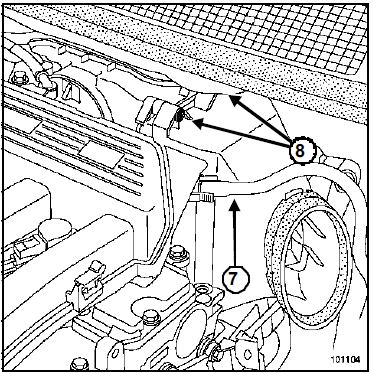
- Disconnect the vacuum hose (7) from the brake booster to the intake manifold.
Do not damage the vacuum outlet on the intake manifold. Damage will require replacement of the intake manifold.
- Remove:
- the two mounting bolts (8) of the air filter cover,
- the filter element.
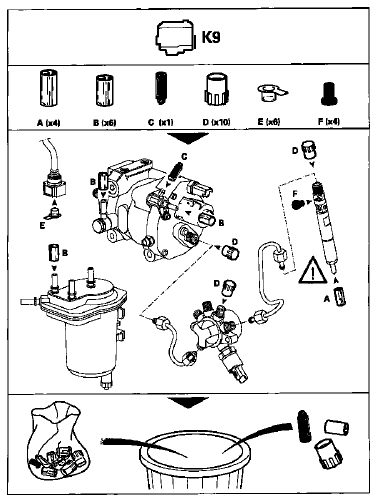
- Disconnect the connector (9) from the oxygen sensor.
- Remove the mounting bracket (10).
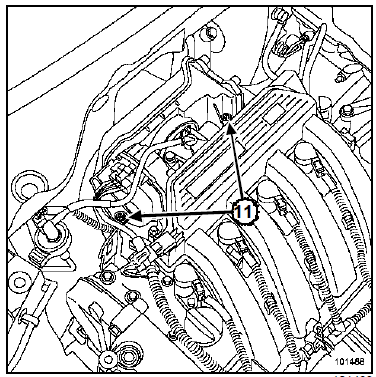
- Remove the two mounting bolts (11) of the air box.
- Remove the air filter housing.
INSTALLATION
- Replace:
- the throttle body gasket each time it is removed, using grease to ease installation,
- the plastic rivets and clips after each removal.
- Refit in the reverse order of removal.
- Tighten the air filter housing mounting bolts to torque (0.9 daN.m).
Connect the battery; carry out the necessary re-learns (see Electrical Equipment chapter).
F4R or K4M
Tightening torques |
|
| battery tray mounting bolt | 2.1 daN.m |

REMOVAL
- Remove the engine covers.
- Disconnect the battery.
- Remove the battery.
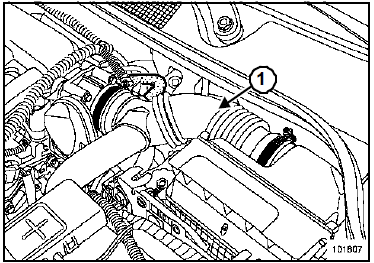
- Remove the air duct (1).
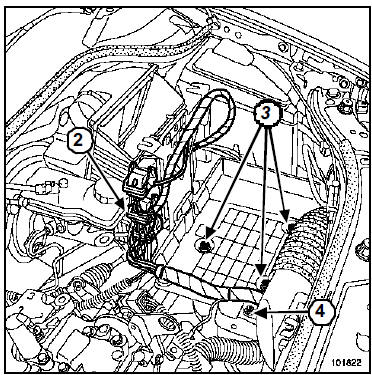
- Disconnect the connectors (2) from the injection ECU.
- Remove:
- the three mounting bolts (3) of the battery tray,
- the clip (4) of the wiring harness.
- Unclip the wiring harnesses from the battery tray.
- Remove the battery tray.
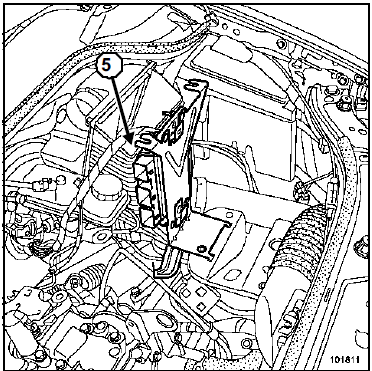
- Remove the injection ECU (5) with its bracket.
- Remove:
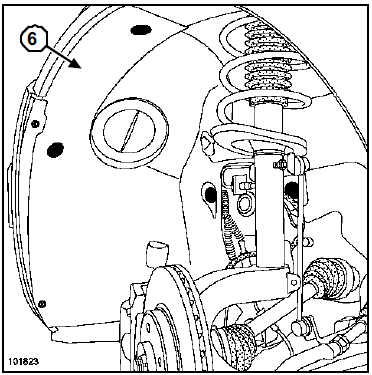
- the front left wheel,
- the mudguard (6).
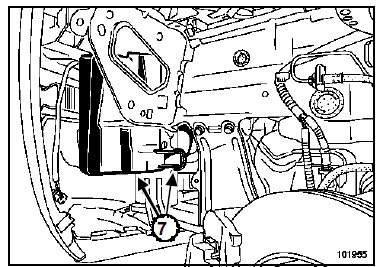
- Remove the two air resonators (7).
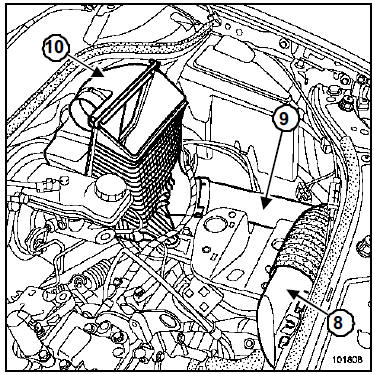
- Remove:
- the air intake sleeve (8),
- the air duct (9),
- the air filter housing (10).
INSTALLATION
- Refit in the reverse order of removal.
- Tighten the battery tray mounting bolts to torque (2.1 daN.m).
Connect the battery; carry out the necessary re-learns (see Electrical Equipment chapter).
F9Q or K9K
Tightening torques |
|
| battery tray mounting bolt | 2.1 daN.m |

REMOVAL
- Remove:
- the engine covers,
- the battery.
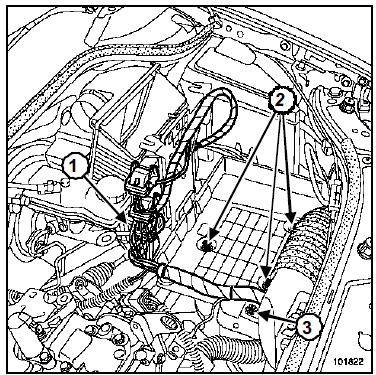
- Disconnect the connectors (1) from the injection ECU.
- Remove:
- the three mounting bolts (2) of the battery tray,
- the clip (3) of the wiring harness.
- Unclip the wiring harnesses from the battery tray.
- Remove the battery tray.
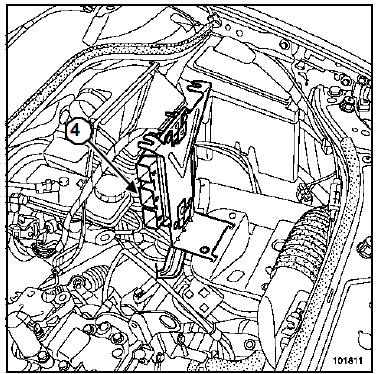
- Remove the injection ECU (4) with its bracket
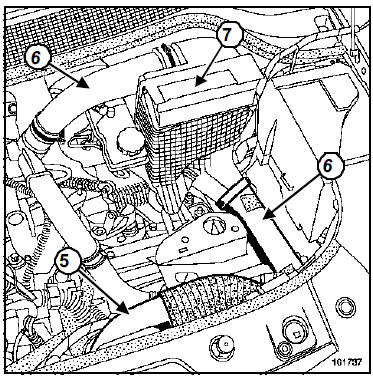
- Remove:
- the air intake sleeve (5),
- the air ducts (6),
- the air filter housing (7).
INSTALLATION
- Refit in the reverse order of removal.
- Tighten the battery tray mounting bolts to torque (2.1 daN.m).
Connect the battery; carry out the necessary re-learns (see Electrical Equipment chapter).
Test yourself
A quick Renault Megane quiz: every answer comes with an explanation and a link to the manual page.
Was this page helpful?