Rear side door
Replacing this part is a basic operation for a side collision. Removing and refitting is a supplementary operation to replacing the body shell.
The method below covers the following operations:
- for removing and refitting the complete door,
- for its complete replacement.
NOTE: All body gap specifications are given in chapter 40A-E.
REPLACEMENT PART CONTENTS
Supplied with soundproofing plates
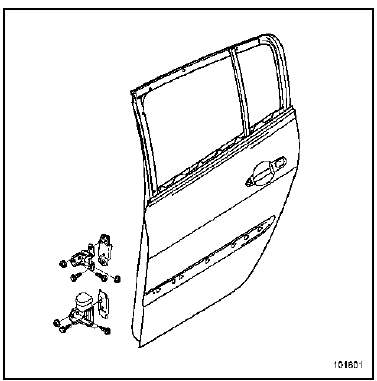
NOTE: It is advised to order in addition a set of clips, available from the spare parts store.
1. DOOR REMOVAL AND REFITTING
This operation can be carried out by one person using the door support tool.
RENAULT approval no.: 661000
Supplier: Z INTERNATIONAL
Reference: SUP 01
Otherwise, this operation requires two operators.
REMOVAL
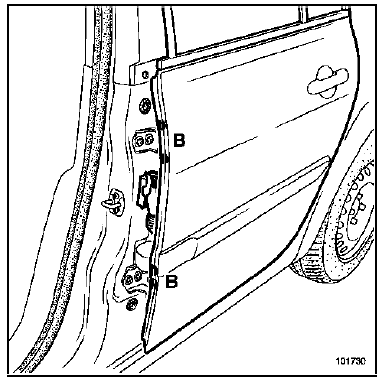
NOTE: When the door is to be refitted to the same body shell without replacement, it is preferable to remove it using the fixings (A) so as not to change the settings.
Disconnect:
- the battery,
- the door harness connector (A).
Remove:
- the door check strap fixing bolt,
- the four door hinge bolts (B).
INSTALLATION
Refit in the reverse order of removal.
Carry out the adjustment following the instructions at the end of this chapter.
WARNING:
Connect the battery; carry out the necessary relearns (see chapter 8).
Before final refitting, the seal between the front pillar and the hinges must be remade using filler sealant (see Technical Note 396A).
2. DOOR TRIM REMOVAL AND REFITTING
The order of operations described below is specific to replacing the door.
For specific removal details of each part fitted to the door, refer to their respective chapters (example: window regulator mechanism, see chapter 51A).
NOTE: It is advisable to carry out the trim removal operations on the vehicle before removing the door.
REMOVAL
Carry out the trim removal operations in the following order.
Remove:
- the sliding window
- the interior trim panel
- the outer door handle
- the door lock
- the lower door sealing strip
- outer door frame seal and fixed glass
- outer door trim strip
a. Removing the sliding window
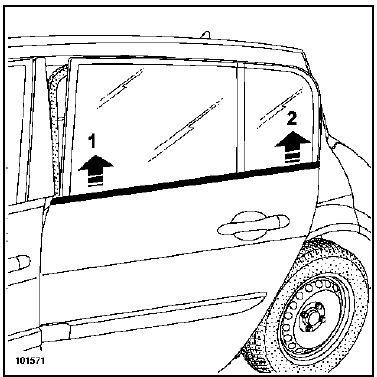
Using tool Car. 1363, unclip the outer weatherstrip (1) and (2).
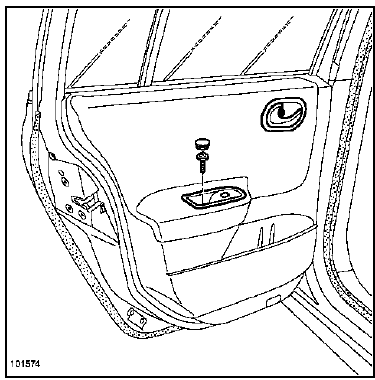
Remove the cover and the screw from the window regulator plate.
Release the plate.
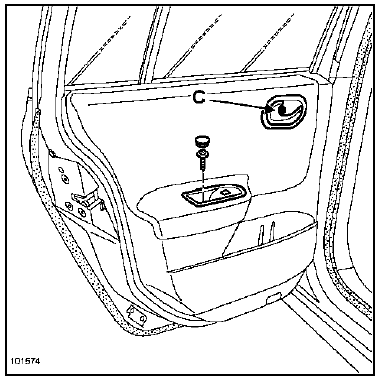
Remove the cover and the screw (C) from the door opening control.
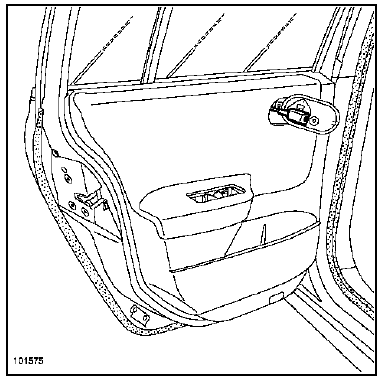
Unclip the cover securing the door opening control cable using a flat-blade screwdriver.
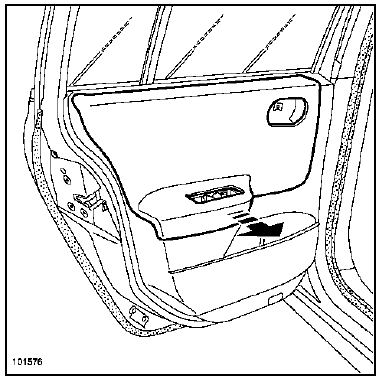
Unclip the trim panel access cover using the trim clip pliers (protecting the trim panel).
Open the access cover.
Hold it open using masking tape.
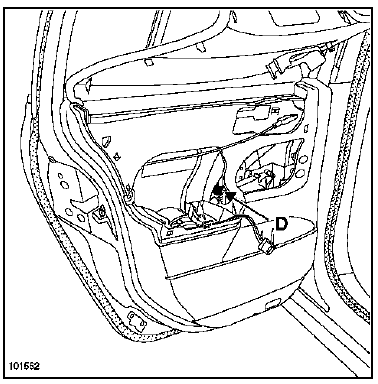
Position the window to gain access to the retaining clip (D).
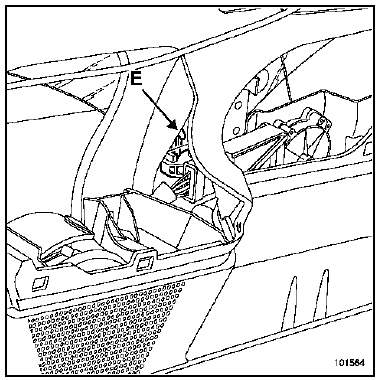
Hold the lug (E) of clip (D) away using a screwdriver.
Simultaneously pull the window upwards.
Secure the window in the raised position using masking tape.
b. Removing the inner trim panel
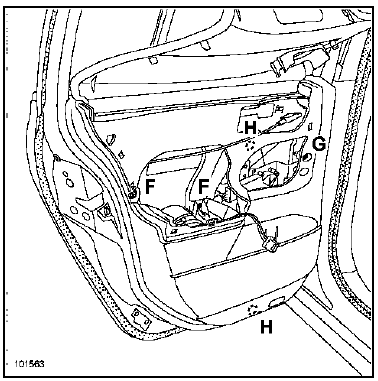
Remove:
- the screws (F),
- the two window regulator motor screws (H),
- the trim panel retaining screw (G).
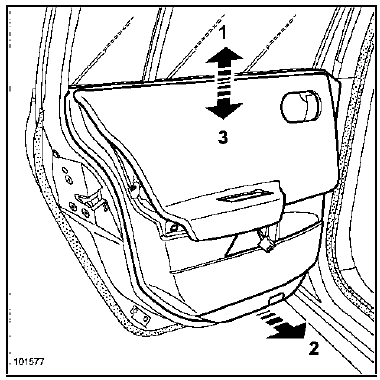
NOTE: The window regulator motor and the harness are attached to the trim panel.
Lift the trim panel upward (arrow 1).
Pull it away to release the window regulator drive carriers from the door shell at the bottom (arrow 2).
Pull the trim panel downward (arrow 3).
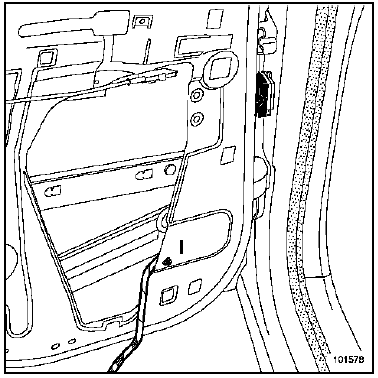
Disconnect the centre pillar connector.
Unclip the clip (I) and remove the "trim panel - window regulator motor - harness" assembly.
c. Removing the outer door handle
NOTE: As the method is identical to that of the front door, the drawings have been taken from the front door.
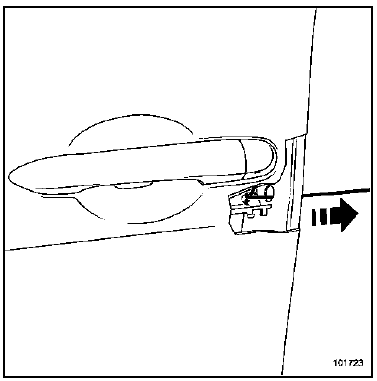
Remove the cover plug.
Using a hook (locally made), release the retaining plate from the lock cylinder.
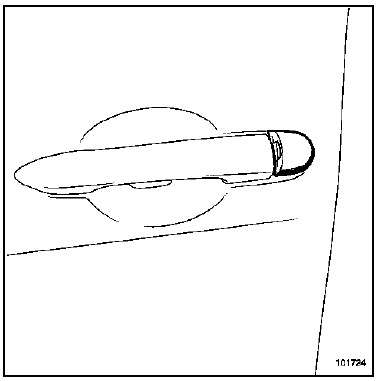
Remove the dummy lock cylinder.
Special feature of vehicles fitted with the "hands-free" function.
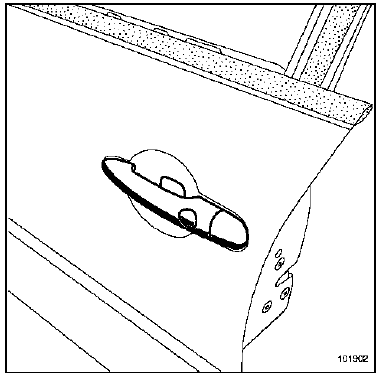
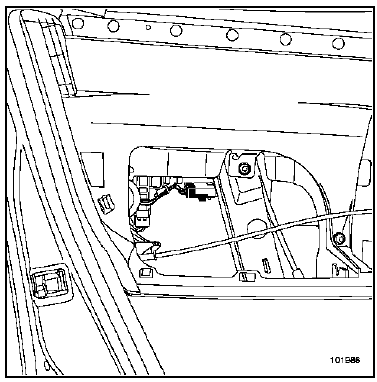
Disconnect:
- the male connector of the opening button,
- the female connector of the handle module.
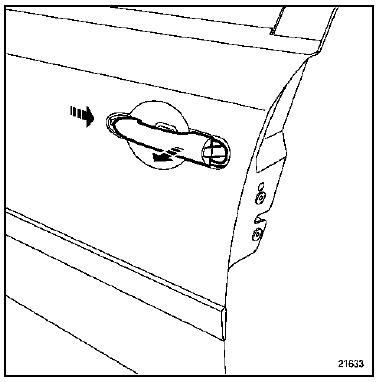
Remove the exterior door handle.
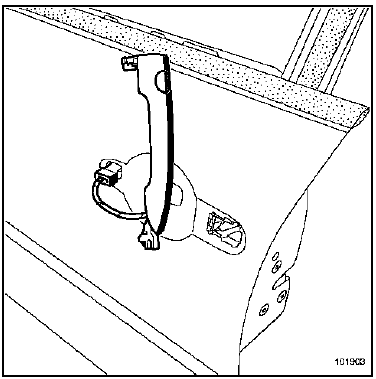
CAUTION: On versions fitted with the "hands-free" function, take care not to damage the connector during removal.
d. Removing the door lock
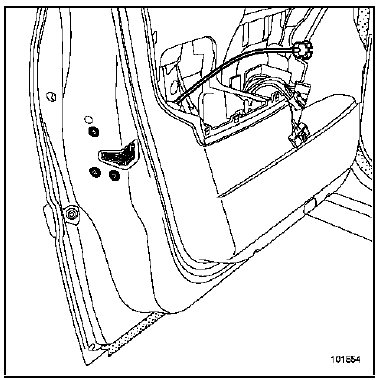
Remove:
- the three lock retaining screws,
- the lock.
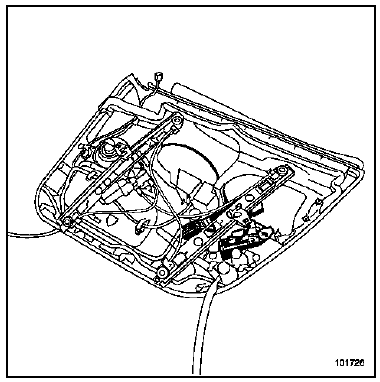
IMPORTANT: On vehicles fitted with the "hands-free" function, operations (c) and (d) must be carried out at the same time as removing the inner door trim panel, and the lock, bracket and outer handle assembly must be left in the inner trim panel during removal.
e. Removing the lower inner door weatherstrip
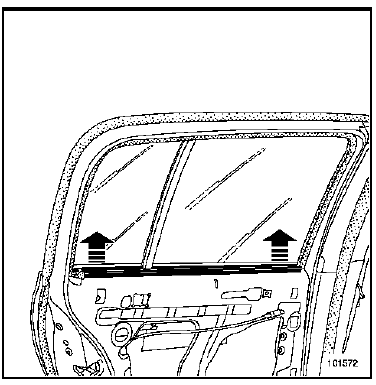
Unclip the inner weatherstrip.
f. Removing the rear door frame and fixed glass
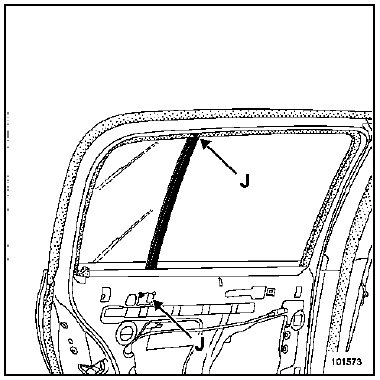
Remove the screws (J).
Release the window guide slider from the door pillar.
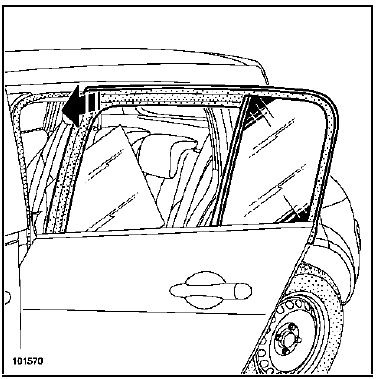
Unclip the front part of the seal.
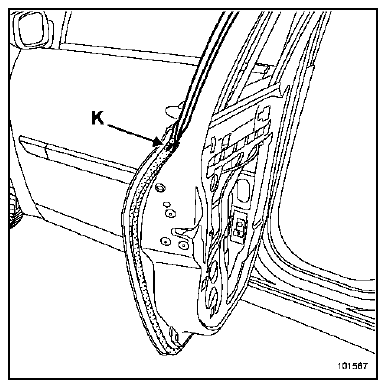
Unclip the upper clip of the double sealing strip (K).
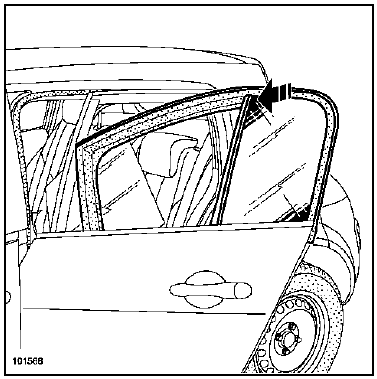
Remove the "seal - fixed glass" assembly from the door.
g. Removing the outer trim strip
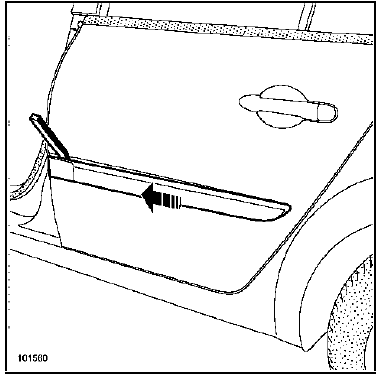
Insert tool Car. 1363, apply light pressure to it and release the strip towards the front of the vehicle.
3. ADJUSTMENT
Adjustment zones
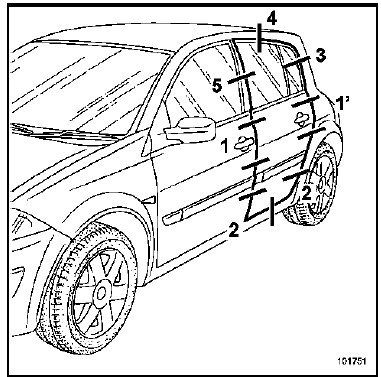
Remove the striker before adjusting via the hinges.
Special feature of the upper hinge
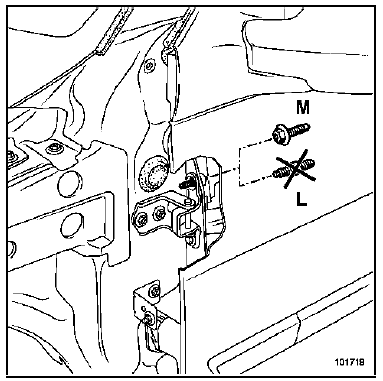
During repair, to allow adjustment of the door, the original indexing screw (L) must be replaced with a specific screw (M) available in the spare parts catalogue.
NOTE: The upper holes of the original hinges will need to be enlarged to obtain more adjustment.
Aftermarket hinges are supplied with square slots.
Adjustment procedures
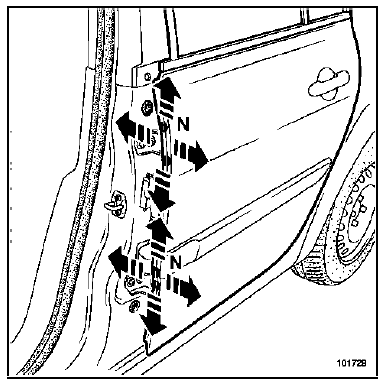
It is recommended to start adjustments at the hinge-to-door body fixings. Adjust the flushness and the height.
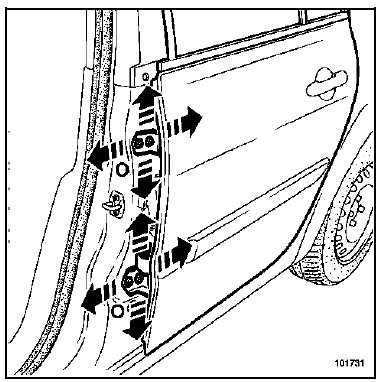
Fore-and-aft adjustment is made by turning the hinge-to-front-pillar screws (O). These screws also allow the height to be adjusted.
Check the adjustments and tighten in position.
Special feature of the striker plate
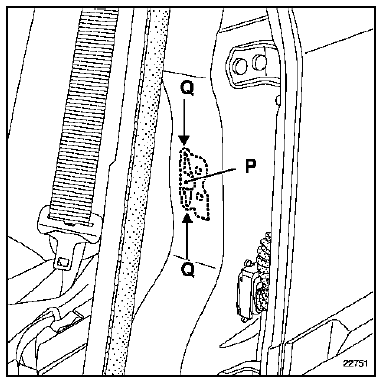
The striker plate is spot-welded at point (P) to the rear wing reinforcement.
For adjustment operations, it is necessary to deform the fusible sections (Q) of the plate.
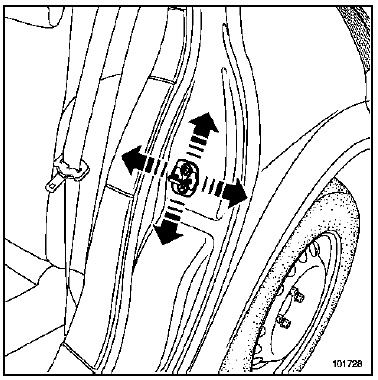
This operation consists of adjusting the rear flushness of the door, the bump-stop and the closing firmness. It can only be done by applying a relatively large force to the striker (using a hammer, for example).
To do this, loosen the striker screws and move the striker in the direction of the arrows.
Check the adjustment and tighten the door in position.
4. PASSIVE SAFETY
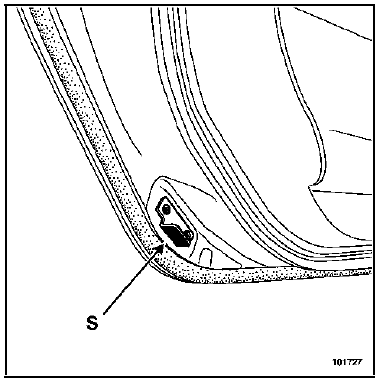
CAUTION: At the end of the operation, check the presence and condition of the anti-release device (S).
REMINDER: The function of this part is essential in the event of a rear collision. The anti-release device keeps the door in its plane and effectively contributes to absorbing the impact energy.
TIGHTENING TORQUE (in daN.m) |
|
| Anti-release device | 2,1 |

Test yourself
A quick Renault Megane quiz: every answer comes with an explanation and a link to the manual page.