Tire Pressure Check

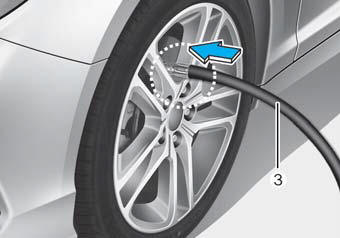
1. After driving approximately 7–10 km (4–6 miles, or about 10 minutes), stop in a safe place.
2. Connect the compressor hose (3) directly to the tire valve.
3. Insert the compressor power cord into the vehicle power outlet.
4. Adjust the tire pressure to the recommended value. With the ignition on, proceed as follows.
- To increase inflation pressure: Turn on the compressor. To check the current inflation pressure setting, turn off the compressor briefly.
- To decrease inflation pressure: Press the button (8) on the compressor.
NOTICE
Do not operate the compressor for more than 10 minutes, otherwise the unit may overheat and be damaged.
Information
The pressure gauge may show readings higher than the actual values while the compressor is running. To obtain accurate tire readings, the compressor must be turned off.
CAUTION
If the tire pressure cannot be maintained, drive the vehicle a second time, see Distributing the Sealant. Then repeat steps 1 through 4.
The use of TMK may be ineffective if the tire damage is larger than approximately 4 mm (0.16 in).
We recommend that you contact an authorized HYUNDAI dealer if the tire cannot be made serviceable with the Tire Mobility Kit.
WARNING
Tire pressure must be at least 220 kPa (32 psi). If not, do not continue driving.
Call for roadside assistance or a tow truck.
CAUTION
Tire Pressure Monitor Sensor
The sealant on the tire pressure monitor sensor and wheel should be removed when you replace the tire with a new one, and the tire pressure monitor sensors should be checked at an authorized dealer.
When reinstalling repaired or replaced tires and wheels on the vehicle, tighten the wheel nuts to 11~13 kgf·m (79~94 lbf·ft).
Test yourself
A quick Hyundai Sonata LF quiz: every answer comes with an explanation and a link to the manual page.