Drive Shaft and Axle
Front Propeller Shaft Repair Procedures
In this manual: Drive Shaft and Axle
37steps
~227min
5/5difficulty
1special tools
Done 0 of 37
Removal
- Raise the vehicle and make sure it is securely supported.
- Remove the wheel cap (A).
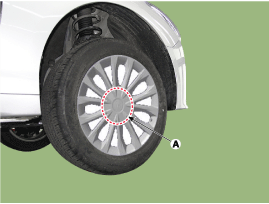
Be careful not to damage the wheel cap (A) when removing it.
- Remove the front wheel and tire (A) from the front hub.
Tightening torque: 88.3 ~ 108 N·m

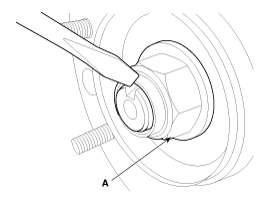
- Remove the driveshaft nut (A) from the front hub while applying the brake. Tightening torque: 274.6 ~ 294 N·m (28.0 ~ 30.0 kgf·m, 202.5 ~ 217.1 lb-ft)

- Replace the front hub dust cover with a new one.
- After installing the caulked nut (A), stake the caulked nut using a chisel and hammer, as shown in the illustration below.
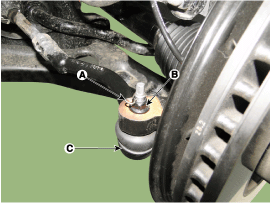
Be careful not to damage the hub bolts when removing the front wheel and tire (A). - Disconnect the tie rod end ball joint (C) from the steering knuckle.
- Remove the cotter pin (A).
- Remove the castellated nut (B).
Tightening torque: 34.3 ~ 44 N·m
- Loosen the lower arm mounting bolts and remove the lower arm (A).
- Remove the cotter pin (B).
- Loosen the nut and mounting bolt.

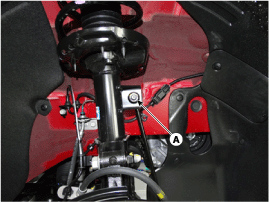
- Loosen the stabilizer link (A) and disconnect it from the strut.
Tightening torque: 98.1 ~ 118 N·m
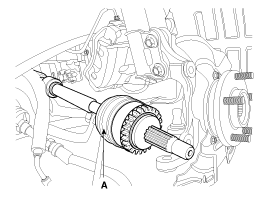
- Disconnect the drive shaft (A) from the front hub assembly.
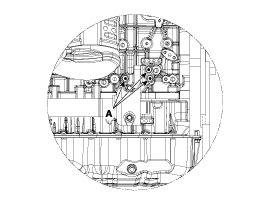
- Loosen the inner shaft bearing mounting bolts (A). [T-GDI ONLY]
Tightening Torque: 49.0 ~ 64 N·m
- Insert a pry bar (A) between the transaxle case and the joint housing, and separate the drive shaft (B) from the transaxle case.
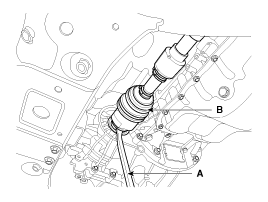
- Use a pry bar (A), taking care not to damage the transaxle and the joint.
- Do not insert the pry bar (A) too deeply, as this may damage the oil seal.
- Do not pull the propeller shaft with excessive force, as this may cause the components inside the joint assembly to shift, resulting in a torn boot or damaged bearing.
- Plug the transaxle case opening with an oil seal cap to prevent contamination.
- Support the propeller shaft properly.
- Replace the snap ring every time the propeller shaft is removed from the transaxle case.
- Install in the reverse order of removal.
Inspection
- Inspect the drive shaft boots for damage and wear.
- Inspect the drive shaft splines for wear or damage.
- Make sure there is no water or foreign matter in the joint.
- Inspect the spider assembly for roller rotation, wear, or corrosion.
- Inspect the groove inside the joint case for wear or corrosion.
- Inspect the dynamic damper for damage or cracks.
Disassembly
|
- Remove the snap ring (B) from the spline of the drive shaft (A).

- Remove both boot bands from the transaxle side TJ housing.


- Pull the boot off the transaxle side joint housing (B).
- Separate the boot (A) of the TJ from the transaxle side, wipe the grease from the TJ housing (B), and assemble them accordingly.
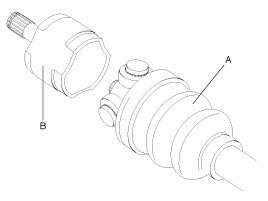
Make alignment marks (D) on the spider roller assembly (A), the joint housing (B) and the shaft spline (C) to facilitate reassembly.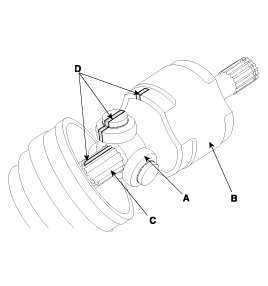
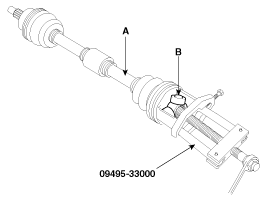
- Remove the snap ring (A) from the shaft.

- Remove the spider assembly (B) from the drive shaft (A) using special service tool (09495-33000).
- Clean the spider assembly.
- Remove the boot (A) from the transaxle side TJ.
To reuse the boot (A), wrap tape (B) around the drive shaft splines (C) to protect the boot (A).
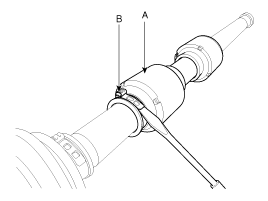
- Using pliers or a flat-tip screwdriver (-), remove both clamps (B) of the dynamic damper (A).
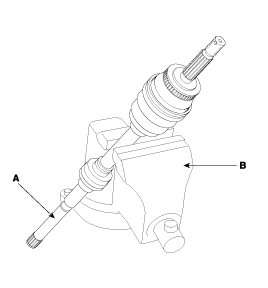
- Secure the drive shaft (A) in a vise (B), as shown in the illustration.
- Apply soap powder to the shaft to prevent damage between the shaft splines and the dynamic damper when the dynamic damper is removed.
- Carefully separate the dynamic damper (A) from the shaft (B).

- Using pliers or a flat-tip screwdriver (-), remove the BJ boot band on the wheel side.

- Pull the BJ joint (wheel side) toward the transaxle.
Installation
- Wrap the driveshaft splines (TJ) with tape to prevent damage to the boots.
- Using the alignment marks (D) made during disassembly as a guide, install the spider assembly (A) and snap ring (B) onto the splines of the drive shaft (C).

- Add the specified grease to the joint boot in the amount that was wiped off during inspection.
- Install both boot bands.
- To control the air in the TJ boots, observe the specified distance between the boot bands when they are tightened.
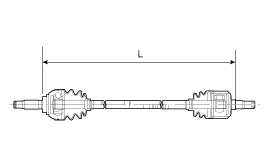
Items Distance (D) mm (in.) Left side Right Side THETA2.4 GDI A/T 530,5 843,5 GAMMA 1.6 T-GDI 7DCT 517,8 509,5 THETA2.0 T-GDI A/T 518,5 524
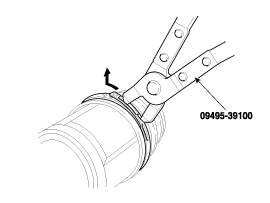
- Using the SST, secure the TJ clamps.
Clearance (A): 2.0 mm (0.0787 in) or less

Test yourself
A quick Hyundai Sonata LF quiz: every answer comes with an explanation and a link to the manual page.
Was this page helpful?