Body Electrical System
Hazard Warning Switch Repair Procedures
In this manual: Body Electrical System
7steps
~42min
2/5difficulty
Done 0 of 7
Inspection
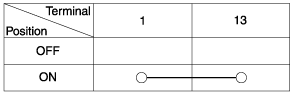
- Check the continuity between the terminals. If continuity is not as specified, replace the hazard warning switch.
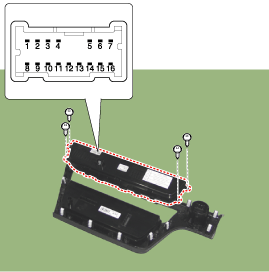
AVN Type Audio type No Description No Description 1 GROUND 1 GROUND 2 CAN _ High 2 - 3 CAN _ Low 3 - 4 - 4 - 5 Latch 5 Latch 6 ACC 6 Battery 7 Battery (+) 7 Battery (+) 8 PAB Off 8 PAB Off 9 - 9 Illumination (-) 10 - 10 Illumination (+) 11 SBR _ PS 11 SBR PS 12 - 12 - 13 Hazard Warning Switch 13 Hazard Warning Switch 14 - 14 - 15 IGN (+) 15 IGN (+) 16 - 16 -
Removal
|

- Disconnect the negative (-) battery terminal.
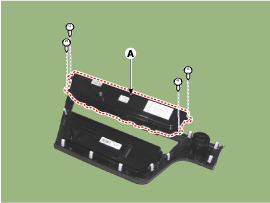
- Remove the center fascia panel (A).
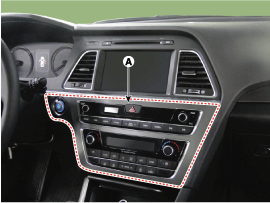
- Remove the center fascia panel after disconnecting the center fascia panel.
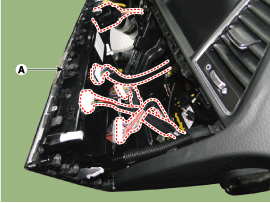
- Remove the keypad after loosening the screws.
Installation
- Install the hazard switch.
- Install the center fascia panel.
- Connect the negative (-) battery terminal.
Test yourself
A quick Hyundai Sonata LF quiz: every answer comes with an explanation and a link to the manual page.
Was this page helpful?