Heating, Ventilation, and Air Conditioning
Mode Control Actuator Repair Procedures
In this manual: Heating, Ventilation, and Air Conditioning
18steps
~108min
4/5difficulty
Done 0 of 18
Inspection
- Turn the ignition off.
- Disconnect the mode control actuator connector.
- Make sure the mode control actuator moves to the defrost position when 12 V is applied to terminal 3 and ground terminal 4. Make sure the mode control actuator moves to the vent position when the connections are reversed.
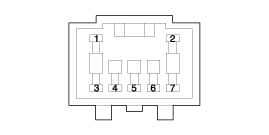
1. -
2. -
3. Defrost Mode
4. Sensor Ground5. Feedback signal
6. Sensor (+5V)
7. Vent mode - Connect the mode control actuator connector.
- Turn the ignition on.
- Check the voltage between terminals 6 and 5. Specification
Door Position Voltage (V) Fault Detection vent 1 Low voltage: 0.1 V or less Defrost 4.4 High voltage: 4.9 V or more
It will report the current actuator position to the controls. - If the measured voltage does not meet the specification, replace the mode control actuator with a known good one and check for proper operation.
- Replace the mode actuator if it is determined to be faulty.
Diagnosis Using GDS
- The heating, ventilation and air conditioning system can quickly diagnose faulty components using the Generic Diagnostic System (GDS). The diagnostic system (GDS) provides the following information: (1) Self-diagnosis: Diagnostic Trouble Code (DTC) check and display. (2) Current data: Checking the input/output status of the system. (3) Actuation test: Checking the operating status of the system. (4) Additional functions: Other controls such as system option and zero point adjustment.
- Select "Vehicle Model" and the system to be checked to inspect the vehicle with the tester.
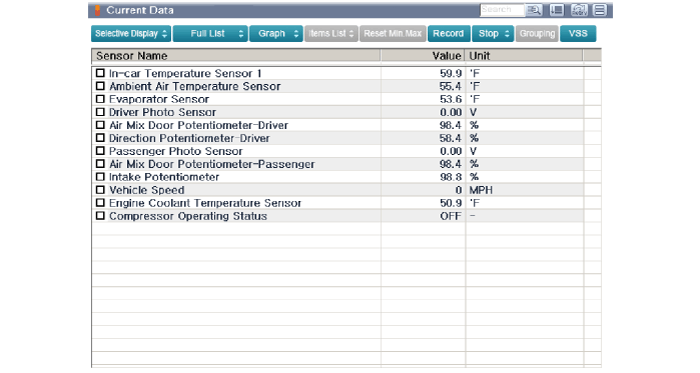
- Select the "CURRENT DATA" menu to check the current input/output status. The input/output data for the sensors related to the mode control actuator can be checked.
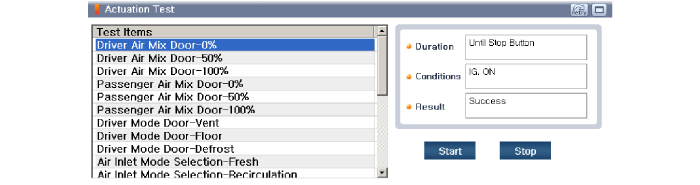
- To perform a forced operation of the mode control actuator input factors, select "ACTUATION TEST".
Replacement
- Disconnect the negative (-) battery terminal.
- Remove the emergency pad lower panel. (Refer to Body - "Emergency Pad Lower Panel")
- Lower the steering column after loosening the mounting bolts. (Refer to Steering System - "Steering Column and Shaft")
- Remove the driver side air vent duct (A) after loosening the screw.
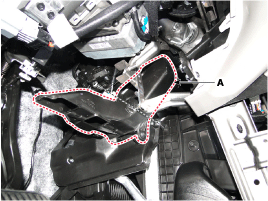
- Disconnect the connector (A), then remove the mode control actuator (B) after loosening the mounting screws.
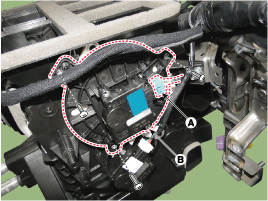
- Install in the reverse order of removal.
Test yourself
A quick Hyundai Sonata LF quiz: every answer comes with an explanation and a link to the manual page.
Was this page helpful?