Raise the vehicle and make sure it is securely supported.
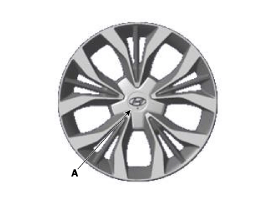
Remove the wheel cap (A).
Remove the front wheel and tire (A) from the front hub.
Tightening torque: 88.2 - 108 N·m
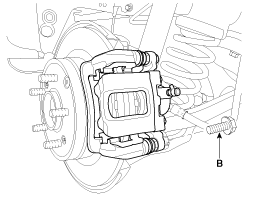
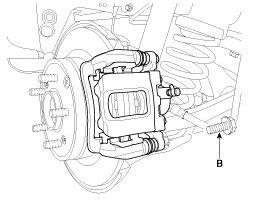
Loosen the guide rod bolt (B) and rotate the caliper (A) upward so that it does not interfere.
Tightening torque: 21.6 ~ 31 N·m
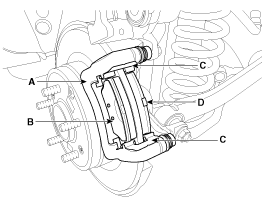
Replace the pad shim (D), pad retainers (C) and brake pads (B) in the caliper support (A).
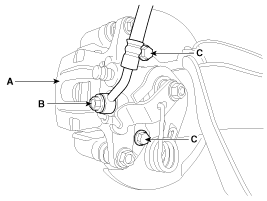
Loosen the brake hose eye bolt (B) and caliper mounting bolts (C), then remove the rear caliper assembly (A). Tightening Torque: Caliper assembly with holder (C): 78.5 ~ 98 N·m Brake hose to caliper (B): 24.5 ~ 29 N·m
Remove the rear brake disc by loosening the screws (A).
Raise the vehicle and make sure it is securely supported.
Remove the wheel cap (A).
Remove the front wheel and tire (A) from the front hub.
Tightening torque: 88.2 - 108 N·m
Release the EPB by pressing the EPB switch or using GDS. (Refer to Parking Brake - "Electric Parking Brake")
Loosen the guide rod bolt (B) and rotate the caliper (A) upward so that it does not interfere.
Tightening torque: 21.6 ~ 31 N·m
Replace the pad shim (D), pad retainers (C), and brake pads (B) in the caliper carrier (A).
Disconnect the EPB connector (A).
Loosen the brake hose eye bolt (B).
Tightening torque: 24.5 ~ 29 N·m
Loosen the mounting bolt (A) and remove the rear brake caliper assembly.
Tightening Torque: 78.5 ~ 98 N·m
Remove the rear brake disc by loosening the screws (A).
[EPB Type]
Replacement
Rear Brake Pads
Loosen the guide rod bolt (B) and rotate the caliper (A) upward so that it does not interfere.
Tightening torque: 21.6 ~ 31 N·m
Replace the pad shim (D), pad retainers (C), and brake pads (B) in the caliper carrier (A).
Inspection
Rear brake disc thickness inspection
Inspect the brake pads for wear and discoloration.
Inspect the brake disc for damage and cracks.
Remove all rust and contamination from the surface and measure the disc thickness at at least 8 points equally spaced (5 mm) from the outer edge of the brake disc. Brake Disc Thickness Standard: 10 mm (0.3937 in.) Maximum Operating Limit: 8.4 mm (0.3307 in.)
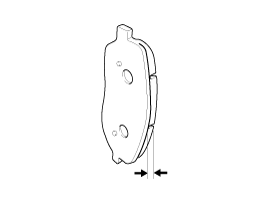
Check pad wear. Measure the pad thickness and replace it if it is less than the specified value. Pad Thickness - Standard: 10 mm (0.3937 in.) Service Limit: 2.0 mm (0.0787 in.)
Make sure grease is applied to the sliding contact points, as well as to the abutment and metal backing, and check for damage.
Position a dial indicator approximately 5 mm (0.2 in.) from the outer edge of the brake disc and measure the disc runout.
Brake disc runout Limit: 0.05 mm (0.00197 in.) or less (new)
If brake disc runout exceeds the limit, replace the disc, then measure the runout again.
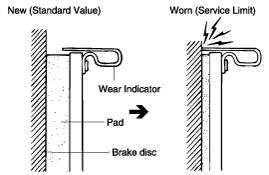
The pad wear indicator (C) and brake disc create squealing noise when the brake pads wear below the service limit of 2.0 mm (B).
If runout exceeds the specification, install the brake disc rotated 180°, then inspect the brake disc runout again.
If runout cannot be corrected by changing the brake disc position, replace the brake disc.
Rear Brake Pad Inspection Rear Brake Disc Runout Inspection
Installation
Installation is the reverse of removal.
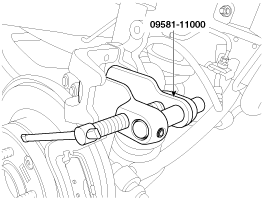
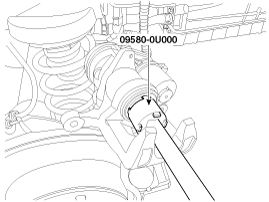
Use SST (09581-11000, 09580-U100) when installing the brake caliper assembly. [General] [EPB]
After installation, bleed the brake system. (Refer to Brake System - "Brake System Bleeding") (Refer to ESP (Electronic Stability Program) System - "ESP System Bleeding")
?
Test yourself
A quick Hyundai Sonata LF quiz: every answer comes with an explanation and a link to the manual page.