Brake System
Brake Booster Repair Procedures
In this manual: Brake System
26steps
~156min
4/5difficulty
Done 0 of 26
Brake Booster Operational Test
To perform a simple check of brake booster operation, carry out the following inspections.- Start the engine for one or two minutes, then stop it. If the pedal depresses fully the first time but gradually rises when depressed again, the booster is operating properly. If the pedal height remains unchanged, the booster is not operating.
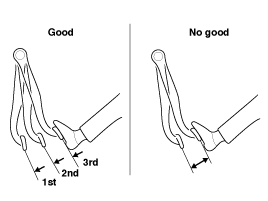
- With the engine stopped, depress the brake pedal several times. Then depress the brake pedal and start the engine. If the pedal moves down slightly, the booster is in good condition. If there is no change, the booster is not operating.
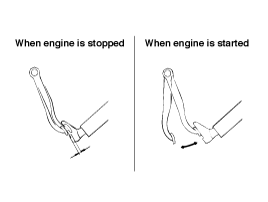
- With the engine running, depress the brake pedal, then stop the engine. Hold the pedal depressed for 30 seconds. If the pedal height does not change, the booster is in good condition; if the pedal rises, the booster is not operating. If the previous three tests were performed normally, booster performance can be judged as good. Even if one of the three tests above is not satisfactory, inspect the check valve, vacuum hose, and booster for malfunction.

Removal
- Turn the ignition switch OFF and disconnect the negative (-) battery cable.
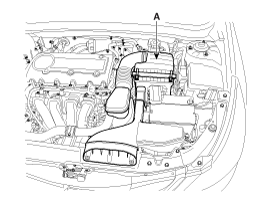
- Remove the air cleaner assembly (A).
- Disconnect the vacuum hose (A) from the brake booster.
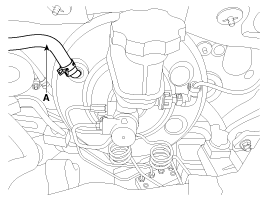
- Disconnect the brake fluid level switch connector (A).
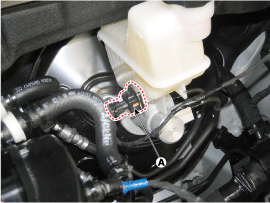
- Remove the master cylinder. (Refer to Master Cylinder)
- Remove the lock pin (A) and the flat head pin (B).
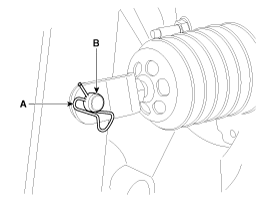
- Remove the mounting nuts.
Tightening torque: 9.8 ~ 14.7 N·m
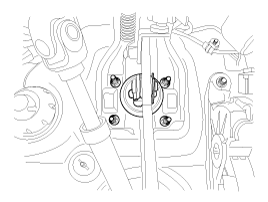
- Remove the brake booster.
- Turn the ignition off.
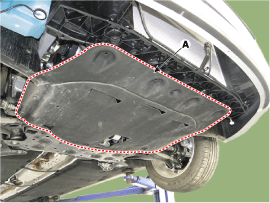
- Remove the lower cover (A).
Tightening torque: 7.8 ~ 11.8 N·m
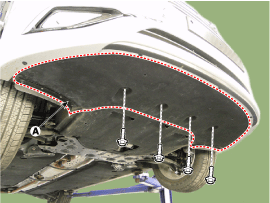
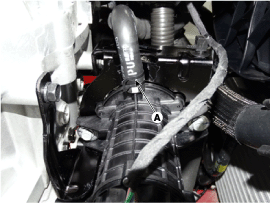
- Disconnect the vacuum pump connector (A).

- Disconnect the vacuum hose (A).
- Loosen the vacuum pump bracket bolts (A), then remove the vacuum pump and bracket.
Torque: 19.6 ~ 29 N·m
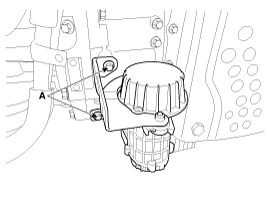
- Remove the 2 bolts and remove the bracket from the vacuum pump.
Inspection
- Inspect the vacuum hose, booster and connection.
- Check the boot for damage.
- Check the brake system warning lamp with the ignition in the ON position.
- Check that the brake system warning lamp turns off after releasing the parking brake with sufficient brake fluid level. If the brake system warning lamp is on, check the following items.
- Does the brake system warning lamp illuminate within 5 seconds after turning the ignition ON? (CAN timeout error)

? Reconnect the vacuum pump connector after removal. If the brake system warning lamp illuminates within 5 seconds after turning the ignition ON, replace the vacuum pump. 
? Check 2). - Does the brake system warning lamp illuminate for 45 - 55 seconds?
? The vacuum brake switch is normal. ? Check 3). - Does the brake system warning lamp illuminate for 15 - 35 seconds after disconnecting the vacuum hose from the brake booster?
? Replace the vacuum pump. ? The vacuum pump is normal.
- Does the brake system warning lamp illuminate within 5 seconds after turning the ignition ON? (CAN timeout error)
Installation
Brake booster- Installation is the reverse of removal.
- Adjust the brake pedal height and free play. (Refer to Brake Pedal Height and Free Travel Adjustment)
- After installation, bleed the brake system. (Refer to Brake System - "Brake System Bleeding") (Refer to ESP (Electronic Stability Program) System - "ESP System Bleeding")
- Installation is the reverse of removal.
- Tighten the vacuum pump mounting bolts to the specified torque.
Test yourself
A quick Hyundai Sonata LF quiz: every answer comes with an explanation and a link to the manual page.
Was this page helpful?