before draining engine oil and engine coolant, inspect engine oil and coolant leakage between the water pump and crankcase. If engine oil is leaking, visually inspect the oil seal and o-ring. If engine coolant is leaking, visually inspect the mechanical seal and seal washer. Refer to “water pump related parts inspection” .
Remove the left side cowling. Refer to “exterior parts removal and installation” in section 9d .
Drain engine oil and coolant. Refer to “engine oil and filter replacement” in section 0b and “cooling system inspection” in section 0b .
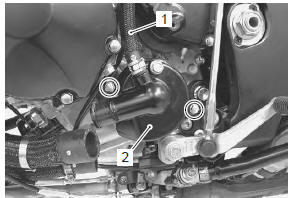
Disconnect the water bypass hose (1).
Remove the water pump (2).
Installation
Install the water pump in the reverse order of removal.
Pay attention to the following points:
apply grease to the o-ring.
Caution replace the o-ring with the a new one.
: Grease 99000–25010 (suzuki super grease “a” or equivalent)
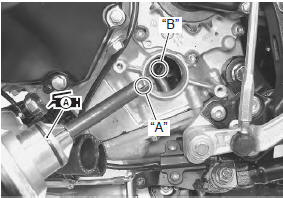
Install the water pump assembly with the slot of the pump shaft end “a” securely engaged with the flat “b” of the oil pump shaft.
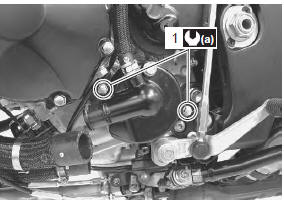
Tighten the water pump mounting bolts (1) to the specified torque.
Tightening torque water pump mounting bolt (a): 10 N·m
Connect the water hoses securely. Refer to “water hose routing diagram” .
Pour engine oil and coolant. Refer to “engine oil and filter replacement” in section 0b and “cooling system inspection” in section 0b (page 0b- 12).
Bleed air from the cooling circuit. Refer to “cooling system inspection” in section 0b .
?
Test yourself
A quick Suzuki GSX-R 1000 quiz: every answer comes with an explanation and a link to the manual page.
 : Grease 99000–25010 (suzuki