Engine
Water pump disassembly and assembly
In this manual: Engine
6steps
~36min
2/5difficulty
Done 0 of 6
Refer to “water pump removal and installation” .
Disassembly- Remove the air bleeder bolt (1) if necessary.
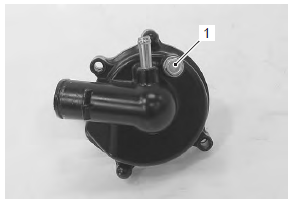
- Remove the water pump case screws.
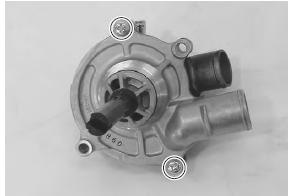
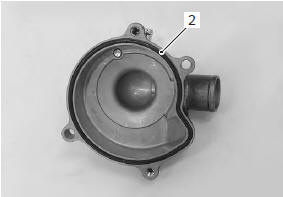
- Remove the o-ring (2).
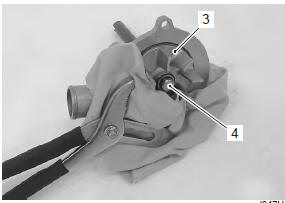
- Hold the impeller (3) with water pump pliers and remove the impeller securing bolt (4).
- Remove the impeller (3).
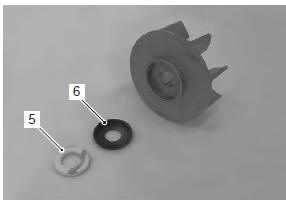
- Remove the mechanical seal ring (5) and rubber seal (6) from the impeller.
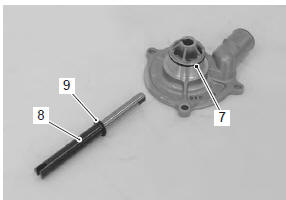
- Remove the o-ring (7), impeller shaft (8) and washer (9) from the holder.
- Remove the mechanical seal (10) with the special tool.
if there is no abnormal condition, the mechanical seal removal is not necessary.
Special tool (a): 09921–20240 (bearing remover
set)

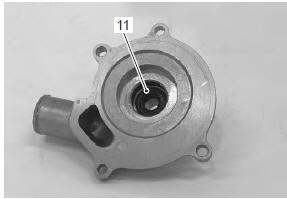
- Remove the oil seal (11).
Note if there is no abnormal condition, the oil seal removal is not necessary.
Assembly
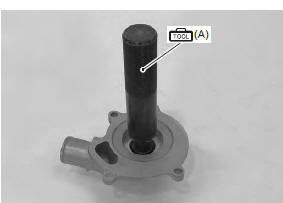
- Install the oil seal with the special tool.
Caution the removed oil seal must be replaced with a new one.
Note the stamped mark on the oil seal should face mechanical seal side.
Special tool (a): 09913–70210 (bearing
installing set (10 – 75 ö))
- Apply a small quantity of the grease to the oil seal lip.
 : Grease 99000–25010 (suzuki
super grease “a” or equivalent)

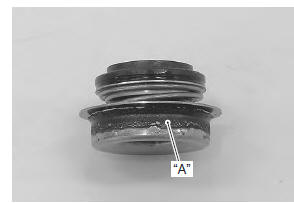
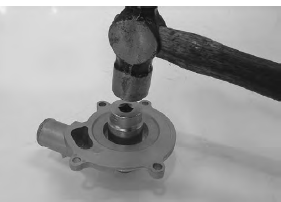
- Install a new mechanical seal using a suitable size socket wrench.
Caution the removed mechanical seal must be replaced with a new one.
Note on new mechanical seals, the sealer “a” has been applied.
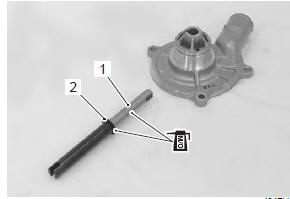
- Apply molybdenum solution to the impeller shaft (1) and washer (2).
- Install the impeller shaft (1) and washer (2) to the holder.
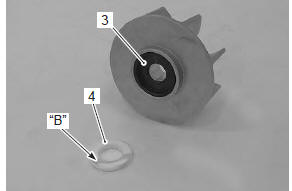
- Install the rubber seal (3) into the impeller.
- After wiping off the oily or greasy matter from the mechanical seal ring (4), install it into the impeller.
Note the paint marked side “b” of mechanical seal ring faces the rubber seal.
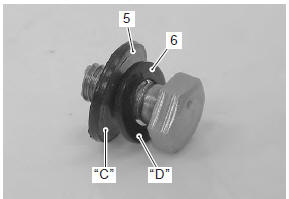
- Install the washer (5) and seal washer (6) onto the impeller securing bolt.
the metal side “c” of seal washer and the curved side “d” of washer face the impeller securing bolt head.
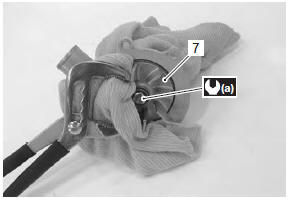
- Install the impeller (7).
- Hold the impeller with water pump pliers and tighten the impeller securing bolt to the specified torque.
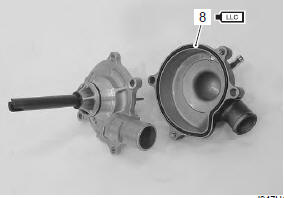
- Install new o-ring (8) and apply engine coolant to it.
Caution use a new o-ring to prevent engine coolant leakage.
- Tighten the water pump case screws to the specified torque.
- Tighten the water pump air bleeder bolt (9) to the specified torque.
Caution use a new gasket washer to prevent engine coolant leakage.
Tightening torque water pump air bleeder bolt (b): 13 N·m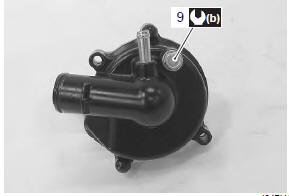
Test yourself
A quick Suzuki GSX-R 1000 quiz: every answer comes with an explanation and a link to the manual page.
Was this page helpful?