Reassembly
REASSEMBLY
PROCEDURE
1. INSTALL TAILGATE EMBLEM NO. 1
Click here
2. INSTALL TAILGATE MODEL NAME PLATE NO. 2
Click here
3. INSTALL BACK DOOR MODEL DESIGNATION PLATE No. 1 (with brand mark)
Click here
4. INSTALL REAR COMBINATION LAMP GARNISH
Click here
5. INSTALL LEFT REAR COMBINATION LAMP ASSEMBLY
Click here
6. INSTALL RIGHT REAR COMBINATION LAMP ASSEMBLY
HINT:
Perform the same procedure as for the left side.
7. INSTALL BACK DOOR PANEL PROTECTOR No. 2
(a) Clean the vehicle mounting surface.
(b) Peel off the backing paper from a new back door panel protector No. 2.
(c) Engage the clips to install the No. 2 back door panel protector.
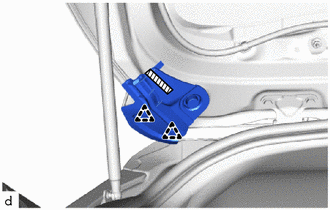
 |
Double-sided adhesive tape |
(d) Press the double-sided tape area of the No. 2 back door panel protector.
8. INSTALL BACK DOOR PANEL PROTECTOR No. 1
HINT:
Use the same procedure for the No. 1 back door panel protector.
9. INSTALL BACK DOOR PANEL CUSHION
(a) Engage the claws to install the 2 rear door panel pads. |
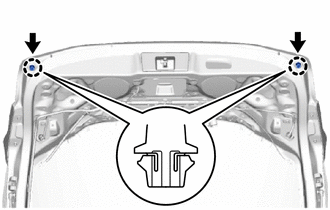 |
10. INSTALL REAR VIEW CAMERA ASSEMBLY (with Rear View Monitor System)
Click here
11. INSTALL BACK DOOR TRIM RETAINER No. 2 (without Rear View Monitor System)
(a) Engage the claws to install the No. 2 back door trim retainer. |
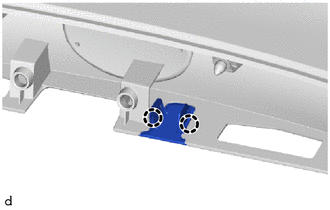 |
12. INSTALL LICENSE PLATE LIGHT ASSEMBLY
Click here
13. INSTALL BACK DOOR OPENER SWITCH ASSEMBLY
Click here
14. INSTALL BACK DOOR OUTSIDE TRIM
Click here
15. INSTALL REAR WASHER NOZZLE
Click here
16. INSTALL REAR SPOILER ASSEMBLY
Click here
17. INSTALL BACK DOOR LOWER STOPPER
(a) Engage the guide and install the back door lower stopper. |
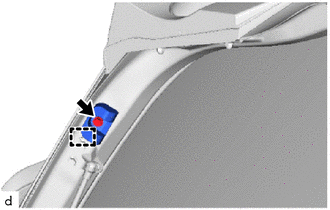 |
(b) Install a new bolt.
Torque:
7.2 N·m {73 kgf·cm, 64 in·lbf}
HINT:
Repeat the same procedure for the right side and the left side.
18. INSTALL REAR WIPER MOTOR GROMMET
Click here
19. INSTALL REAR WIPER MOTOR ASSEMBLY
Click here
20. INSTALL REAR WIPER ARM AND BLADE ASSEMBLY
Click here
21. INSTALL BACK DOOR LOCK ASSEMBLY
Click here
22. INSTALL BACK DOOR LOCK COVER
(a) Clean the vehicle mounting surface.
(b) Peel off the backing paper from a new back door lock cover.
(c) Engage the claws to install the back door lock cover.
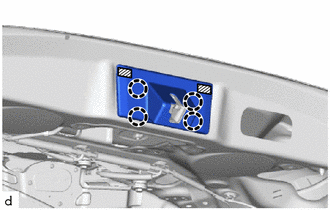
|
Double-sided adhesive tape |
(d) Press the double-sided tape area of the back door lock cover.
23. INSTALL LEFT BACK DOOR ACCESS HOLE COVER
(a) Engage the tabs to install the left back door access hole cover. |
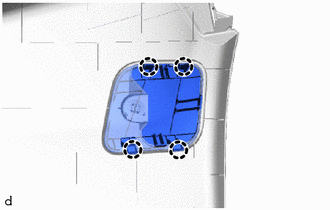 |
24. INSTALL RIGHT BACK DOOR ACCESS HOLE COVER
HINT:
Perform the same procedure as for the left side.
25. INSTALL NO. 3 BACK DOOR ACCESS HOLE COVER
(a) Engage the tabs to install the No. 3 rear door access hole cover. |
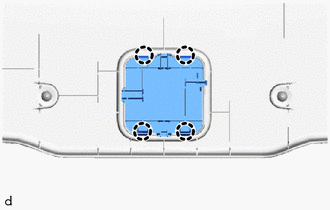 |
26. INSTALL NO. 2 BACK DOOR ACCESS HOLE COVER
HINT:
Perform the same procedure as for the back door access hole cover No. 1.
27. INSTALL NO. 1 BACK DOOR ACCESS HOLE COVER
(a) Engage the tabs to install the No. 1 rear door access hole cover. |
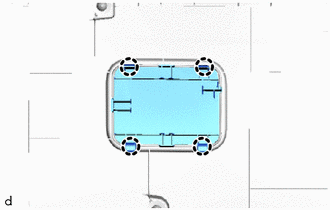 |
28. INSTALL DOOR CLOSER HANDLE
(a) Engage the tabs to install the door closer handle as shown in the illustration. HINT: Fully open the back door, and make sure the arrow on the back door closer handle is facing up. |
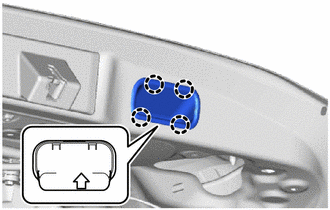 |
29. INSTALL BACK DOOR TRIM PANEL ASSEMBLY
(a) Engage the clips to install the back door trim panel assembly. |
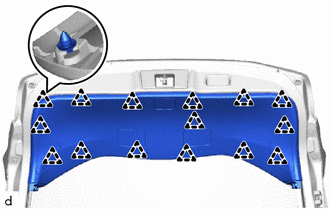 |
30. INSTALL REAR DECK TRIM HOOK
HINT:
Repeat the same procedure for the right side and the left side.
(a) Install the rear deck trim hook. |
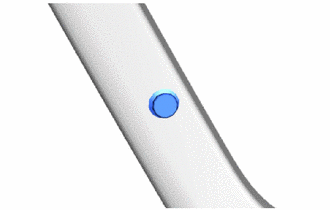 |
(b) Install the screw. |
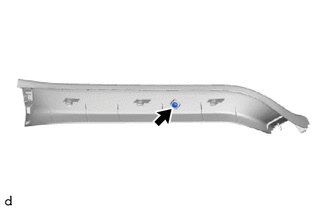 |
31. INSTALL LEFT BACK DOOR SIDE TRIM
(a) Engage the tabs and clips to install the left back door side trim. |
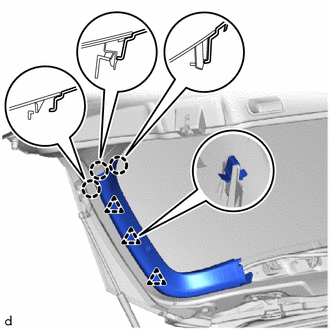 |
32. INSTALL RIGHT BACK DOOR SIDE TRIM
HINT:
Perform the same procedure as for the left side.
33. INSTALL BACK DOOR UPPER TRIM PANEL ASSEMBLY
(a) Engage the tabs and clips to install the back door upper trim panel assembly. |
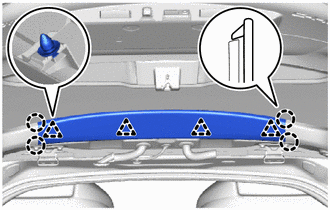 |
34. INSTALL SILL PLATE ASSEMBLY (with sill plate)
Click here
35. INSTALL REAR DECK TRIM PANEL ASSEMBLY (with rear deck trim)
Click here