Installation
INSTALLATION
PRECAUTION / NOTICE / HINT
HINT:
- Repeat the same procedure for the right side and the left side.
- The following procedure applies to the left side.
PROCEDURE
1. INSTALL REAR DOOR OPENING TRIM COVER SUB-ASSEMBLY
HINT:
When installing the rear door opening trim cover sub-assembly, heat the vehicle body and the rear door opening trim cover sub-assembly using a heat light.
CAUTION:
- Do not touch heated parts or the heat lamp. Touching them may cause burns.
- Prolonged contact with heated parts may cause burns.
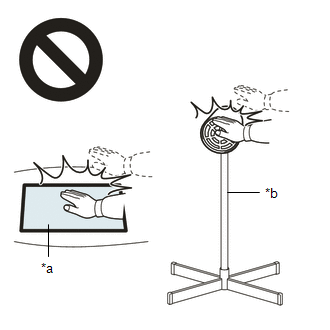
*a |
Hot Surface |
*b |
Heat Lamp |
Item | Temperature |
|---|---|
Vehicle Body |
40 à 60 °C |
Quarter Pillar Garnish Sub-assembly |
20 à 30 °C |
NOTICE:
Do not overheat the vehicle body or the quarter pillar garnish sub-assembly.
(a) Clean the surface of the vehicle body.
(1) Using a heat light, heat the surface of the vehicle body.
(2) Remove the double-sided tape from the vehicle body.
(3) Remove any adhesive residue using a cleaning agent.
(b) Remove the protective sheet from a new rear door opening trim cover sub-assembly.
HINT:
After removing the release liner, prevent the adhesive surface from contacting foreign matter.
(c) Engage the guide and the clips to install the rear door opening trim cover sub-assembly, as shown in the illustration.
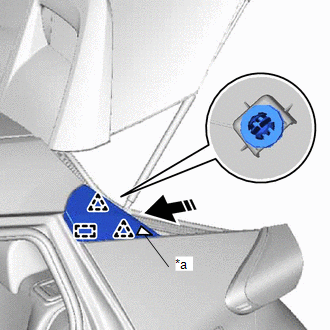
*a |
Double-sided adhesive tape |
 |
Install in this direction |
HINT:
When installing the double-sided tape, remove the release paper.
(d) Press the rear door opening trim cover sub-assembly.