Overhaul
: wash the brake fluid off immediately if it comes into contact with any painted surface
. 2. Remove air cleaner cap sub–assy 3. Remove brake master cylinder sub–assy- disconnect the brake fluid level switch connector from master cylinder reservoir sub–assy.
- m/t: slide the clip and disconnect the clutch reservoir tube no.1 From master cylinder reservoir sub–assy.
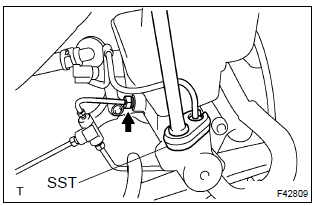
- Using sst, disconnect the 2 brake tubes from the master cylinder.
Sst 09023–00100
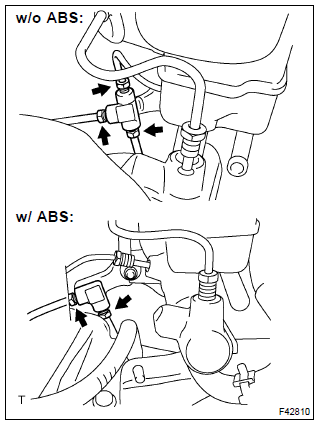
- Using sst, disconnect the 2 or 3 brake tubes from the no.1 Way.
Sst 09023–00100
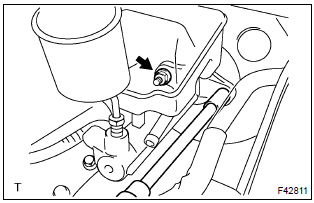
- Remove the 2 nuts, and pull out the master cylinder, no.1 Way and vacuum check valve bracket.
- remove the reservoir stopper screw and master cylinder reservoir sub–assy.
- remove the 2 cylinder reservoir grommets.
- hold the master cylinder in the vise with the 2 aluminum plates in between.
- remove the o–ring.
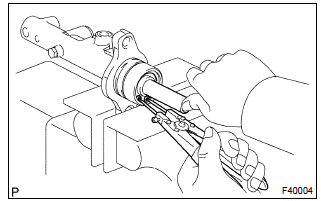
- Push in the piston and remove the snap ring with snap ring pliers.
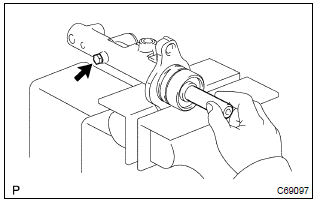
- Push in the piston and remove the piston stopper bolt and gasket.
- remove the no.1 Piston sub–assy by hand, pulling straight out not at an angle.
: if being pulled out at an angle, the piston may damage the cylinder bore.
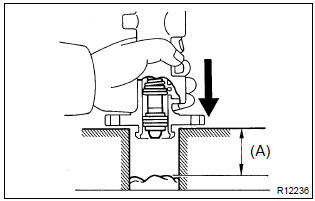
- Place a cloth and 2 wooden blocks on the work table and lightly edges until the no.2 Piston sub–assy drops out of the cylinder.
: if being pulled out at an angle, the piston may damage the cylinder bore.
Hint: make sure that the distance (a) from the cloth to the top of the blocks is at least 100 mm (3.94 In.).
6. Inspect brake master cylinder- check the cylinder bore for rust or scoring.
- hold the master cylinder in the vise with the 2 aluminum plates in between.
- apply the lithium soap base glycol grease to the no.1 And no.2 Piston sub–assy.
- install the no.2 And no.1 Piston sub–assy to the master cylinder.
:
- if being inserted at an angle, the piston may damage the cylinder bore.
- Be careful not to damage the rubber lips on the pistons.
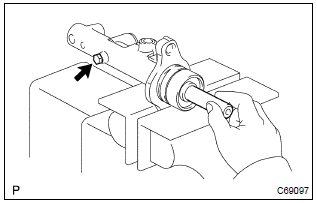
- Push in the piston and install a new gasket and a new piston stopper bolt.
Torque: 10 nvm (102 Kgf·cm, 7 ft·lbf)
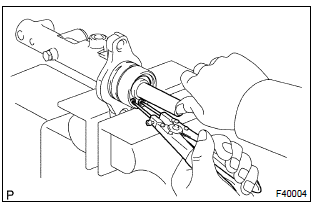
- Push in the piston and install the snap ring with snap ring pliers.
- apply the lithium soap base glycol grease to a new o– ring, and install the o–ring to the master cylinder.
- apply the lithium soap base glycol grease to 2 brake master cylinder reservoir grommets.
- install the master cylinder reservoir with the screw.
Torque: 1.8 Nvm (18.4 Kgf·cm, 15.9 In.Vlbf)
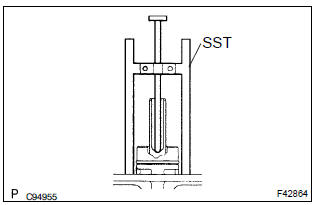
- Apply the chalk to the flat surfaced tip of the sst pin.
- set sst on the master cylinder and lower the pin of the sst until it slightly touches the piston.
Sst 09737–00013
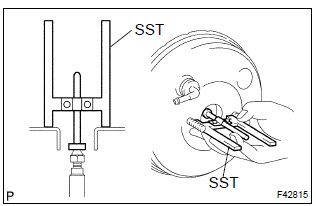
- Turn sst upside down and place it on the brake booster.
Sst 09737–00013 clearance: 0 mm (0 in.)
:
- if there is a space between the sst main body and the booster shell (chalk is applied to the booster push rod), it means that the clearance is too small.
- If chalk is not applied to the booster push rod after placing the sst on the brake booster, it means that the clearance is too large.
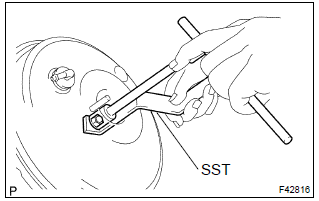
- If clearance is outside of the specified range, fix the push rod using sst and adjust the length of the protruding adjusting bolt.
Sst 09737–00020
: when adjusting the push rod, depress the brake pedal sufficiently so that the push rod sticks out.
10. Install brake master cylinder sub–assy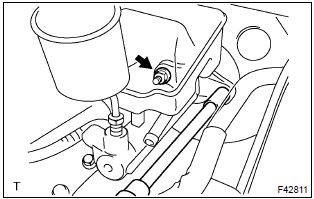
- install the master cylinder, no.1 Way and vacuum check valve bracket with the 2 nuts.
Torque: 12.5 Nvm (127 Kgf·cm, 9 ft·lbf)
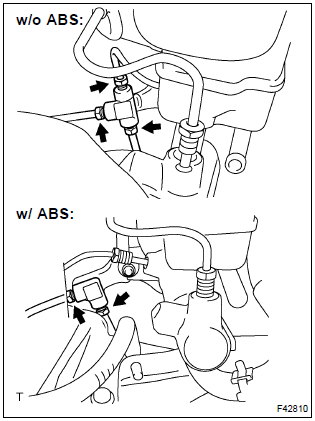
- Using sst, connect the 2 or 3 brake tubes to the no.1 Way.
Sst 09023–00100
torque: 15.2 Nvm (155 Kgf·cm, 11 ft·lbf)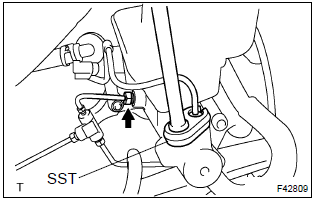
- Using sst, connect the 2 brake tubes to the master cylinder.
Sst 09023–00100
torque: 15.2 Nvm (155 Kgf·cm, 11 ft·lbf) - m/t: connect the clutch reservoir tube no.1 With the clip to master cylinder reservoir sub–assy.
- connect the brake fluid level switch connector to master cylinder reservoir sub–assy.
sst 09023–00100
14. Bleed brake line 15. Check fluid level in reservoir 16. Check brake fluid leakageTest yourself
A quick Toyota Corolla quiz: every answer comes with an explanation and a link to the manual page.