Overhaul
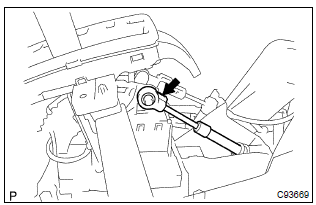
- Remove the cable end from the rod of the floor shift assembly.
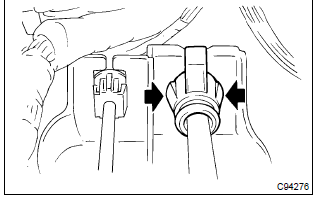
- Using a screw driver, disconnect the control cable from the shift lever plate.
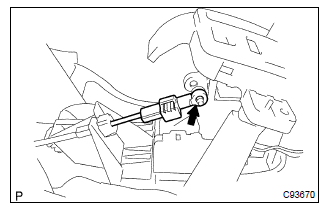
- Remove the cable end from the lever pin of the floor shift assembly.
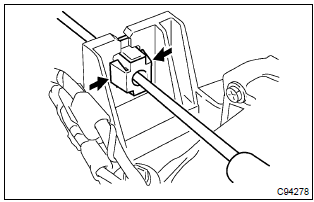
- Using a screw driver, disconnect the parking lock cable from the floor shift assembly.
- disconnect the 2 connector.
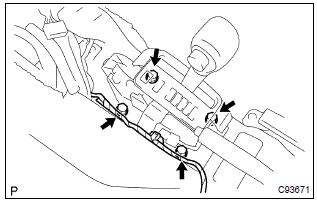
- Disconnect the 2 wire harness clamps from the shift lever assy.
- remove the 4 bolts and floor shift assy.
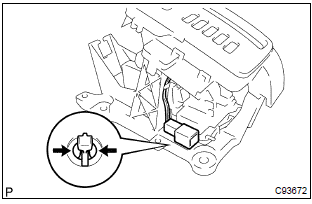
- Releasing the lock by pressing the slick, disconnect the indicator lamp wire connector from the shift lever plate.
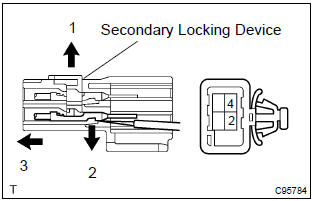
- Disengage the secondary locking device.
- using a small screwdriver, disengage the locking lug of the terminals 2 and 4, and pull the terminals out from the rear.
- disconnect the wire harness from the clamps.
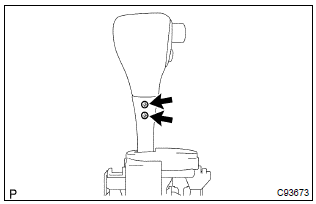
- Remove the 2 screws and shift lever knob sub–assembly.
: pay attention not to apply unnatural load to transmission control switch wire harness.
9. Remove floor shift shift lever knob cover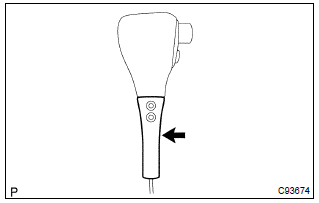
- Remove the shift lever knob cover.
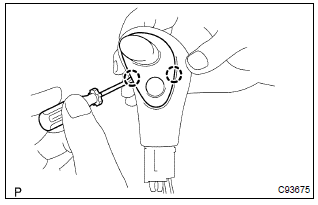
- Using a small screw driver, remove the transmission control switch.
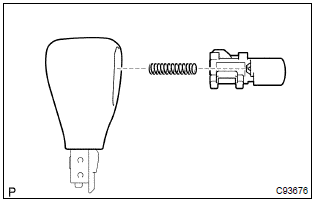
- Remove the shift lever knob button and spring.
- Remove the indicator lamp wire sub–assy.
- remove the cap and bulb from the indicator lamp wire sub–assy.
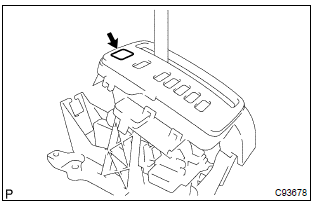
- Using a screwdriver, remove the shift lock release button cover.
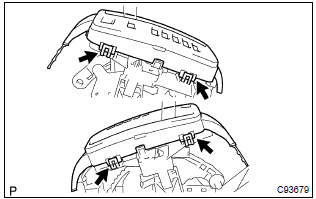
- Using a screwdriver, release the 4 claws and remove the position indicator housing upper.
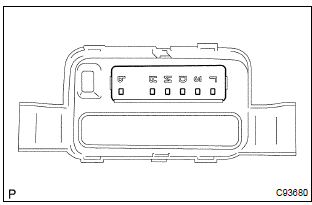
- Remove the position indicator plate from the position indicator housing upper.
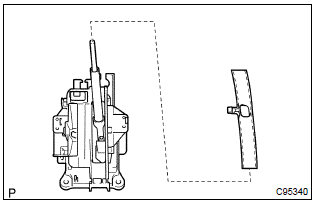
- Remove the position indicator slide cover.
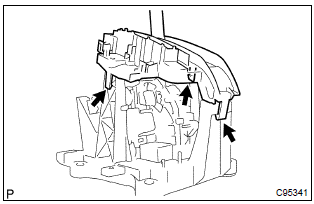
- Using a screwdriver, release the 3 claws and remove the position indicator housing lower.
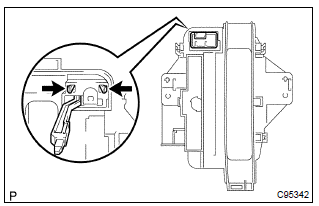
- Remove the shift lock release button and spring.
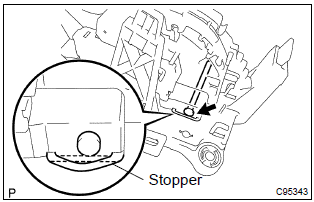
- Using a screwdriver, remove the toggle lever support pin and shift lock control unit assy.
: work so as not to damage the stopper position.
20. Remove shift lever insert no.1 21. Install shift lever insert no.1 22. Install shift lock control unit assy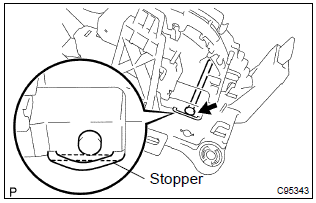
- Install the shift lock control unit assy and toggle lever support pin.
: work so as not to damage the stopper position.
23. Install shift lock release button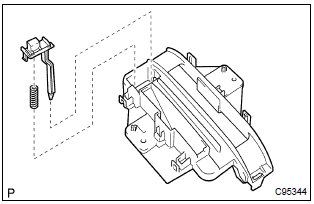
- Apply mp grease on the shift lock release spring and shift lock release button.
- install the shift lock release button and shift lock release spring to the position indicator housing lower.
: fit the claws securely.
24. Install position indicator housing lower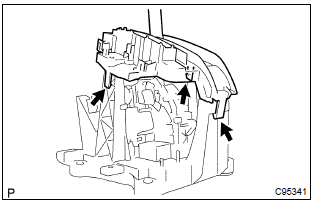
- Install the position indicator housing lower.
: fit the claws securely.
25. Install position indicator slide cover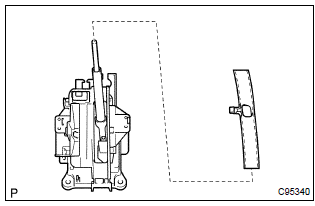
- Install the position indicator slide cover.
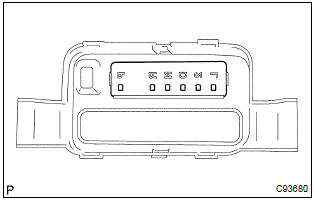
- Install the position indicator plate to the position indicator housing upper.
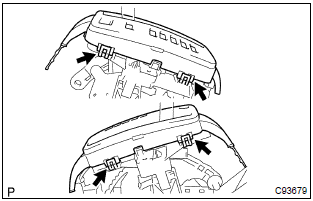
- Install the position indicator housing upper.
: fit the claws securely
. 28. Install shift lock release button cover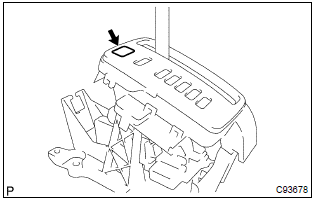
- Install the shift lock release button cover to the position indicator housing upper.
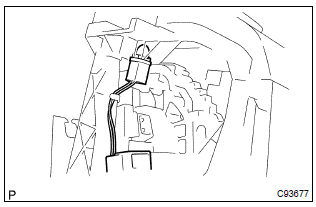
- Install the bulb and cap to the indicator lamp wire sub– assy.
- install the indicator lamp wire sub–assy.
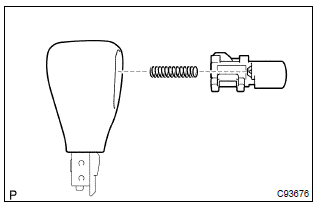
- Apply mp grease to the spring and shift lever knob button.
- install the spring and shift lever knob button.
: fit the claws securely
31. Install transmission control switch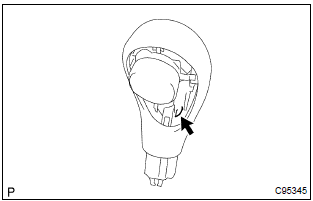
- Insert the wire harness into the shift lever knob from the part shown by the arrow, and install the transmission control switch to the shift lever knob.
: fit the claws securely.
32. Install floor shift shift lever knob cover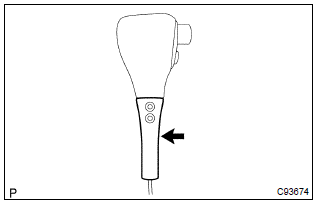
- Install the shift lever knob cover.
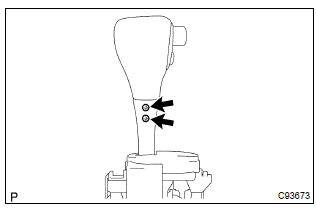
- Install the shift lever knob sub–assembly with the 2 screws.
: coat the threads of screws with sealant.
Sealant: part no. 08833–00080, Three bond 1344, loctite 242 or equivalent Notice: make sure not to catch wire harness.
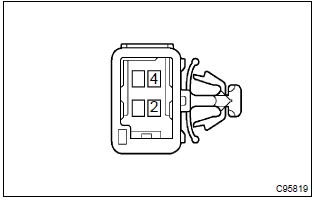
- Install the 2 terminals into the indicator lamp wire connector.
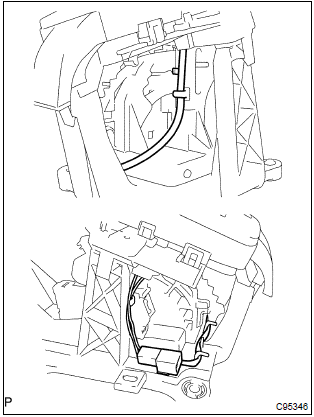
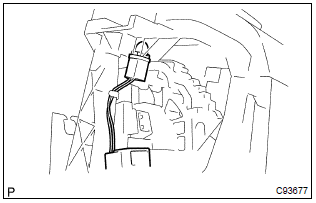
- Install the wire harness and connector as shown in the illustration.
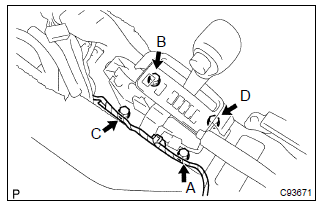
- Install the floor shift assy with the 4 bolts. Torque: 12 nvm (122 Kgf·cm, 9 ft·lbf) Hint
: tighten them in the order, a, b, c and d.
- connect the 2 wire harness clamps to the shift lever plate.
- connect the 2 connector.
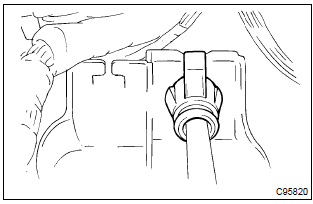
- Install the control cable to the shift lever plate.
: fit the claws securely.
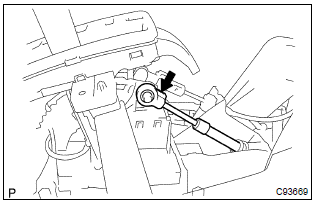
- Install the cable end to the rod of the floor shift assy.
: install it with the uneven surface facing upward.
36. Connect floor shift parking lock cable assy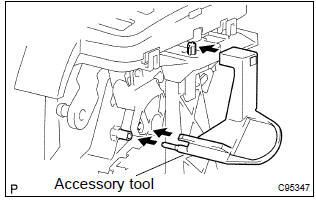
- Set the accessory tool.
- Shift the shift lever to n position and turn the ignition switch to acc or on.
- Set the accessory tool to the shift lock control unit assy as shown in the illustration.
Accessory tool parts no.: 33693–02010
: only in the case of reusing the shift lock control unit assy.
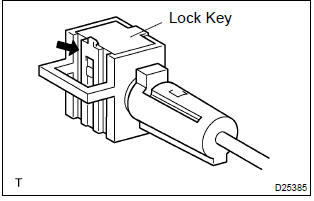
- using a screwdriver, unlock the claw of the lock key of automatic adjustment parts.
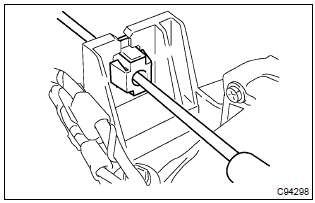
- Insert the slide cap into the through hole and install.
: fit the claws securely.
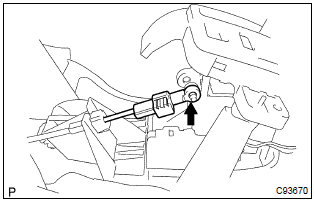
- Insert the lever pin into the hole in the cable end.
: fit the claws securely.
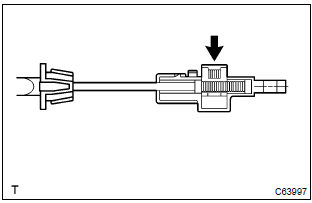
- Lock the lock key.
: at this time, the shift lever should be in n position and the ignition key should be set to acc or on.
- remove the accessory tool.
Accessory tool parts no.: 33693–02010
Test yourself
A quick Toyota Corolla quiz: every answer comes with an explanation and a link to the manual page.