Inspection
1. INSPECT POWER WINDOW MASTER SWITCH CIRCUIT

Check the voltage and continuity of each terminal of the wire harness side connector.

If the circuit is not as specified, inspect the circuits connected to other parts.
2. INSPECT POWER WINDOW SWITCH CIRCUIT
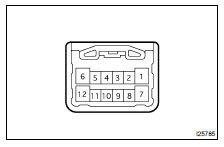
Check the voltage and continuity of each terminal of the wire harness side connector.

If the circuit is not as specified, inspect the circuits connected to other parts.
3. Driver's door and rear right door: INSPECT POWER WINDOW MOTOR OPERATION
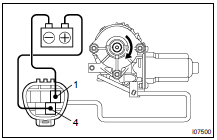
(a) Connect the positive (+) lead from the battery to terminal 1 and the negative (-) lead to terminal 4, check that the motor turns counterclockwise.
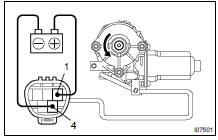
(b) Reverse the polarity, check that the motor turns clockwise.
If operation is not as specified, replace the motor
4. Passenger's door and rear left door: INSPECT POWER WINDOW MOTOR OPERATION
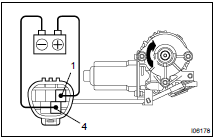
(a) Connect the positive (+) lead from the battery to terminal 4 and the negative (-) lead to terminal 1, check that the motor turns clockwise.
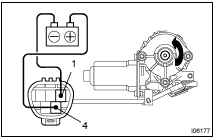
(b) Reverse the polarity, check that the motor turns counterclockwise.
If operation is not as specified, replace the motor
5. INSPECT POWER WINDOW MOTOR PTC THERMISTOR OPERATION
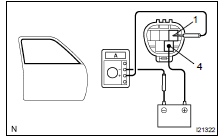
(c) Connect the positive (+) lead from the battery to terminal 4 on the wire harness side connector, and raise the window to the fully position.
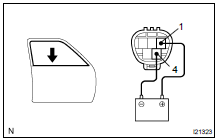
(f) Approximately 60 seconds later, connect the positive (+) lead from the battery to terminal 1 and the negative (-) lead to terminal 4, and check that the window begins to descend.
If operation is not as specified, replace the motor.
6. INSPECT JAM PROTECTION LIMIT SWITCH OPERATION

(c) Check that the continuity exists when the window goes up.

(d) Check that the no continuity exists when the window is in the fully closed position.
If operation is not as specified, replace the motor.
NOTICE: If connecting the wire harness wrongly, the sensor might be damaged so caution is necessary.
7. INSPECT JAM PROTECTION PULSE SWITCH OPERATION

(c) Check that pulse is generated during the motor running.
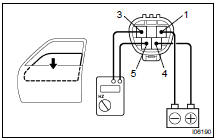
(d) Reverse the polarity and check that pulse is generated.
If operation is not as specified, replace the motor.
NOTICE: If connecting the wire harness wrongly, the sensor might be damaged so caution is necessary.
8. INSPECT JAM PROTECTION FUNCTION
NOTICE: Never, ever be caught any part of your body when checking.
HINT: In case of performing resetting of the limit switch, do checking after repeating up and down of the glass with automatic operation.
(a) Confirmation of AUTO up operation: Confirm that the window will be fully close with AUTO up operation.(b) Checking of the operation of the jam protection function:
- Move up the window with AUTO up operation and check that the window will go down when it touches the handle of the hammer stetted.
- Confirm that the window will then stop going down about 200 mm.
HINT: In case of removing the glass, glass guide, regulator and etc.
be sure to perform checking of the jam protection function.
If the jam protection is not function properly, adjust power window motor reset switch and pulse switch.
LOCATION
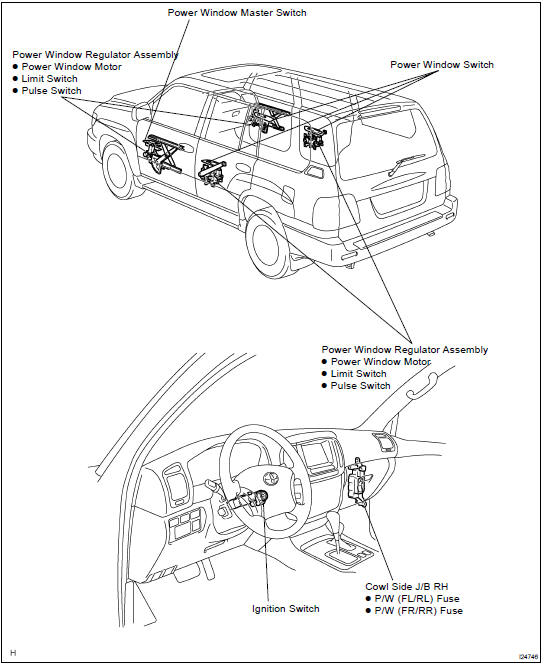
INSPECTION
1. INSPECT SEAT HEATER SWITCH CONTINUITY
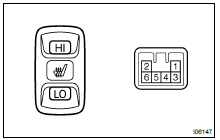

If continuity is not as specified, replace the switch
2. INSPECT SEAT HEATER INDICATOR LIGHT OPERATION

(b) Push the seat heater switch Right or Left side and check that the indicator light lights up.
If operation is not as specified, replace the switch and inspect the circuits connected to other parts.
3. INSPECT SEAT HEATER ASSY (SEAT CUSHION) CONTINUITY
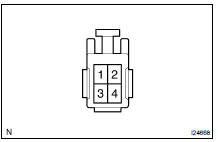
Inspect the seat heater assy between terminals, as shown.

If continuity is not as specified, replace the seat heater assy.
4. INSPECT SEAT HEATER ASSY (SEAT BACK) CONTINUITY
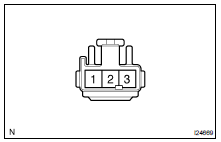
Inspect the seat heater assy between terminals, as shown.

If continuity is not as specified, replace the seat heater assy.
5. INSPECT SEAT HEATER ASSY (SEAT CUSHION) OPERATION
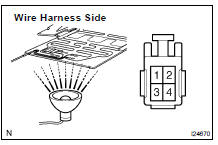
(c) Inspect the seat heater assy continuity between terminals, as shown.

If continuity is not as specified, replace the seat heater assy.
6. INSPECT SEAT HEATER ASSY (SEAT BACK) OPERATION

(c) Inspect the seat heater assy continuity between terminals, as shown.

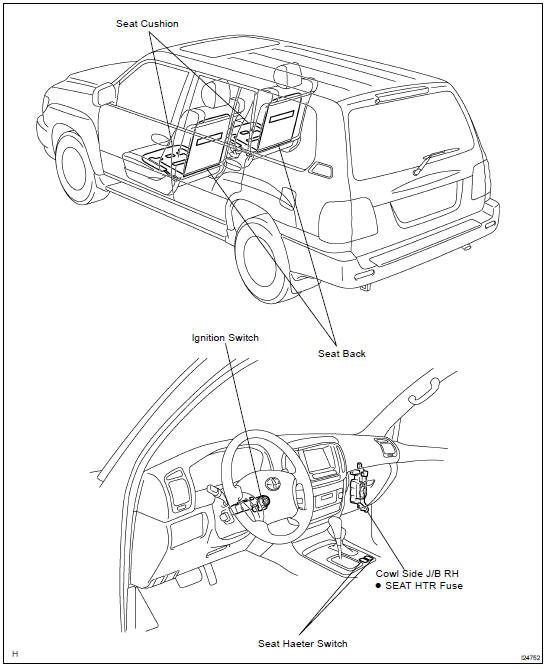
LOCATION
Test yourself
A quick Toyota Land Cruiser quiz: every answer comes with an explanation and a link to the manual page.