2Az-fe engine mechanical
Installation
In this manual: 2Az-fe engine mechanical
92steps
~562min
5/5difficulty
2special tools
Done 0 of 92
- Install drive plate sub-assembly
- Clean the 8 bolts and 8 bolt holes.
- Apply adhesive to 2 or 3 threads of the 8 bolts.
- Using sst, hold the crankshaft.
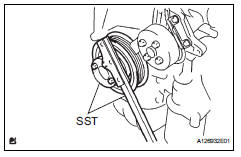
- Install the front spacer.

Hint:
Align the pin of the front spacer with the pin hole of the crankshaft.
- Install the drive plate and rear spacer onto the crankshaft.
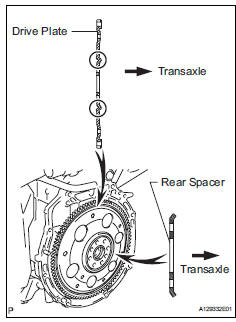
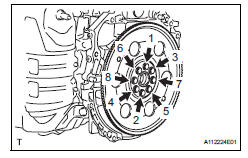
- Using several steps, uniformly install and tighten the 8 bolts in the sequence shown in the illustration.
- Install torque converter clutch assembly
- Install the torque converter clutch for u241e (2wd) (see page ax-148).
- Install the torque converter clutch for u140f (4wd) (see page ax-149).
- Install automatic transaxle assembly
- Install the automatic transaxle for u241e (2wd) (see page ax-149).
- Install the automatic transaxle for u140f (4wd) (see page ax-150).
- Install starter assembly (see page st-14)
- Install transfer assembly (for 4wd) (see page tf-75)
- Install drive shaft bearing bracket (for 2wd)
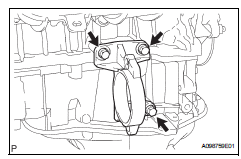
- Install the bracket with the 3 bolts.
- Install drive shaft bearing bracket (for 4wd)
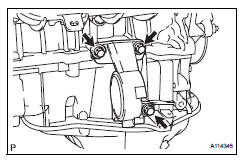
- Install the bracket with the 3 bolts.
- Install engine hanger
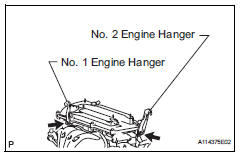
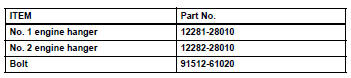
- Install the no. 1 And no. 2 Engine hangers.
- Attach the sling device and the engine with the chain block.
- Install engine assembly with transaxle
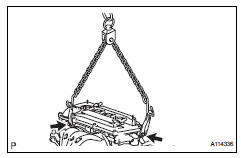
- Lift the engine assembly (with transaxle) with the chain block.
- Lower the engine out of the vehicle slowly and carefully.
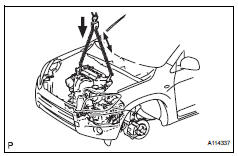
Notice:
Make sure the engine is clear of all wiring, hoses and cables.
- Install engine mounting insulator lh
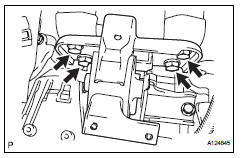
- Install the engine mounting insulator lh with the 4 bolts.

- Install the engine mounting insulator lh with the through bolt and nut.
Install the through bolt by tightening the nut.
Torque: 56 n*m (571 kgf*cm, 41 ft.*Lbf)- Install engine mounting insulator rh
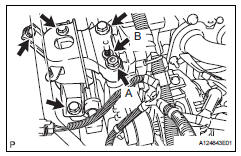
- Install the engine mounting insulator rh with the 2 bolts and 2 nuts.
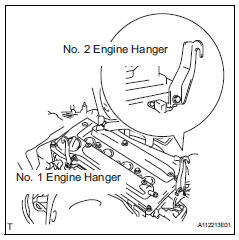
- Remove engine hanger
- Remove the no. 1 And no. 2 Engine hangers.
- Install engine mounting insulator rr
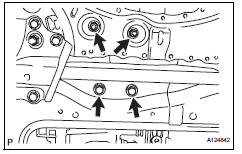
- Install the engine mounting insulator rr with the 2 nuts and 2 bolts.
- Install the through bolt which is used to secure the rear engine mounting insulator, into the rear engine mounting bracket.
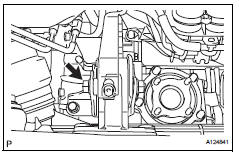
Torque: 95 n*m (969 kgf*cm, 70 ft.*Lbf)
- Install engine mounting insulator fr
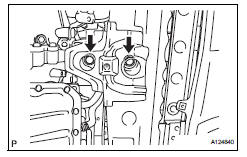
- Install the engine mounting insulator fr with the 2 bolts.
- Install the through bolt and nut which is used to secure the front engine mounting bracket fr.
Install the through bolt by tightening the nut.
Torque: 145 n*m (1,479 kgf*cm, 107 ft.*Lbf)
- Install propeller shaft assembly (for 4wd)
- Install the propeller shaft (see page pr-5).
- Install front drive shaft assembly
- Install the front drive shaft rh (for 2wd) (see page ds-32).
- Install the front drive shaft rh (for 4wd) (see page ds-65).
- Install front exhaust pipe (see page ex-4)
- Connect engine wire
- Install the ground cable with the bolt located near the starter.
- Connect the ground cable to the clamp located near the starter.
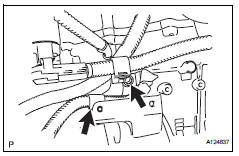
- Connect the engine wire to the positive (+) battery terminal with the nut.
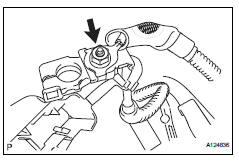
- Connect the ground cable connector.
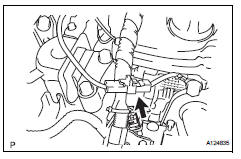
- Connect the 2 engine wire connectors and install the nut.
- Install the engine room relay block cover.
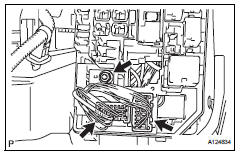
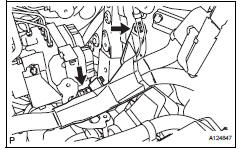
- Attach the clamp of the engine wire cover.
- Install the engine wire cover to with the bolt.
- Install ecm (see page es-430)
- Install cooler compressor assembly (see page ac-217)
- Install generator assembly (see page ch-15)
- Install fan and generator v belt (see page em-7)
- Install front suspension member reinforcement rh (see page em-7)
- Install transaxle control cable assembly
- Install the transaxle control cable for u241e (see page ax-130).
- Install the transaxle control cable for u140f (see page ax-130).
- Install intake manifold insulator (see page es-421)
- Install intake manifold (see page es-421)
- Install fuel delivery pipe sub-assembly (see page fu-13)
- Connect no. 2 Ventilation hose (see page fu- 14)
- Install throttle body assembly (see page es-413)
- Connect fuel tube (see page fu-14)
- Connect heater water outlet hose
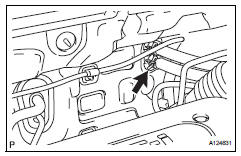
- Connect the heater water outlet hose to the air conditioner tube.
- Connect heater water inlet hose
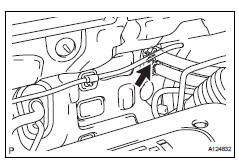
- Connect the heater water inlet hose to the air conditioner tube.
- Connect union to connector tube hose
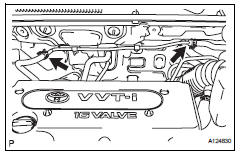
- Connect the 2 union to connector tube hoses to the booster vacuum tube.
- Install battery carrier bracket
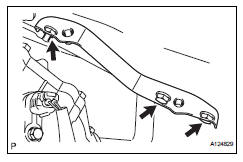
- Install the battery carrier bracket with the nut and 2 bolts.
- Install battery bracket reinforcement
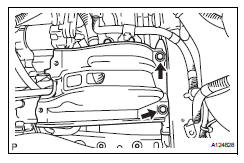
- Install the battery bracket reinforcement with the 2 bolts.
- Install front battery carrier
- Install the front battery carrier with the 4 bolts.

- Install air cleaner case sub-assembly
- Connect the air cleaner case to the no. 1 Air cleaner inlet.
- Install the air cleaner case with the 3 bolts.
- Install air cleaner filter element subassembly
- Install air cleaner cap (see page es-413)
- Install purge vsv (see page ec-16)

- Install radiator reservoir
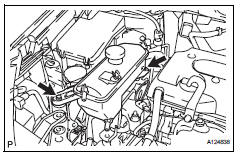
- Install the reservoir with the 2 bolts.
- Install radiator assembly
- Install the radiator (see page co-32).
- Install battery tray
- Install battery
- Install the battery.
- Install the battery clamp with the bolt and nut.
- Connect cable to negative battery terminal
- Add automatic transaxle fluid
- Add automatic transaxle fluid for u241e (2wd) (see page ax-151).
- Add automatic transaxle fluid for u140f (4wd) (see page ax-152).
- Check for fuel leaks (see page fu-14)
- Add engine coolant (see page co-6)
- Check for engine coolant leaks (a) check for engine coolant leaks (see page co-1).
- Check for automatic transaxle fluid leaks
- Adjust shift lever position
- Adjust the shift lever position for u241e (2wd) (see page ax-138).
- Adjust the shift lever position for u140f (4wd) (see page ax-138).
- Install no. 1 Engine cover (see page em-43)
- Install front fender apron rh
- Install no. 2 Engine under cover
- Install no. 1 Engine under cover
- Install front wheel
- Install radiator support opening cover
- Install hood sub-assembly
- Install the hood (see page ed-7).
- Adjust the hood (see page ed-5).
- Inspect and adjust front wheel alignment
- Inspect and adjust the front wheel alignment (see page sp-3).
- Perform registration
- When replacing the engine assembly, perform vehicle stability control system recognition in ecm (see page cc-12).
- Reset memory (for automatic transaxle)
- When replacing the engine assembly, perform the reset memory procedure (a/t initialization) for u241e (2wd) (see page ax-18) and for u140f (4wd) (see page ax-18).
Test yourself
A quick Toyota RAV4 quiz: every answer comes with an explanation and a link to the manual page.
Was this page helpful?