Audio / visual
Front No. 1 speaker
In this manual: Audio / visual
4steps
~24min
2/5difficulty
Done 0 of 4
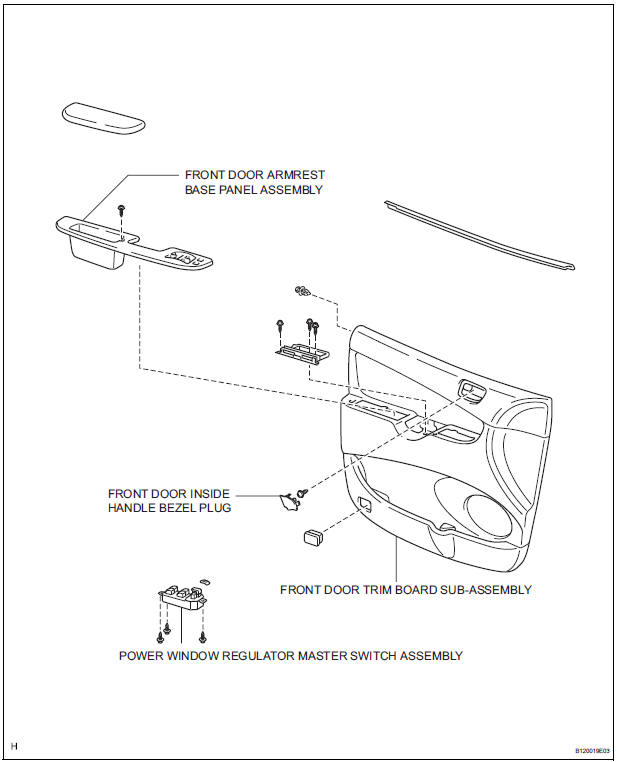
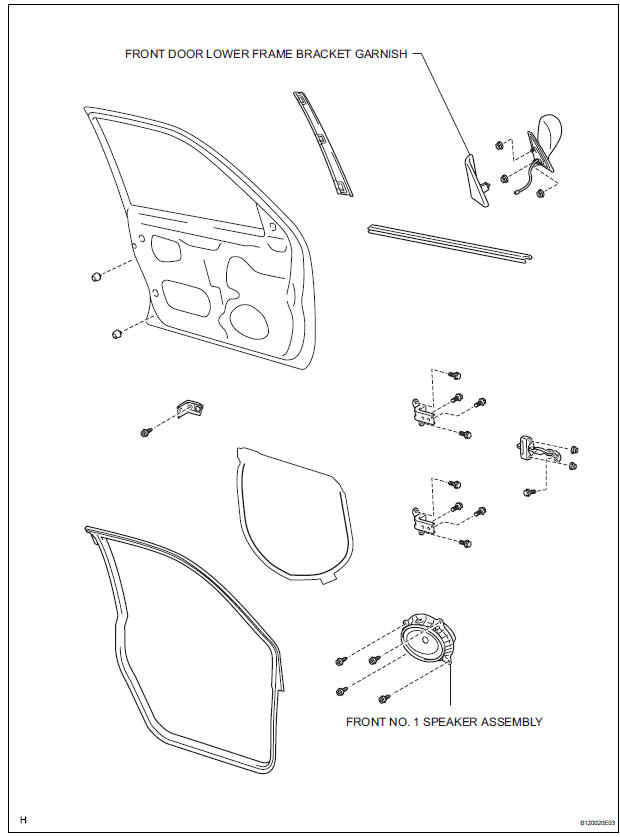
COMPONENTS
ON-VEHICLE INSPECTION
1. INSPECT FRONT NO.1 SPEAKER
HINT: Remove interior parts so that the front No.1 speaker can be seen.
- Check the speaker installation.
OK: The speaker is securely installed.
If the result is not as specified, reinstall the front No.1 speaker.
OK: The cone paper of the speaker is not torn.
If the result is not as specified, replace the front No.1 speaker.- Disconnect the front No.1 speaker connector.
- Measure the resistance between the terminals of the speaker.
Standard resistance:
6 Speaker system: Approximately 4 Ω
10 Speaker system: 4 to 6 Ω
If the result is not as specified, replace the front No.1 speaker.
REMOVAL
1. REMOVE FRONT DOOR LOWER FRAME BRACKET GARNISH
2. REMOVE FRONT DOOR INSIDE HANDLE BEZEL PLUG
3. REMOVE POWER WINDOW REGULATOR MASTER SWITCH ASSEMBLY
4. REMOVE FRONT DOOR ARMREST BASE PANEL ASSEMBLY
5. REMOVE FRONT DOOR TRIM BOARD SUBASSEMBLY
6. REMOVE FRONT NO. 1 SPEAKER ASSEMBLY
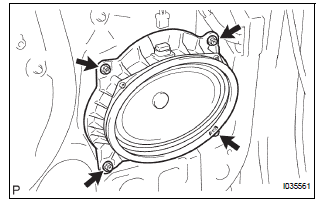
- Disconnect the connector.
- Remove the 4 screws and front No. 1 speaker assembly.
INSTALLATION
1. INSTALL FRONT NO. 1 SPEAKER ASSEMBLY
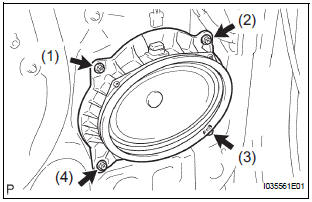
- Install the front No. 1 speaker assembly with the 4 screws.
2. INSTALL FRONT DOOR TRIM BOARD SUBASSEMBLY
3. INSTALL FRONT DOOR ARMREST BASE PANEL ASSEMBLY
4. INSTALL POWER WINDOW REGULATOR MASTER SWITCH ASSEMBLY
5. INSTALL FRONT DOOR INSIDE HANDLE BEZEL PLUG
6. INSTALL FRONT DOOR LOWER FRAME BRACKET GARNISH
Test yourself
A quick Toyota Sienna quiz: every answer comes with an explanation and a link to the manual page.
Was this page helpful?