Glove Box Light
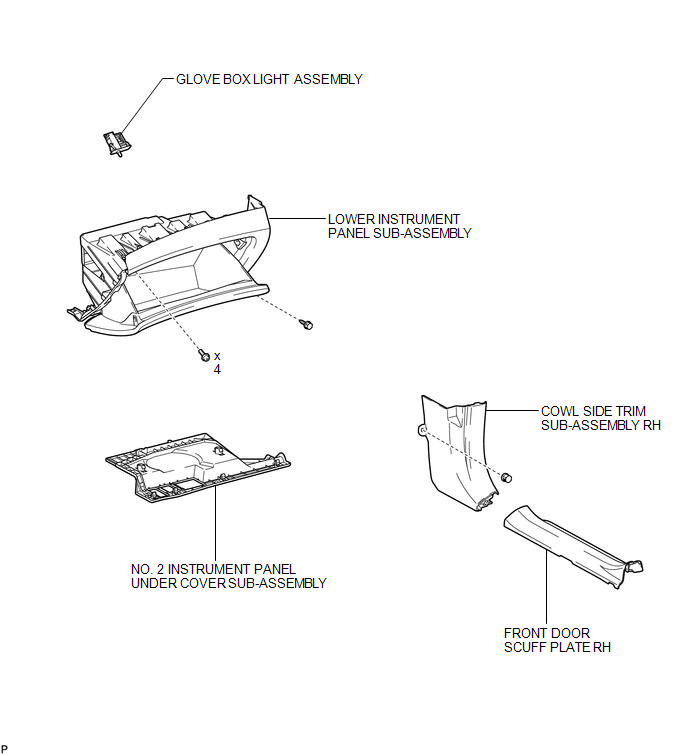
Inspection INSPECTION PROCEDURE
1. INSPECT GLOVE BOX LIGHT ASSEMBLY
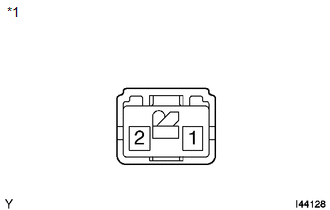
(a) Connect a positive (+) lead from the battery to terminal 1 and a negative (-) lead to terminal 2. |
 |
(b) Check that the light comes on when the glove box light switch is on (not pushed).
OK:
Glove box light comes on.
Text in Illustration*1 |
Component without harness connected (Glove Box Light Assembly) |
If the result is not as specified, replace the glove box light assembly.
Removal REMOVAL PROCEDURE1. REMOVE FRONT DOOR SCUFF PLATE RH
HINT:
Use the same procedure for the RH side and LH side (See page  ).
2. REMOVE COWL SIDE TRIM SUB-ASSEMBLY RH
HINT:
Use the same procedure for the RH side and LH side (See page ).
3. REMOVE NO. 2 INSTRUMENT PANEL UNDER COVER SUB-ASSEMBLY
4. REMOVE LOWER INSTRUMENT PANEL SUB-ASSEMBLY
5. REMOVE GLOVE BOX LIGHT ASSEMBLY
(a) Disengage the 2 claws. |
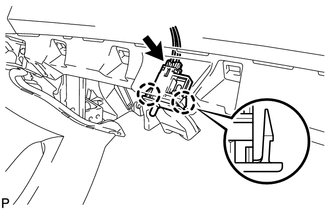 |
(b) Disconnect the connector and remove the glove box light assembly.
Installation INSTALLATION PROCEDURE1. INSTALL GLOVE BOX LIGHT ASSEMBLY
(a) Connect the connector. |
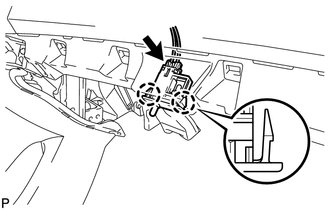 |
(b) Engage the 2 claws to install the glove box light assembly.
2. INSTALL LOWER INSTRUMENT PANEL SUB-ASSEMBLY

3. INSTALL NO. 2 INSTRUMENT PANEL UNDER COVER SUB-ASSEMBLY
4. INSTALL COWL SIDE TRIM SUB-ASSEMBLY RH
HINT:
Use the same procedure for the RH side and LH side (See page ).
5. INSTALL FRONT DOOR SCUFF PLATE RH
HINT:
Use the same procedure for the RH side and LH side (See page ).
Test yourself
A quick Toyota Venza quiz: every answer comes with an explanation and a link to the manual page.