Removal
1. REMOVE AUTOMATIC TRANSAXLE ASSEMBLY
HINT:
See the steps from "Remove Engine Assembly with transaxle" through "Remove Automatic Transaxle Assembly" (See page  ).
2. REMOVE AUTOMATIC TRANSAXLE OIL PAN SUB-ASSEMBLY
(a) Remove the 18 bolts and automatic transaxle oil pan sub-assembly from the automatic transaxle assembly. NOTICE: Some fluid will remain in the automatic transaxle oil pan sub-assembly. Remove all the bolts, and carefully remove the automatic transaxle oil pan sub-assembly. |
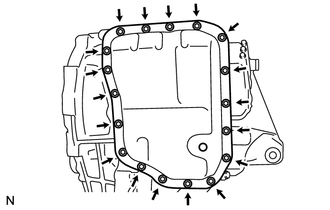 |
(b) Remove the automatic transaxle oil pan gasket from the automatic transaxle oil pan sub-assembly.
(c) Remove the 2 transmission oil cleaner magnets from the automatic transaxle oil pan sub-assembly. Text in Illustration
|
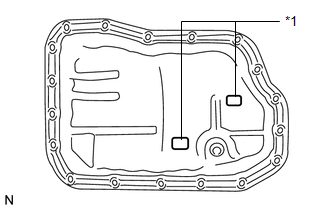 |
(d) Examine particles in the automatic transaxle oil pan sub-assembly. (1) Use the removed transmission oil cleaner magnets to collect any steel chips. Examine the chips and particles in the automatic transaxle oil pan sub-assembly and on the transmission oil cleaner magnets to determine what type of wear has occurred in the automatic transaxle assembly: Result: Steel (magnetic) Bearing, gear and plate wear Brass (non-magnetic) Bushing wear |
 |
3. REMOVE VALVE BODY OIL STRAINER ASSEMBLY
(a) Remove the 2 bolts and valve body oil strainer assembly from the transmission valve body assembly. |
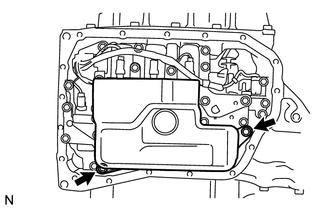 |
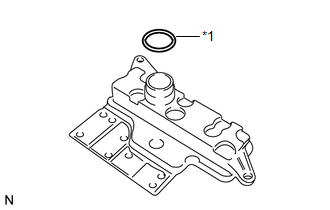
(b) Remove the O-ring from the valve body oil strainer assembly. Text in Illustration
|
 |
4. REMOVE TRANSMISSION VALVE BODY ASSEMBLY
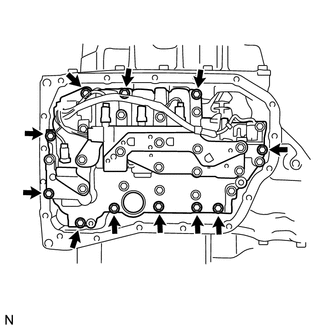
(a) Remove the 11 bolts and transmission valve body assembly from the automatic transaxle assembly. NOTICE: When removing the transmission valve body assembly, be careful not to allow the speed sensor and the automatic transaxle assembly to interfere with each other. |
 |
5. REMOVE MANUAL VALVE
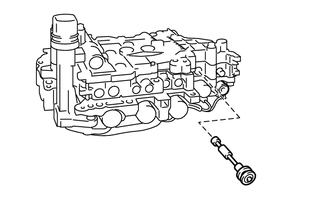
(a) Remove the manual valve from the transmission valve body assembly. |
 |
Test yourself
A quick Toyota Venza quiz: every answer comes with an explanation and a link to the manual page.