Running gear, axles, steering

Dismantling and assembling drive shaft, constant velocity joint VL107

~2min read
010203040502518N·mlb·ft
Tightening torque found on this page
Dismantling and assembling drive shaft, constant velocity joint VL107

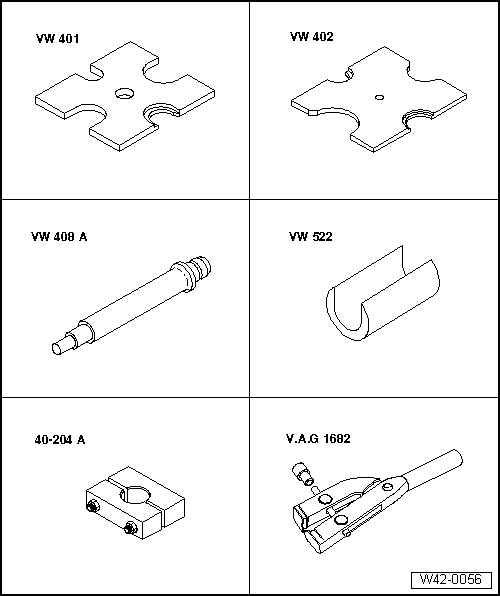
Special tools and workshop equipment required

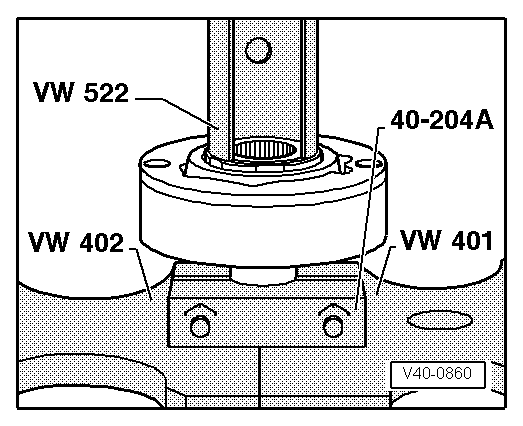
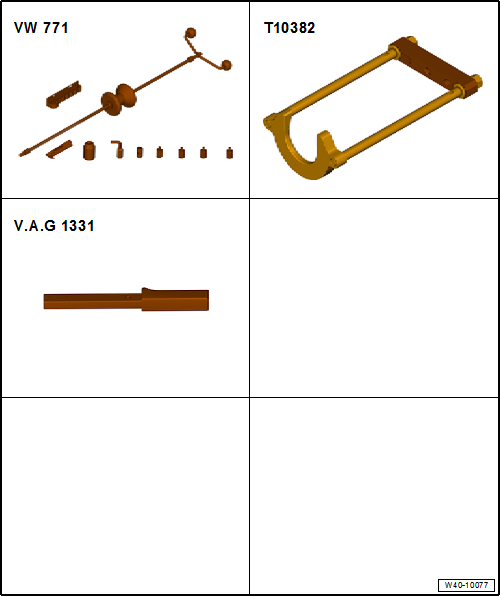
Thrust plate -VW 401-

Thrust plate -VW 402-

Press tool -VW 408 A-

Support sleeve -VW 522-

Tensioner -40 - 204 A-

Special pliers -V.A.G 1682-

Dismantling and assembling drive shaft, constant velocity joint VL107

Multi-purpose tool -VW 771-

Puller -T10382-

Torque wrench -V.A.G 1331-


Removing outer constant velocity joint

  • Clamp drive shaft in vice using protective jaw covers.
  • Fold back boot.
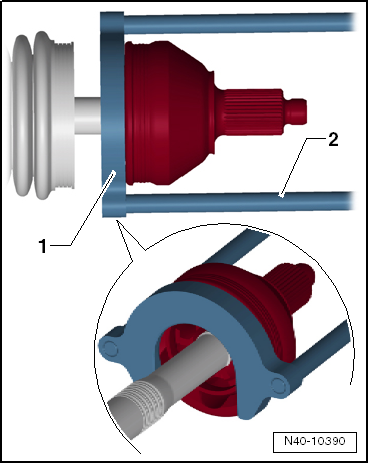
  • Set puller -T10382- up so that smooth side of puller plate -T10382/1- points to spindles -T10382/2-.
  • Assemble puller -T10382- complete with multi-purpose tool -VW 771-.
  • Pull constant velocity joint from drive shaft with puller -T10382- and multi-purpose tool -VW 771-.
1 - Puller plate -T10382/1-
2 - Spindles -T10382/2-

Driving on outer constant velocity joint

  • Install new retaining ring.
  • If necessary, push new joint boot onto drive shaft.
  • Knock onto shaft with plastic hammer until circlip engages.
Dismantling and assembling drive shaft, constant velocity joint VL107

Driving off cover for inner joint

  • Remove retaining ring.
  • Remove both clamps and slide boot towards outer joint.
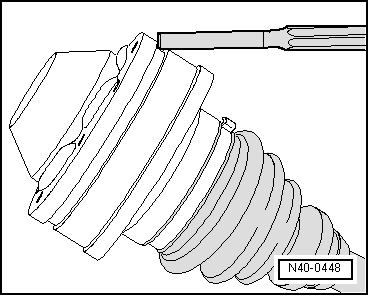
  • Drive off joint boot with a drift.
Dismantling and assembling drive shaft, constant velocity joint VL107

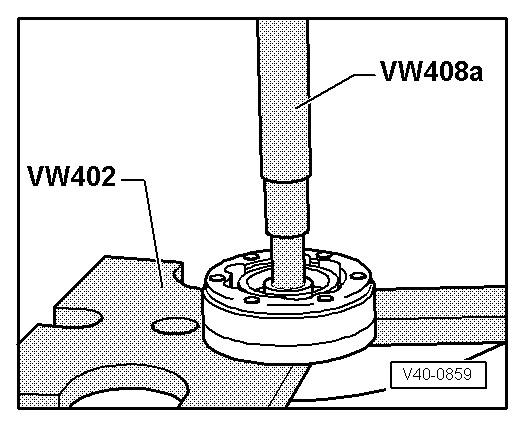
Pressing off inner constant velocity joint

Assembling

Dismantling and assembling drive shaft, constant velocity joint VL107

Pressing on inner constant velocity joint

  • Press joint on to stop.
  • Install retaining ring.
Dismantling and assembling drive shaft, constant velocity joint VL107
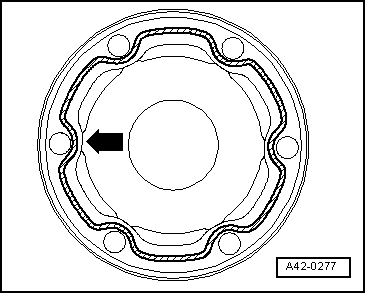
  • Coat sealing surface of cover with -D 454 300 A2-.
  • Apply a continuous bead of sealant with a diameter of 2 ... 3 mm to clean surface of cover in area of inner holes -arrow-.
Dismantling and assembling drive shaft, constant velocity joint VL107
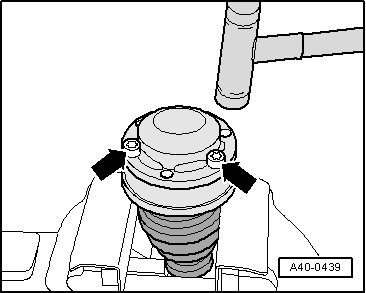
  • Using bolts -arrows-, align new cover in relation to bolt holes.
The alignment must be very accurate, because no further alignment is possible once the part has been hammered on.
  • Drive on cover using a plastic hammer.
  • Wipe off surplus sealant.
Dismantling and assembling drive shaft, constant velocity joint VL107

Tighten clamp on outer joint

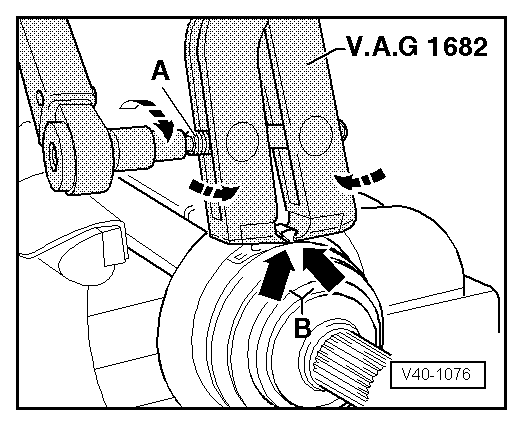
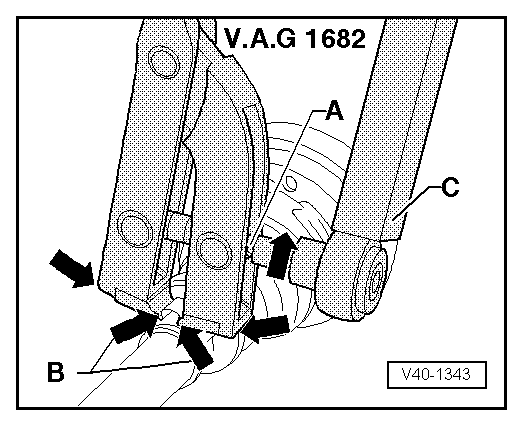
  • Apply special pliers-V.A.G 1682- as shown in diagram. Ensure jaws of tensioner lie in corners -arrows B- of ear on O-type clip.
  • Tighten clamp by turning spindle with a torque wrench (do not cant pliers).
Note Due to the hard material of the protective boot (compared to rubber) and the necessity of using a stainless steel clamp, it is only possible to tension the clamp with clamp tensioner -V.A.G 1682-.

Specified torque: 25 N·m.

Use torque wrench -C - with setting range of 5 ... 50 N·m. Make sure thread of spindle -A- on pliers moves freely. Lubricate with MoS2 grease if necessary. If the thread is tight (e.g. due to dirt), the required clamping force for the clamp will not be attained although the specified tightening torque is applied.
Dismantling and assembling drive shaft, constant velocity joint VL107

Tightening clamp on small diameter

Checking outer constant velocity joint → Chapter

Checking inner constant velocity joint → Chapter

Checking function of constant velocity joint → Anchor

Dismantling and assembling drive shaft, constant velocity joint VL107

Test yourself

A quick Volkswagen Golf quiz: every answer comes with an explanation and a link to the manual page.