4- cylinder injection engine(1.4 1 direct inction. turbocharger)

Removing and installing lower part of sump

~2min read

Special tools and workshop equipment required

Flat scraper

Commercially available scraper

Sealant remover

Hand drill with plastic brush attachment

Eye protection

Sealant → Electronic Parts Catalogue

Removing

  • Remove noise insulation → General body repairs, exterior; Rep. gr.66.
  • Drain off engine oil.
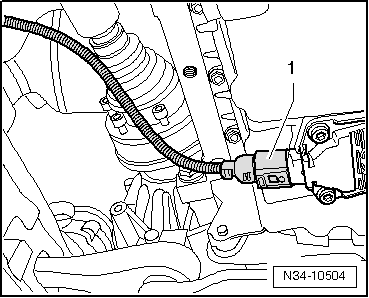
  • Disconnect electrical connector -1- on oil level and oil temperature sender -G266-.
Removing and installing lower part of sump
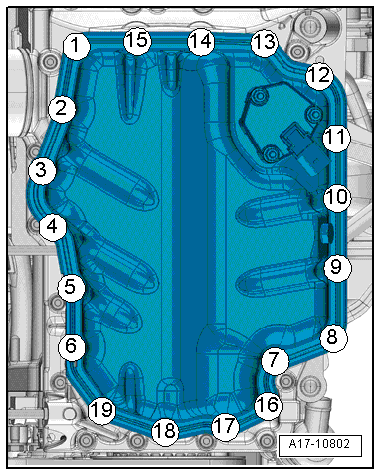
  • Loosen and unscrew bolts in the sequence -19 … 1-.
Removing and installing lower part of sump
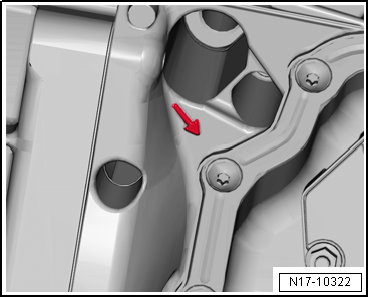
  • Fit a suitable screwdriver at the position marked with an -arrow- and carefully lever lower part of sump.
  • Carefully detach lower part of sump from adhesive bond using a commercially available scraper.

Installing

Note

Danger of soiling lubrication system.

Cover open parts of engine.

  • Spray sealing surface with sealant remover and leave to act.
  • Remove sealant residues from sump upper part with a flat scraper.
Risk of eye injury caused by sealant residue.Wear eye protection.
Removing and installing lower part of sump
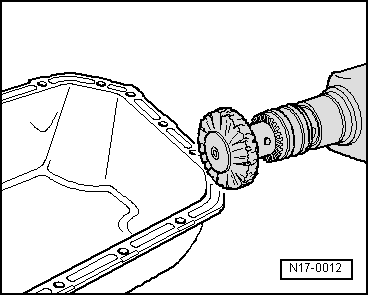
  • Remove residual sealant from bottom part of sump using, e.g., a rotating plastic brush.
  • Remove any oil and grease from sealing surfaces.
Note
Removing and installing lower part of sump

Observe expiry date of sealing compound.

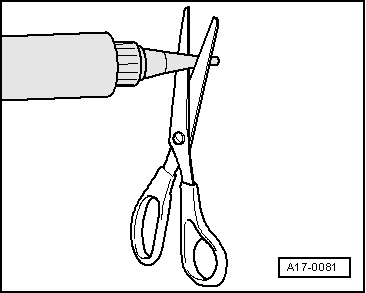
  • Cut off nozzle on tube at front marking (diameter of nozzle approx. 2 mm).

Danger of blocking lubrication system with excess sealant.

Removing and installing lower part of sump

Do not apply sealant bead thicker than specified.

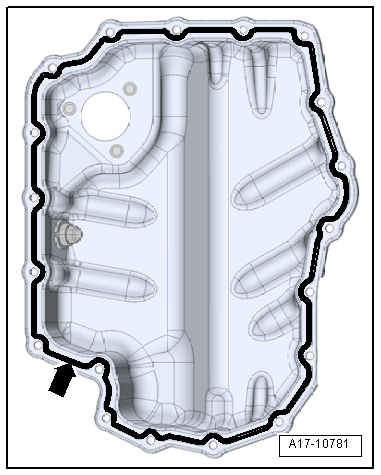
  • Apply bead of sealant -arrow- onto clean sealing surfaces of lower part of oil sump as shown in illustration.

Thickness of sealant bead: 2…3 mm.

Note

Take particular care when applying sealant bead in area of rear sealing flange.

Lower part of oil sump must be installed within 5 minutes after sealant has been applied.
  • Position lower part of oil sump and tighten bolts → Fig..
Note Allow sealant to cure for approx. 30 minutes after installing lower part of sump. Only then fill with engine oil.
  • Replenish engine oil and check oil level → Booklet.

Specified torques

→ Fig. „“Lower part of sump - specified torque and tightening sequence”“

Removing and installing lower part of sump

Test yourself

A quick Volkswagen Golf quiz: every answer comes with an explanation and a link to the manual page.