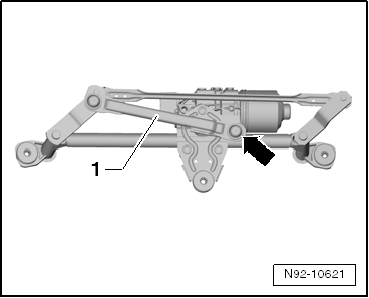
Windshield Wiper System
Assembly Overview - Windshield Wiper System
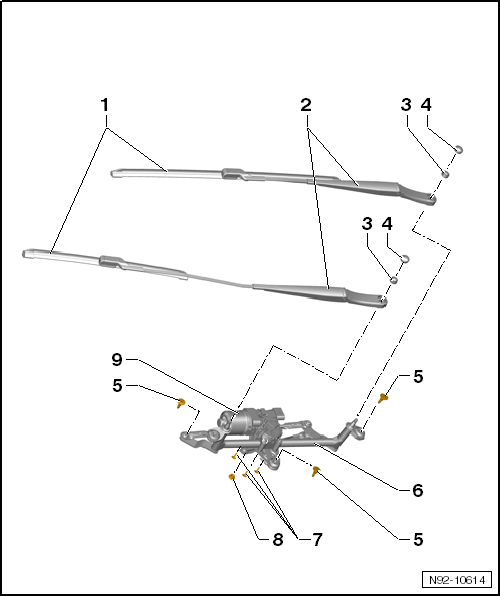
- Beam-Type Wiper Blades
- Remove and install
- Wiper Arms
- Remove and install
- adjust
- Wiper arm to linkage mounting nuts
- Tightening torque: 20 N·m
- Cover caps
- Wiper frame with linkage to body mounting bolts
- Tightening torque: 8 N·m
- Wiper Frame with Linkage
- Remove and install
- Wiper motor to wiper frame with linkage mounting bolts
- Tightening torque: 9 N·m
- Wiper motor shaft crank mounting nut
- Tightening torque: 25 N·m
- Windshield Wiper Motor -V- with Wiper Motor Control Module -J400-
- Remove and install
- Replace
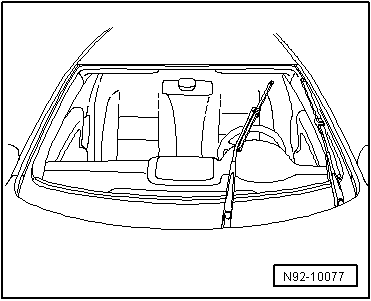
Move Windshield Wipers to Service Position

Caution!
Risk of damage to the hood when the wipers return to park position.
- Do not move the vehicle with the wiper arms folded away from the windshield.
- When the wiper switch is actuated or at a speed of 6 km/h the wipers automatically return to park position.

Caution!
Risk of damage to the wiper blades from freezing.
In freezing conditions, check whether the wiper blades are frozen to the windshield.

Note
If the wiper motor must run during the procedure, the hood must be fully closed, otherwise the power supply to the wiper motor is interrupted.
- Switch the ignition on briefly and then off again.
- Within 10 seconds, briefly actuate the wiper switch for single wipe. The wipers move to the "service position".
Remove and Install Wiper Blade
Removing

Caution!
Risk of damage to the wiper blade.
The beam-type wiper blades are very flexible. Only hold the wiper blades in the area of the wiper blade attachment when lifting them off the windshield.
- Move the wipers to the service position.
- Fold up the wiper arm.
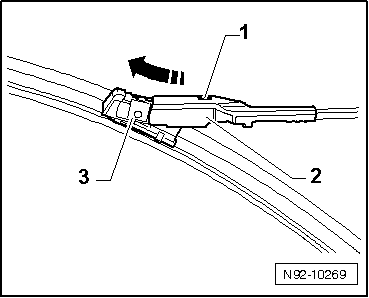
- Press button -1- and pull the wiper blade holder -3- out of the wiper arm -2- in the -direction of arrow-.
Installing
Installation is carried out in the reverse order of removal, observing the following:

Caution!
Risk of damage to the body.
The wiper blades have different lengths for the driver and passenger sides.

- Push wiper blade -3- into wiper arm -2- as far as it will go. Make sure the wiper blade is pushed in until the retaining clip audibly engages in the wiper arm.
- Fold the wiper arm back onto the windshield.
Remove and Install Wiper Arms
Required Special Tools, Test and Measuring Equipment and Auxiliary Items
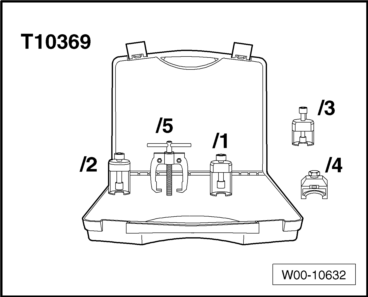
- Puller -T10369/1-
Removing

Caution!
Risk of damage to the wiper arm shafts.
The wiper arm shafts can be damaged when loosening the wiper arms without the puller -T10369/1-.

Note
- If the wiper motor must run during the procedure, the hood must be closed, otherwise the power supply to the wiper motor is interrupted.
- The removal and installation procedure described is for left-hand drive vehicles. Right-hand drive vehicles are performed accordingly.
- Move the wipers to the service position.
- Switch off ignition and all electrical consumers and remove the ignition key.
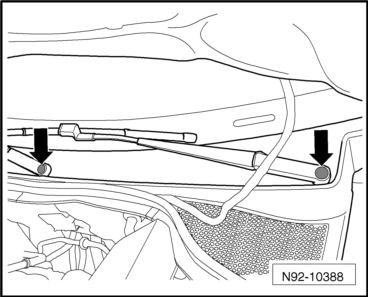
- Pry off the cover caps -arrows- with a screwdriver.
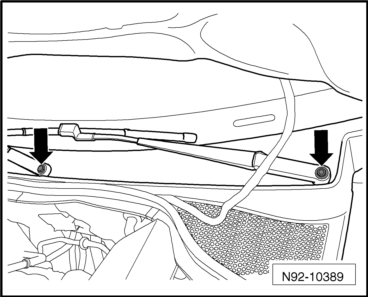
- Loosen the nuts -arrows- a few turns.
- Slide the arms of the puller -T10369/1- -2- under the wiper arm -4-, as shown in the illustration.

Caution!
The wiper arm shaft may be damaged.
Always use the pressure piece -3- to loosen the wiper arm.
- Turn the pressure screw -1- of the puller clockwise until the pressure piece -3- rests on the wiper shaft. Using an Allen key (width across flats 6), turn the pressure screw -1- of the puller clockwise until the wiper arm -4- releases from the shaft.
- Remove the puller and the wiper arm.
- Repeat this procedure on the second wiper arm.
Installing
Installation is carried out in the reverse order of removal, observing the following:

Caution!
Risk of damage to the body.
The wiper arms have different lengths for the driver and passenger sides.
- Close the hood.
- Switch the ignition on.
- Actuate single wipe and let the wiper motor run to the park position.
- Switch the ignition off.
- Open the hood.
- Place the wiper arm with installed wiper blade onto the wiper arm shaft.

- Push the wiper arms onto the wiper arm shafts in the approximate park position and hand-tighten the mounting nuts -arrows-.
- Adjust the wiper arms.

Adjust Wiper Arms
Required Special Tools, Test and Measuring Equipment and Auxiliary Items
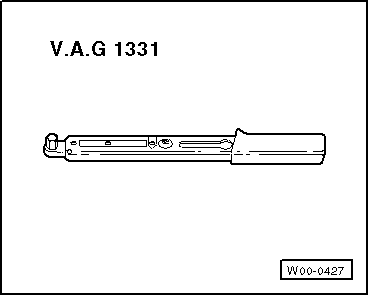
- Torque Wrench -V.A.G 1331-

Note
The removal and installation procedure described is for left-hand drive vehicles. Right-hand drive vehicles are performed accordingly.
- Let the wipers run to the park position, then switch the ignition off.
- Adjust the wiper blade park position.

Note
The specified dimension for the wiper blade park position -a- is measured and adjusted between the center of the wiper blade tip -1- and the upper edge of the cowl panel cover -2-.
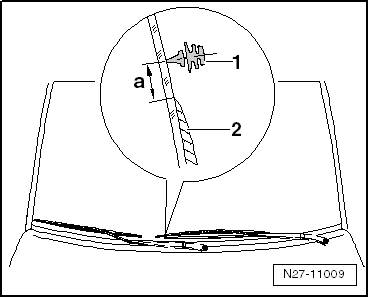
Driver side:
Adjust the distance -a- between the center of the wiper rubber -1- and the upper edge of the cowl panel cover -2-.
- Dimension -a- = 30 mm.
- If necessary, adjust the wiper blade park position by repositioning the wiper arm.
- Tighten the nut.
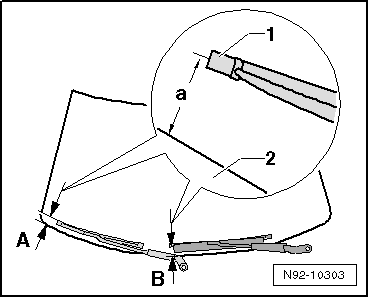
Passenger side:
Adjust the distance -a- between the center of the wiper rubber -1- and the upper edge of the cowl panel cover -2-.
- Dimension -a- = 30 mm.
- If necessary, adjust the wiper blade park position by repositioning the wiper arm.
- Tighten the nut.
Tightening torques
- "Assembly Overview - Windshield Wiper System"
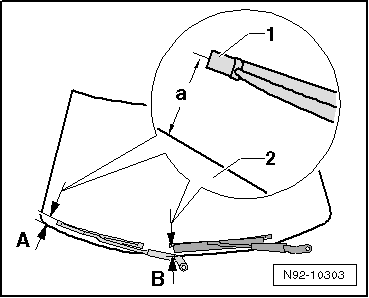
Replace Wiper Rubber

Note
Observe the chapter "Identification Features of Beam-Type Wiper Blades" in the repair manual "Electrical System General Information". A link to this repair manual is currently not possible for technical reasons. Please select the repair manual "Electrical System General Information" manually in ELSA.
- Remove the wiper blade.
- Check on which side the wiper rubber cannot be slid in the guide.
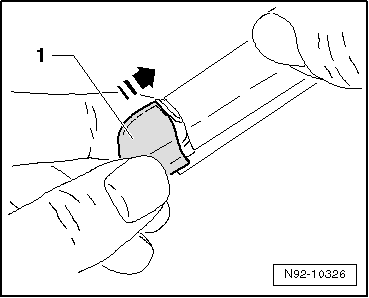
- On the side where the wiper rubber cannot be slid in the guide, carefully pry off cap -1-.
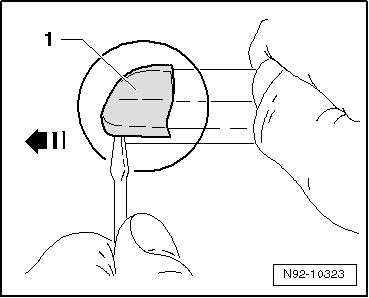
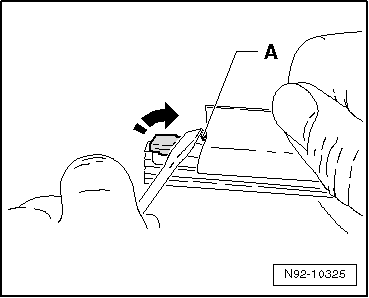
- Using a suitable screwdriver, open the wiper rubber retainer -A- by bending it up.
- Replace the wiper rubber.

Note
Make sure the wiper rubber is correctly seated in the guides of the wiper blade.
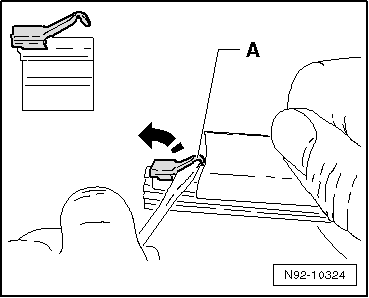
- Using a suitable screwdriver, press the wiper rubber retainer -A- back down until the wiper rubber can no longer be slid in the guide.
- Fit the new cap -1- and check that it is seated firmly.
- Install the windshield wiper blade.
- Check the wiper blade for proper function.
Removing and installing windshield wiper motor -V-

Caution!
When disconnecting and connecting the battery, follow the procedure described in the repair manual.

Note
- The wiper motor control module -J400- and the windshield wiper motor -V- are combined into one assembly. If the wiper motor control module -J400- is replaced, first read out the coding and code the new wiper motor control module -J400- with this value.
- The illustrations show the removal and installation of the front windshield wiper system on a left-hand drive vehicle.
- Removal and installation of the front windshield wiper system on a right-hand drive vehicle is performed in the same way.
Required Special Tools, Test and Measuring Equipment and Auxiliary Items
- Torque Wrench -V.A.G 1331-
Removing
- Let the wiper arms move to the park position, then switch off the ignition.
- Disconnect battery.
- Remove the wiper arms.
- Remove cowl panel cover, refer to Body Assembly Work Exterior.

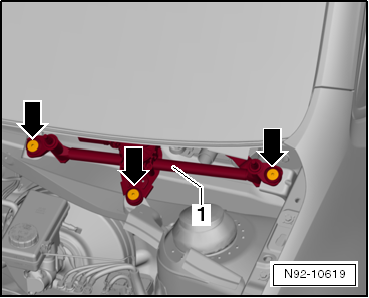
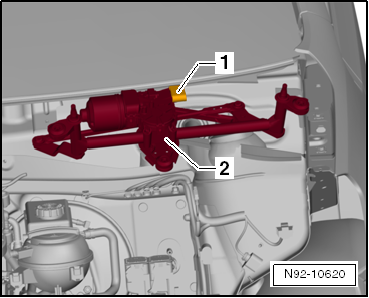
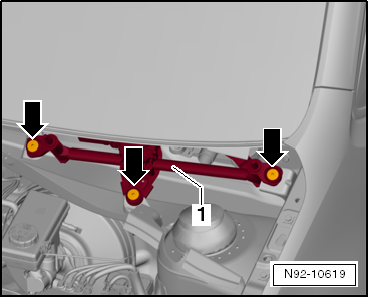
- Unscrew the mounting bolts -arrows- and move the wiper frame with linkage and motor -1- slightly sideways out of the cowl panel, taking the connected cable lengths into account.
- Unlock and disconnect connector -1- and remove the wiper frame with linkage and motor -2- from the vehicle.
Installing
Installation is carried out in the reverse order of removal, observing the following:
- Insert the wiper frame with linkage and wiper motor -1- into the cowl panel.
- Screw in the mounting bolts -arrows-.
- Plug the connector onto the wiper motor connection and lock it in place.
- Install cowl cover → Body Assembly Work, Exterior.
- Connect battery.
- Install the wiper arms.
Tightening torques
- "Assembly Overview - Windshield Wiper System"
Replacing windshield wiper motor
Required Special Tools, Test and Measuring Equipment and Auxiliary Items
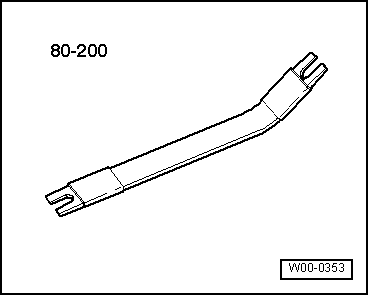
- Release lever -80-200-
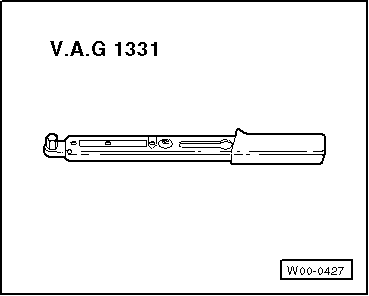
- Torque Wrench -V.A.G 1331-
Removing
- Remove the windshield wiper motor.
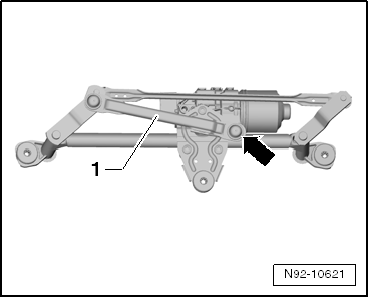
- Use release lever -80-200- to pry the linkage -1- off the ball joint of the motor crank -arrow-.
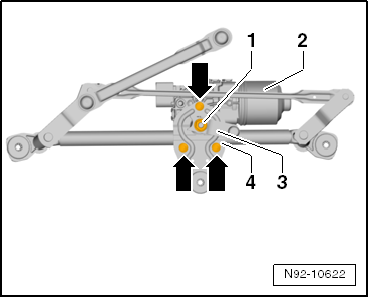
- Unscrew the mounting nut -1- and pull the motor crank -3- off the wiper motor shaft.
- Unscrew the mounting bolts -arrows-, remove the retaining plate -4- and take the wiper motor with control module -2- out of the wiper frame.
Installing

WARNING!
- Risk of crushing!
- Rotating parts can cause crushing injuries.
- When the wiper motor is removed, do not hold it in the area of rotating parts.
- Move the wiper motor to the park position:
- Reconnect the battery.
- Plug the connector onto the wiper motor.
- With the ignition switched on, briefly press the windshield wiper switch (intermittent wipe) and let the wiper motor move to the park position.
- Switch off the ignition.
- Unlock and disconnect the connector from the wiper motor.
- Disconnect the battery.
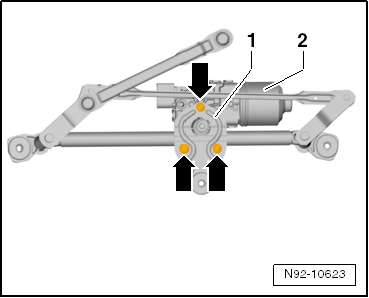
- Insert the wiper motor with control module -2- into the wiper frame, place the retaining plate -1- on it and fasten it with the 3 mounting bolts -arrows-.
- Screw in the 3 mounting bolts -arrows-.
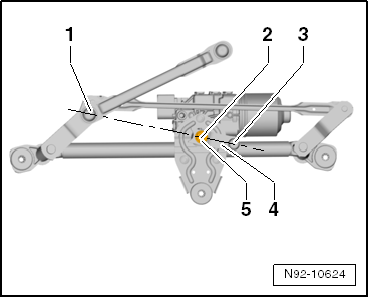
- Place the motor crank -4- onto the shaft of the wiper motor -2- so that the 3 marked points -1-, -2- and -3- are in one line.
- Screw on the mounting nut -5-.
- Press the ball joint -arrow- of the linkage -1- onto the motor crank until it locks.
- Install the windshield wiper motor.
Tightening torques
- "Assembly Overview - Windshield Wiper System"