Heater and A/C unit, front
Assembly overview - attachments of heater and A/C unit and air intake housing
Assembly overview - attachments of heater and A/C unit and air intake housing, left-hand drive
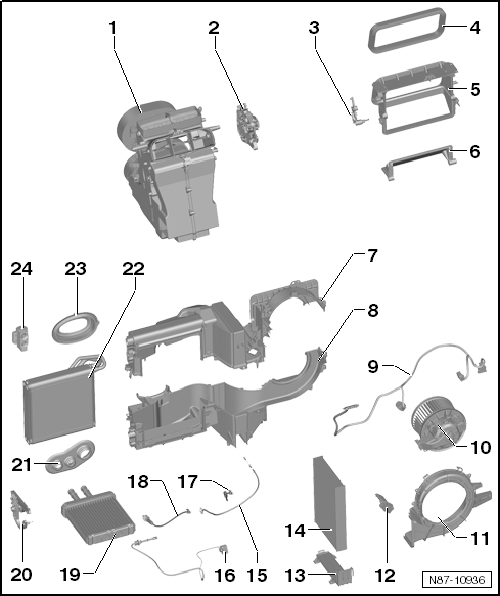
- Air distributor housing
- Actuator for defrost and air distribution flap
- Remove and install
- Actuator for fresh air/recirculation flap
- Remove and install
- Gasket
- Air inlet housing
- Fresh air/recirculation flap
- Evaporator housing: upper section
- Evaporator housing: lower section
- Heater and A/C unit wiring harness
- Fresh air blower -V2-
- Remove and install
- Fresh air blower housing
- Series resistor for fresh air blower with overheat protection -N24-
- Remove and install
- Cover
- for dust and pollen filter
- Dust and pollen filter
- Remove and install
- Bowden cable for fresh air/recirculation flap
- Remove and install
- Evaporator temperature sensor -G308-
- Remove and install
- Flexible shaft for air distribution
- Remove and install
- Flexible shaft for temperature flap
- Remove and install
- Heater core
- Remove and install
- Actuator for temperature flap
- Remove and install
- Gasket
- Observe installation position.
- Evaporator
- Remove and install
- Gasket
- Observe installation position.
- Expansion Valve
- Remove and install
Assembly overview - attachments of heater and A/C unit and air intake housing, right-hand drive
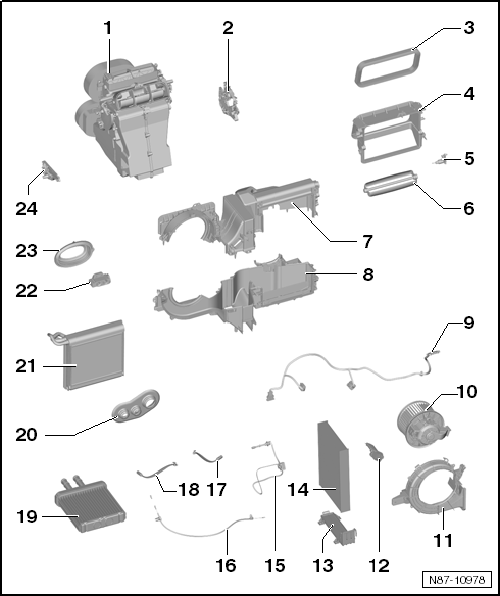
- Air distributor housing
- Actuator for defrost and air distribution flap
- Remove and install
- Gasket
- Air inlet housing
- Actuator for fresh air/recirculation flap
- Remove and install
- Fresh air/recirculation flap
- Evaporator housing: upper section
- Evaporator housing: lower section
- Heater and A/C unit wiring harness
- Fresh air blower -V2-
- Remove and install
- Fresh air blower housing
- Series resistor for fresh air blower with overheat protection -N24-
- Remove and install
- Cover
- for dust and pollen filter
- Dust and pollen filter
- Remove and install
- Evaporator temperature sensor -G308-
- Remove and install
- Bowden cable for fresh air/recirculation flap
- Remove and install
- Flexible shaft for air distribution
- Remove and install
- Flexible shaft for temperature flap
- Remove and install
- Heater core
- Remove and install
- Gasket
- Observe installation position.
- Evaporator
- Remove and install
- Expansion Valve
- Remove and install
- Gasket
- Observe installation position.
- Actuator for temperature flap
- Remove and install
Assembly overview - evaporator housing
Assembly overview - evaporator housing, left-hand drive
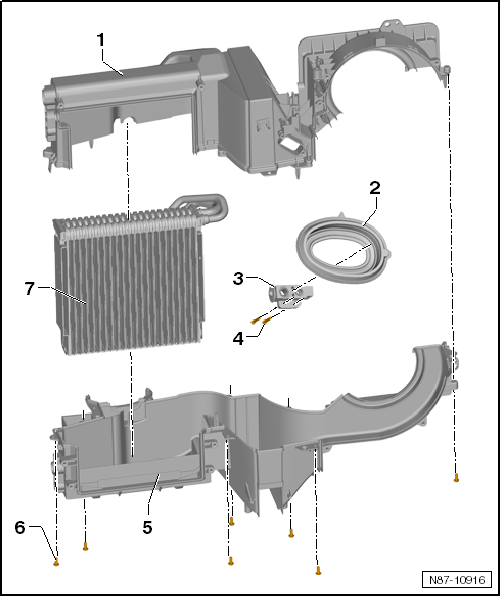
- Evaporator housing upper section
- Gasket
- Observe installation position.
- Expansion Valve
- Removing and installing.
- Cylinder Combination Screw
- 5 N·m
- Evaporator housing lower section
- Bolt
- 1,5 N·m
- Evaporator
- Removing and installing.
Assembly overview - evaporator housing, right-hand drive
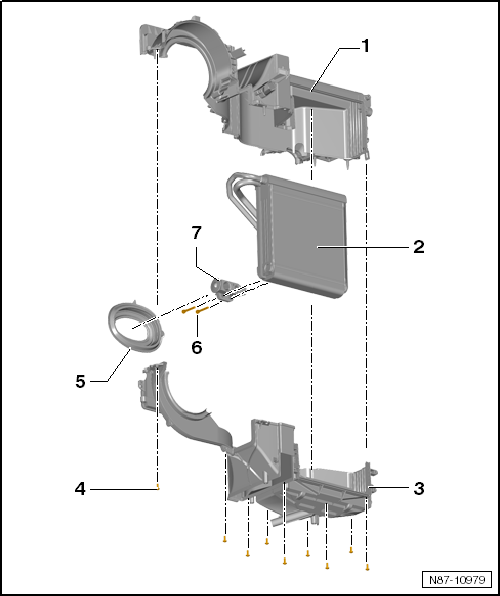
- Evaporator housing upper section
- Evaporator
- Removing and installing.
- Evaporator housing lower section
- Bolt
- 1,5 N·m
- Gasket
- Observe installation position.
- Cylinder Combination Screw
- 5 N·m
- Expansion Valve
- Removing and installing.
Removing and installing evaporator
Removing and installing evaporator, left-hand drive
Required Special Tools, Test and Measuring Equipment and Auxiliary Items
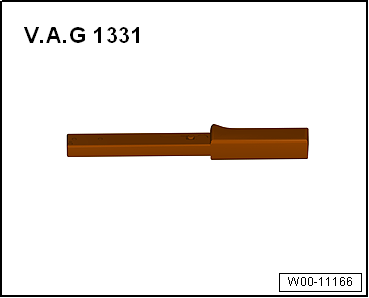
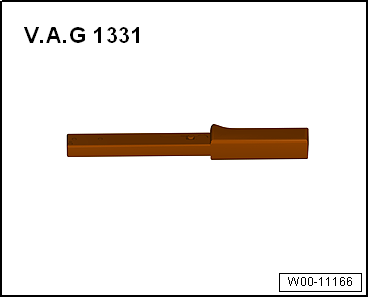
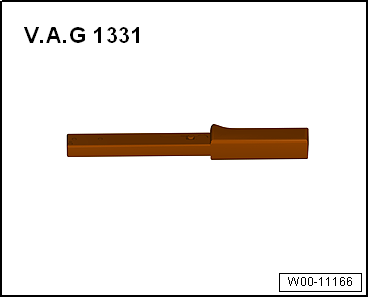
- Torque Wrench -V.A.G 1331-
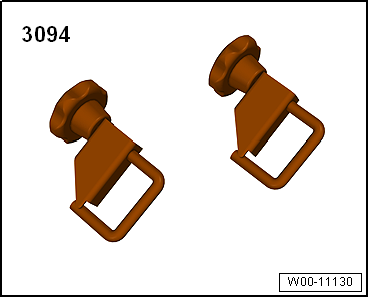
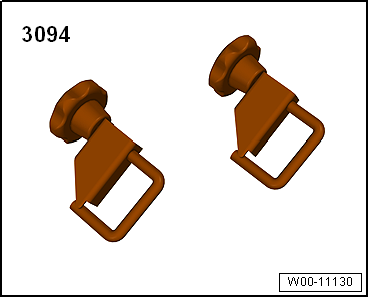
- Hose clamps up to 25 mm -3094-
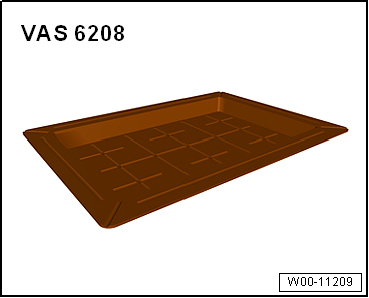
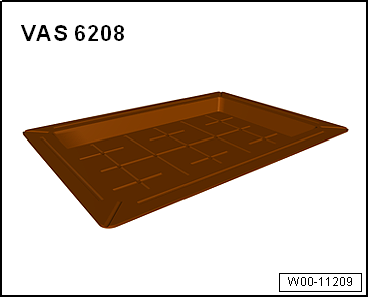
- Drip pan for workshop crane -VAS 6208-
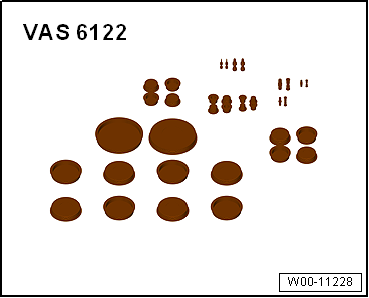
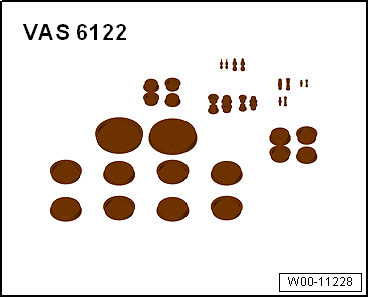
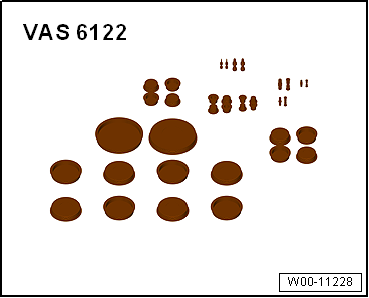
- Plug Set for Engine -VAS 6122-
- Air Conditioning Service Station
- commercially available compressed air gun
Removing
- Extract refrigerant with the air conditioning service station, only then open refrigerant circuit. Observe notes "Working on Refrigerant Circuit".
- Observe safety precautions "Safety Precautions When Working on Air Conditioning Systems".
Risk of frostbite from refrigerant escaping under pressure. Frostbite of skin and other body parts possible. Wear protective gloves. Wear safety goggles. Extract refrigerant and open refrigerant circuit immediately. If more than 10 min have passed since extraction and the refrigerant circuit has not been opened, extract refrigerant again. Post-evaporation has built up pressure in the refrigerant circuit.
- Remove heating and A/C unit.
- Disassemble evaporator housing.
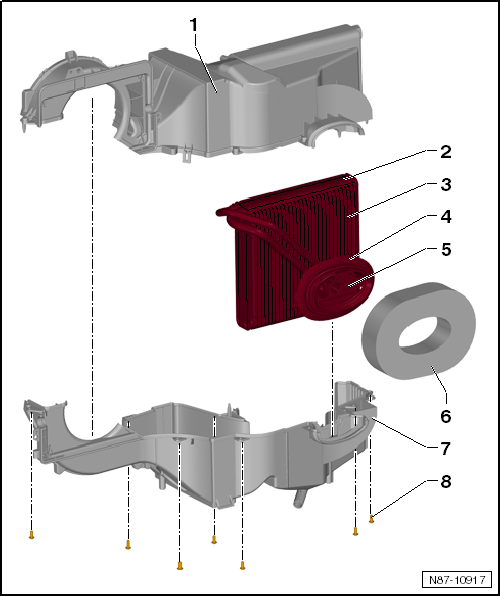
- Remove evaporator -3- from evaporator housing lower section -7-.
Installing
Observe the position of seal -3-:
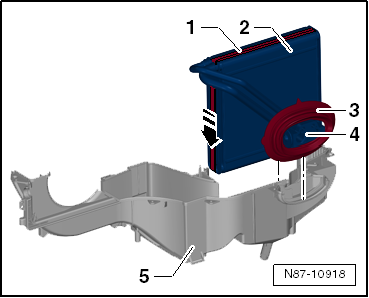
Vehicles with air conditioning
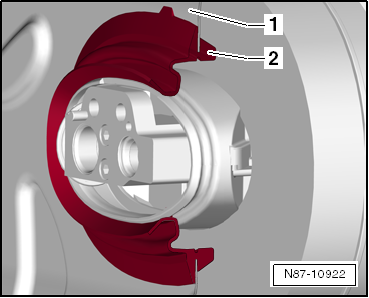
Vehicles without air conditioning
- Install in reverse order.
Removing and installing evaporator, right-hand drive
Required Special Tools, Test and Measuring Equipment and Auxiliary Items
- Torque Wrench -V.A.G 1331-
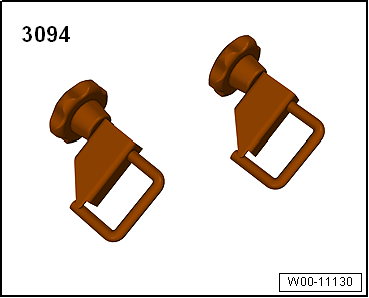
- Hose clamps up to 25 mm -3094-
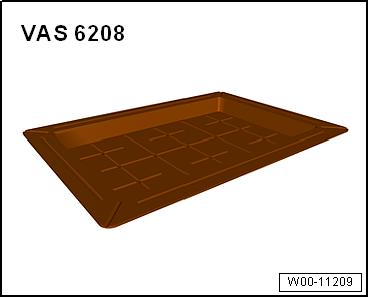
- Drip pan for workshop crane -VAS 6208-
- Plug Set for Engine -VAS 6122-
- Air Conditioning Service Station
- commercially available compressed air gun
Removing
- Extract refrigerant with the air conditioning service station, only then open refrigerant circuit. Observe notes "Working on Refrigerant Circuit".
- Observe safety precautions "Safety Precautions When Working on Air Conditioning Systems".
Risk of frostbite from refrigerant escaping under pressure. Frostbite of skin and other body parts possible. Wear protective gloves. Wear safety goggles. Extract refrigerant and open refrigerant circuit immediately. If more than 10 min have passed since extraction and the refrigerant circuit has not been opened, extract refrigerant again. Post-evaporation has built up pressure in the refrigerant circuit.
- Remove heating and A/C unit.
- Disassemble evaporator housing.
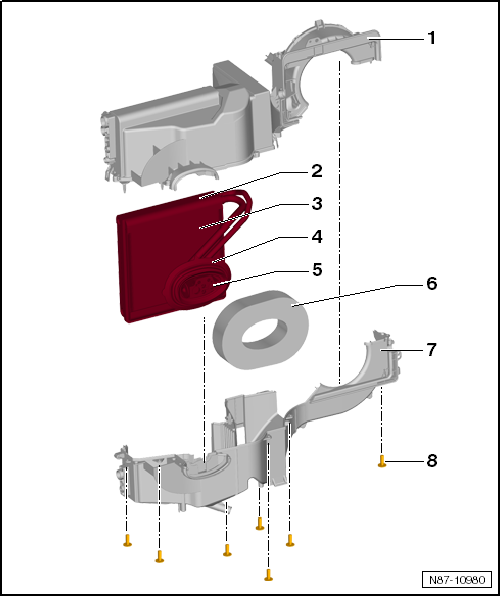
- Remove evaporator -3- from evaporator housing lower section -7-.
Installing

Note
The illustration shows a left-hand drive vehicle.
Observe the position of seal -3-:
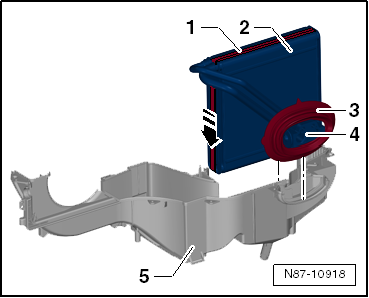
Vehicles with air conditioning
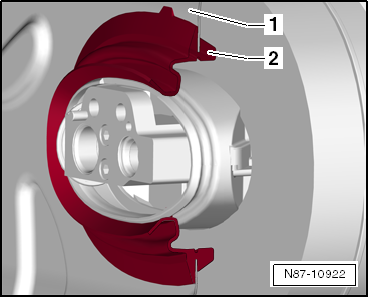
Vehicles without air conditioning
- Install in reverse order.
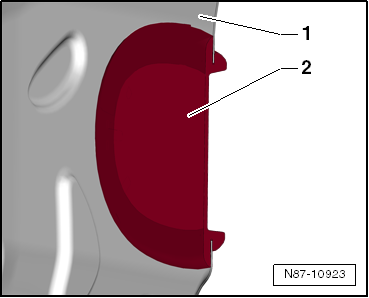
Removing and installing evaporator temperature sensor -G308-
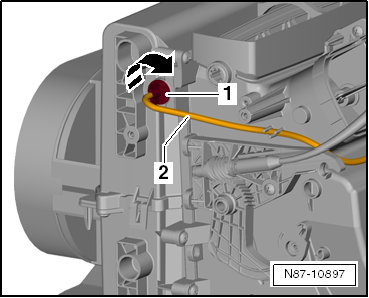
Removing and installing evaporator temperature sensor -G308-, left-hand drive
Removing
- Remove instrument panel → Body assembly work, interior.
- Remove intermediate piece for defrost air outlet.
- Unhook the lead from evaporator temperature sensor -G308-.
- Turn evaporator temperature sensor -G308--1- 90º in the -direction of arrow- and remove it.
Installing
- Install evaporator temperature sensor -G308- in the reverse order of removal.

Note
Make sure the cable of evaporator temperature sensor -G308- is routed correctly.
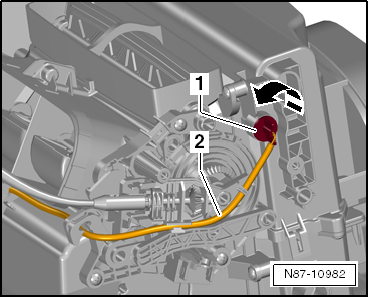
Removing and installing evaporator temperature sensor -G308-, right-hand drive
Removing
- Remove instrument panel → Body assembly work, interior.
- Remove intermediate piece for defrost air outlet.
- Unhook lead -2- from evaporator temperature sensor -G308--3-.
- Turn evaporator temperature sensor -G308--1- 90º in the -direction of arrow- and remove it.
Installing
- Install evaporator temperature sensor -G308- in the reverse order of removal.

Note
Make sure the cable of evaporator temperature sensor -G308- is routed correctly.
Removing and installing heater and A/C unit
Removing and installing heater and A/C unit, left-hand drive
Required Special Tools, Test and Measuring Equipment and Auxiliary Items
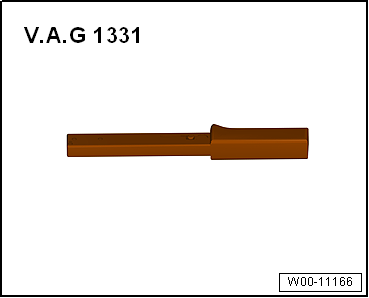
- Torque Wrench -V.A.G 1331-
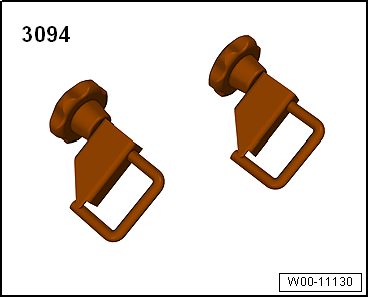
- Hose clamps up to 25 mm -3094-
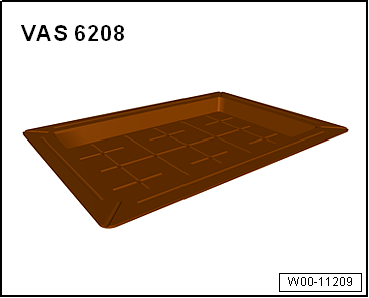
- Drip pan for workshop crane -VAS 6208-
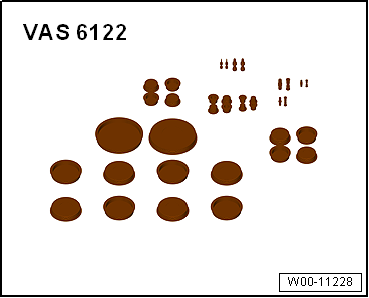
- Plug Set for Engine -VAS 6122-
- Air Conditioning Service Station
- commercially available compressed air gun
Removing
- Disconnect battery → Electrical system.
- Extract refrigerant with the air conditioning service station, only then open refrigerant circuit. Observe notes "Working on Refrigerant Circuit".
- Observe safety precautions "Safety Precautions When Working on Air Conditioning Systems".
Risk of frostbite from refrigerant escaping under pressure. Frostbite of skin and other body parts possible. Wear protective gloves. Wear safety goggles. Extract refrigerant and open refrigerant circuit immediately. If more than 10 min have passed since extraction and the refrigerant circuit has not been opened, extract refrigerant again. Post-evaporation has built up pressure in the refrigerant circuit.
- Remove instrument panel → Body assembly work, interior.
- Cover the front floor covering.
WARNING With the engine warm, the cooling system is under pressure. Risk of scalding from hot steam and hot coolant. Possible scalding of skin and other body parts. Wear protective gloves. Wear safety goggles. Relieve pressure: cover the coolant expansion tank cap with a cloth and open it carefully.
- Remove air filter.
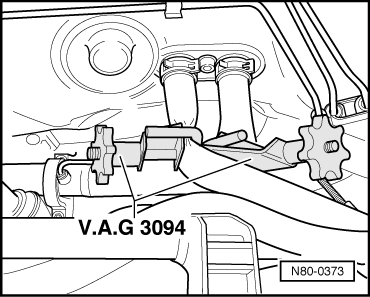
- Mark the coolant hoses in the engine compartment, close them with hose clamps up to 40 mm -3093- and disconnect them from the heater core.
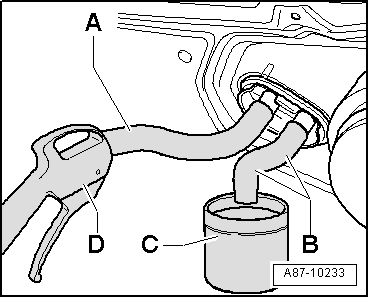
- Push a piece of hose -A- and -B- onto each of the two connections to the heater core.
- Hold container -C- under the hose from the lower connection -B-.
- Using a compressed air gun -D-, carefully blow the coolant out of the heater core (into container -C-) via hose -A-.
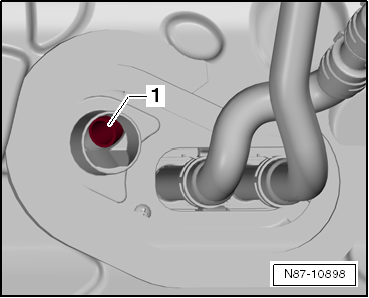
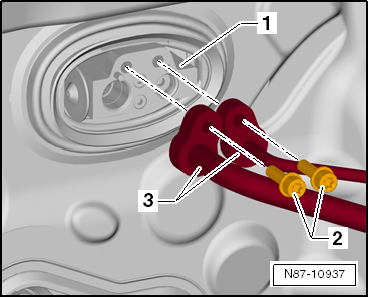
- Unscrew bolts -2- (12 N·m) of refrigerant lines -3- from the engine compartment.
- Disconnect refrigerant lines from expansion valve -1-.

Note
- Seal open line connections.
- For sealing the open connections on the expansion valve, the cap of a replacement expansion valve, for example, is suitable.
- Cover the floor covering in the vehicle interior with liquid-proof foil and absorbent paper.
- Disconnect electrical connectors from heater and A/C unit.
- Remove and install intermediate piece for defrost air outlet.
- Remove and install intermediate piece for center air outlet.
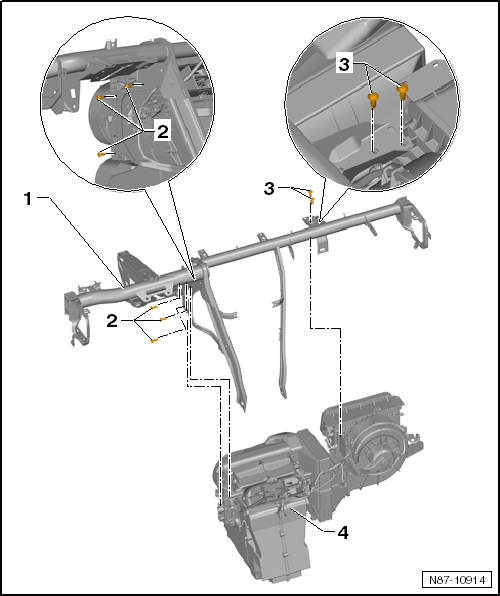
- Instrument panel centre tube
- Removing and installing → Body Assembly Work Interior.
- Bolt
- 3 pcs.
- 3,5 N·m
- Bolt
- 2 pieces
- 3,5 N·m
- Heater and A/C unit
- Remove and install

Note
- All cable ties and other fasteners of the electrical wiring harness that are loosened or cut when removing the A/C unit must be reattached at the same locations during installation.
- The electrical wiring harness "air conditioning" is removed together with the heater and A/C unit.
- Unscrew bolts -2- and -3-.
- Remove center tube of dash panel -1- → Body Assembly Work Interior.
- Remove heater and A/C unit.
Installing
- Installation is carried out in the reverse order, observing the following.
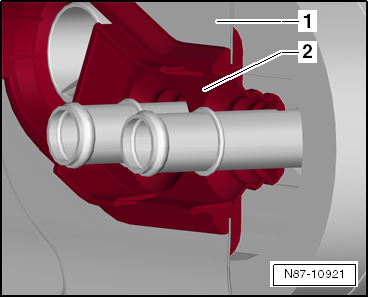
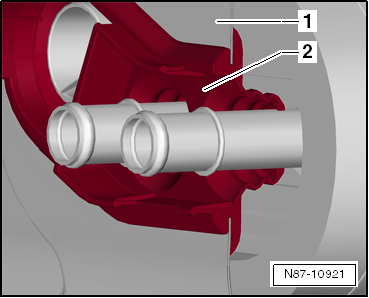
- First install seal -2- on the heater and A/C unit.
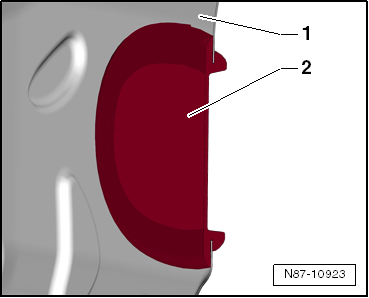
- When installing the heater and A/C unit, pull seal -2- through bulkhead -1-.

Note
- Make sure seal -2- is correctly seated in the cowl bulkhead -1-.
- The condensate drain connector must not be covered by seal -2-.
- Top up coolant after installation.
- Top up refrigerant.
Removing and installing heater and A/C unit, right-hand drive
Required Special Tools, Test and Measuring Equipment and Auxiliary Items
- Torque Wrench -V.A.G 1331-
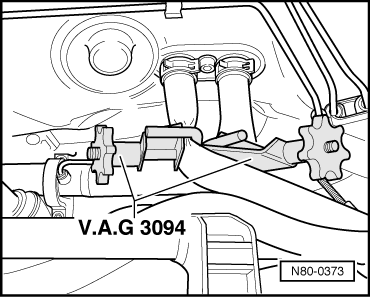
- Hose clamps up to 25 mm -3094-
- Drip pan for workshop crane -VAS 6208-
- Plug Set for Engine -VAS 6122-
- Air Conditioning Service Station
- commercially available compressed air gun
Removing
- Disconnect battery → Electrical system.
- Extract refrigerant with the air conditioning service station, only then open refrigerant circuit. Observe notes "Working on Refrigerant Circuit".
- Observe safety precautions "Safety Precautions When Working on Air Conditioning Systems".
Risk of frostbite from refrigerant escaping under pressure. Frostbite of skin and other body parts possible. Wear protective gloves. Wear safety goggles. Extract refrigerant and open refrigerant circuit immediately. If more than 10 min have passed since extraction and the refrigerant circuit has not been opened, extract refrigerant again. Post-evaporation has built up pressure in the refrigerant circuit.
- Remove instrument panel → Body assembly work, interior.
- Cover the front floor covering.
WARNING With the engine warm, the cooling system is under pressure. Risk of scalding from hot steam and hot coolant. Possible scalding of skin and other body parts. Wear protective gloves. Wear safety goggles. Relieve pressure: cover the coolant expansion tank cap with a cloth and open it carefully.
- Remove air filter.
- Mark the coolant hoses in the engine compartment, close them with hose clamps up to 40 mm -3093- and disconnect them from the heater core.
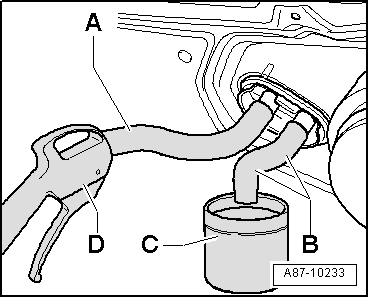
- Push a piece of hose -A- and -B- onto each of the two connections to the heater core.
- Hold container -C- under the hose from the lower connection -B-.
- Using a compressed air gun -D-, carefully blow the coolant out of the heater core (into container -C-) via hose -A-.
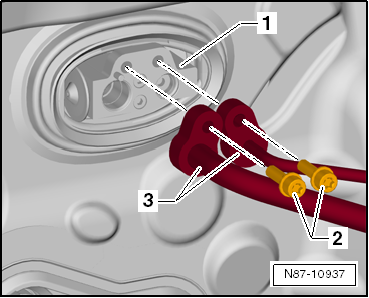
- Unscrew bolts -2- (12 N·m) of refrigerant lines -3- from the engine compartment.
- Disconnect refrigerant lines from expansion valve -1-.

Note
- Seal open line connections.
- For sealing the open connections on the expansion valve, the cap of a replacement expansion valve, for example, is suitable.
- Cover the floor covering in the vehicle interior with liquid-proof foil and absorbent paper.
- Disconnect electrical connectors from heater and A/C unit.
- Remove and install intermediate piece for defrost air outlet.
- Remove and install intermediate piece for center air outlet.
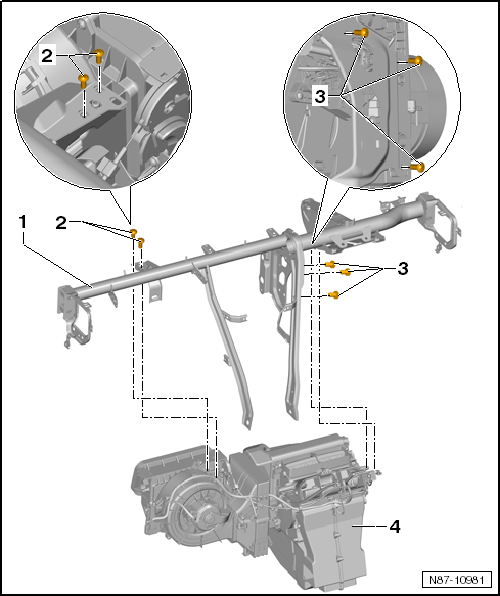
- Instrument panel centre tube
- Removing and installing → Body interior assembly work
- Bolt
- 2 pieces
- 3,5 N·m
- Bolt
- 3 pcs.
- 3,5 N·m
- Heater and A/C unit
- Remove and install

Note
- All cable ties and other fasteners of the electrical wiring harness that are loosened or cut when removing the A/C unit must be reattached at the same locations during installation.
- The electrical wiring harness "air conditioning" is removed together with the heater and A/C unit.
- Unscrew bolts -2- and -3-.
- Remove center tube of dash panel -1- → Body Assembly Work Interior.
- Remove heater and A/C unit.
Installing
- Installation is carried out in reverse order, observing the following:
- First install seal -2- on the heater and A/C unit.
- When installing the heater and A/C unit, pull seal -2- through bulkhead -1-.

Note
- Make sure seal -2- is correctly seated in the cowl bulkhead -1-.
- The condensate drain connector must not be covered by seal -2-.
- Top up coolant after installation.
- Top up refrigerant.
Disassembling and assembling heater and A/C unit
The following information applies to left-hand drive vehicles. It applies accordingly to right-hand drive vehicles.
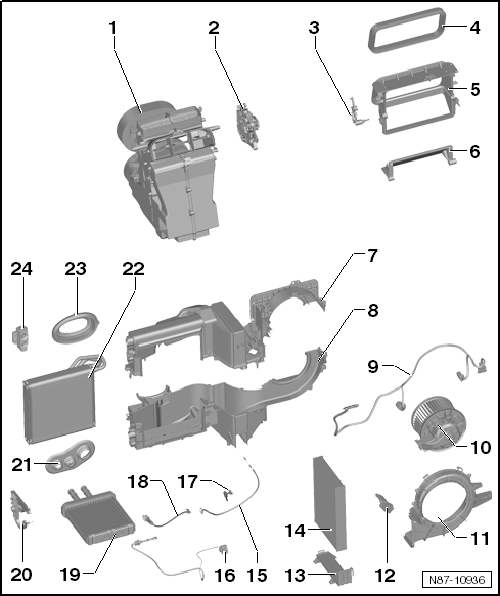
- Air distributor housing
- Actuator for defrost and air distribution flap
- Remove and install
- Actuator for fresh air/recirculation flap
- Remove and install
- Gasket
- Air inlet housing
- Fresh air/recirculation flap
- Evaporator housing: upper section
- Evaporator housing: lower section
- Heater and A/C unit wiring harness
- Fresh air blower -V2-
- Remove and install
- Fresh air blower housing
- Series resistor for fresh air blower with overheat protection -N24-
- Remove and install
- Cover
- for dust and pollen filter
- Dust and pollen filter
- Remove and install
- Bowden cable for fresh air/recirculation flap
- Remove and install
- Evaporator temperature sensor -G308-
- Remove and install
- Flexible shaft for air distribution
- Remove and install
- Flexible shaft for temperature flap
- Remove and install
- Heater core
- Remove and install
- Actuator for temperature flap
- Remove and install
- Gasket
- Observe installation position.
- Evaporator
- Remove and install
- Gasket
- Observe installation position.
- Expansion Valve
- Remove and install
Removing and installing dust and pollen filter
Removing and installing dust and pollen filter, left-hand drive
Removing
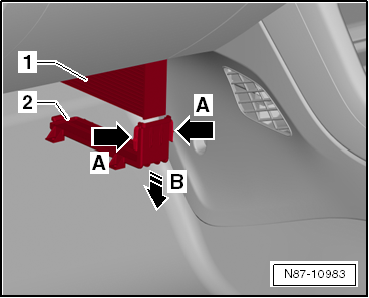
The dust and pollen filter is accessible from the footwell on the front passenger side.
- Press locking tabs -arrow A- inward and fold dust and pollen filter cover -1- downward.
- Unhook dust and pollen filter cover -1- from holder -arrow B- and remove it.
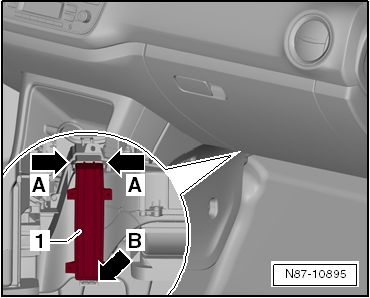
- Pull dust and pollen filter -1- out of the heater unit in -arrow direction-.
Installing
- Observe the installation position of the dust and pollen filter.
- Installation is carried out in the reverse order.
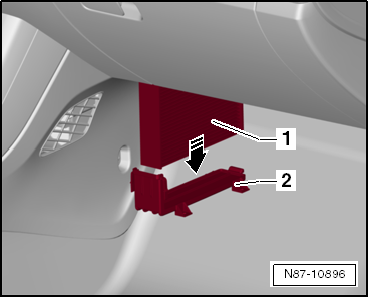
Removing and installing dust and pollen filter, right-hand drive
Removing
The dust and pollen filter is accessible from the footwell on the front passenger side.
- Press locking tabs -arrow A- inward and fold dust and pollen filter cover -2- downward.
- Pull dust and pollen filter -1- out of the heater unit in -arrow direction B-.
Installing
- Observe the installation position of the dust and pollen filter.
- Installation is carried out in the reverse order.
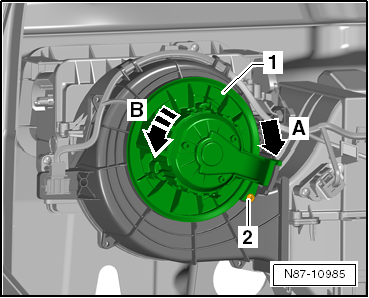
Removing and installing fresh air blower -V2-
Removing and installing fresh air blower -V2-, left-hand drive
Removing
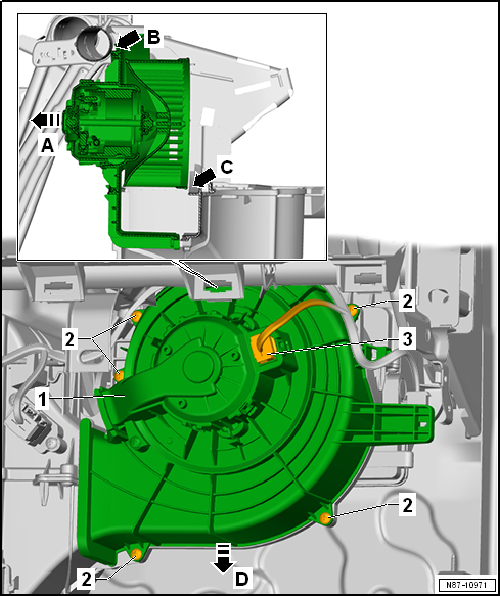
- Remove glove box → Body assembly work, interior.
- Disconnect connector -3- from fresh air blower -V2--1-.
- Unscrew bolts -2- (1 N·m).
- Tilt housing with fresh air blower -V2- forward in -arrow direction A-, making sure the fresh air blower -V2- does not catch at points -arrow B- and -arrow C-.
- Pull housing with fresh air blower -V2- down slightly in -arrow direction D-.
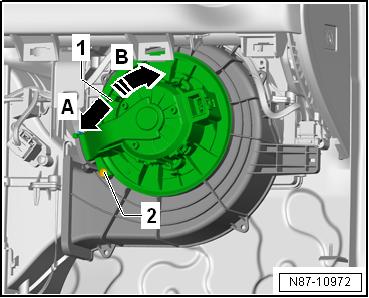
- Loosen bolt -2-.
- Press retaining lug -arrow A- to the left, turn fresh air blower -V2--1- in -arrow direction B- and remove it from the housing.

Note
If the fresh air blower -V2- is to be reused, do not place the fresh air blower on the blower wheel.
Installing
Installation is in reverse order, observing the following:
- The connector must engage correctly in the housing.
Risk of damage to the fresh air blower due to improper handling. Imbalance and operating complaints possible. Avoid applying force to the blower wheel. Never move balancing weights on the blower wheel.
Removing and installing fresh air blower -V2-, right-hand drive
Removing
- Remove glove box → Body assembly work, interior.
- Disconnect connector -3- from fresh air blower -V2--1-.
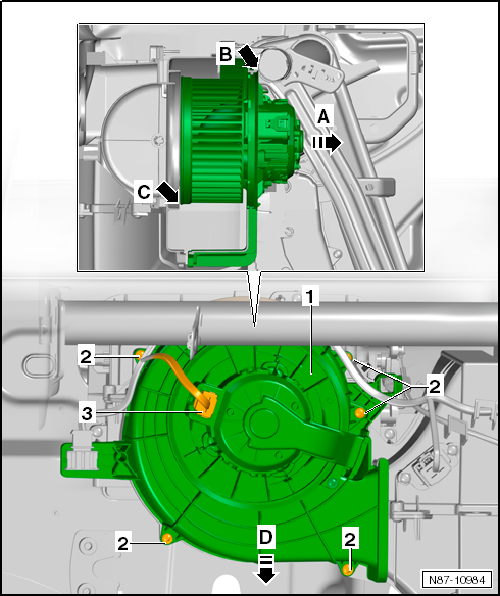
- Unscrew bolts -2- (1 N·m).
- Tilt housing with fresh air blower -V2- forward in -arrow direction A-, making sure the fresh air blower -V2- does not catch at points -arrow B- and -arrow C-.
- Pull housing with fresh air blower -V2- down slightly in -arrow direction D-.
- Loosen bolt -2-.
- Press retaining lug -arrow A- to the left, turn fresh air blower -V2--1- in -arrow direction B- and remove it from the housing.

Note
If the fresh air blower -V2- is to be reused, do not place the fresh air blower on the blower wheel.
Installing
Installation is in reverse order, observing the following:
- The connector must engage correctly in the housing.
Risk of damage to the fresh air blower due to improper handling. Imbalance and operating complaints possible. Avoid applying force to the blower wheel. Never move balancing weights on the blower wheel.
Removing and installing blower resistor with overheating protection -N24-
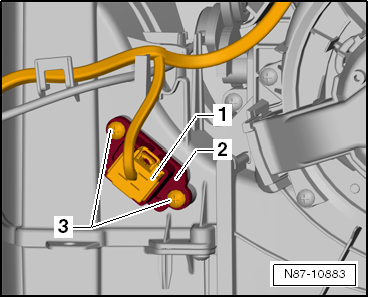
Removing and installing blower resistor with overheating protection -N24-, left-hand drive
Removing
- Remove glove box → Body assembly work, interior.
- Disconnect connector -1- from blower resistor with overheating protection -N24--2-.
- Unscrew bolts -3- (1 N·m).
Risk of burns from the hot heat sink on the fresh air blower control unit. Possible burns to the hands. Wear protective gloves.
- Pull blower resistor with overheating protection -N24--2- out.
Installing
- Installation is carried out in the reverse order.
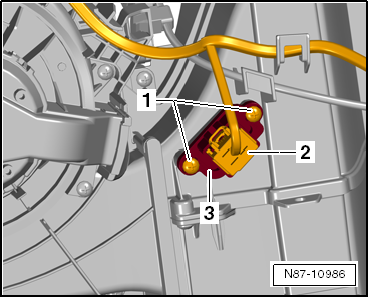
Removing and installing blower resistor with overheating protection -N24-, right-hand drive
Removing
- Remove glove box → Body assembly work, interior.
- Disconnect connector -2- from blower resistor with overheating protection -N24--3-.
- Unscrew bolts -1- (1 N·m).
Risk of burns from the hot heat sink on the fresh air blower control unit. Possible burns to the hands. Wear protective gloves.
- Pull blower resistor with overheating protection -N24--2- out.
Installing
- Installation is carried out in the reverse order.
Removing and installing heat exchanger
Required Special Tools, Test and Measuring Equipment and Auxiliary Items
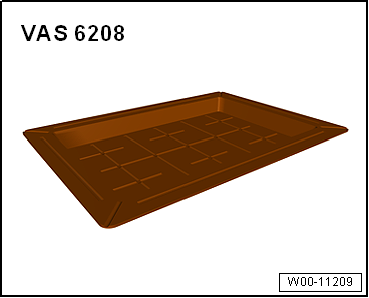
- Drip pan for workshop crane -VAS 6208-
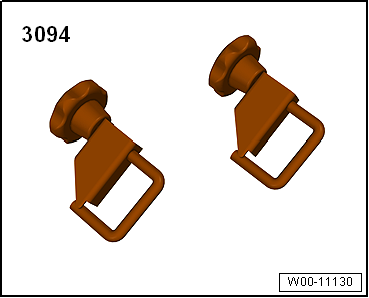
- Hose clamps up to 25 mm -3094-
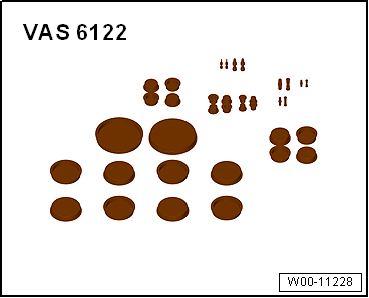
- Plug Set for Engine -VAS 6122-
- commercially available compressed air gun
Removing
- Disconnect battery → Electrical system.
WARNING With the engine warm, the cooling system is under pressure. Risk of scalding from hot steam and hot coolant. Possible scalding of skin and other body parts. Wear protective gloves. Wear safety goggles. Relieve pressure: cover the coolant expansion tank cap with a cloth and open it carefully.
- Remove air filter.
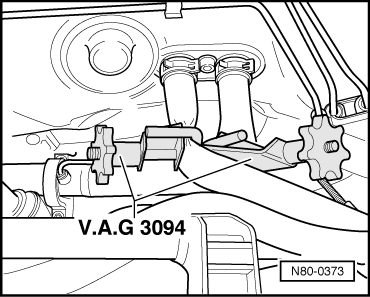
- Mark the coolant hoses in the engine compartment, close them with hose clamps up to 40 mm -3093- and disconnect them from the heater core.
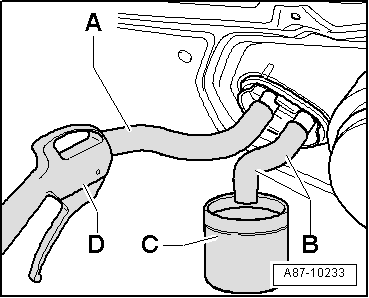
- Push a piece of hose -A- and -B- onto each of the two connections to the heater core.
- Hold container -C- under the hose from the lower connection -B-.
- Using a compressed air gun -D-, carefully blow the coolant out of the heater core (into container -C-) via hose -A-.
- Remove heating and A/C unit.
- Disassemble heater and A/C unit.
- Remove heat exchanger.
Installing
Installation is in reverse order, observing the following:
- Observe the installation position of the coolant hoses and the seal between the heat exchanger and the water box end wall.
Seal between heat exchanger and water box end wall

Note
If the heat exchanger has been replaced, the coolant must be replaced.
- Top up coolant.
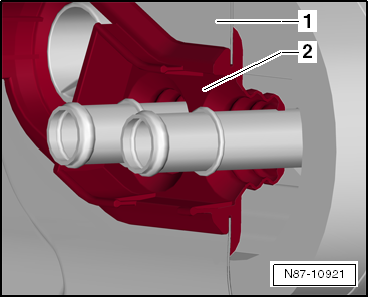
Removing and installing condensate drain
Condensate drain connection

Note
- The condensate drain connection -1- is located behind the heat shield.
- The condensate drain connection -1- is a fixed component of the heater and A/C unit and cannot be removed or installed separately.
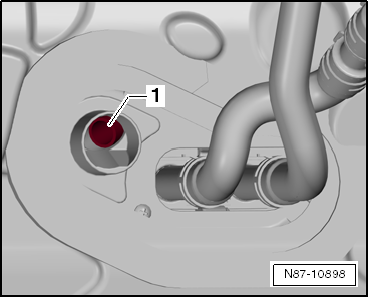
Checking condensate drain
Condensate drain connection
- The condensate drain connection -1- must not be blocked by wax, dirt or the seal.