Air Routing
Assembly overview - air routing and air distribution in passenger compartment
The following information applies to left-hand drive vehicles. It applies accordingly to right-hand drive vehicles.

- Dash panel
- Defrost air vent
- Removing and installing.
- Intermediate piece for defrost air vent
- Removing and installing.
- Removing and installing center vent
- Removing and installing.
- Side dash panel vent
- Removing and installing.
- Vent, driver's or front passenger side
- Removing and installing.
- Intermediate piece for center vent
- Removing and installing.
- Footwell vent, driver's or front passenger side
- Removing and installing.
- Footwell vent, driver's or front passenger side
- Removing and installing.
- Vent, driver's or front passenger side
- Removing and installing.
- Side dash panel vent
- Removing and installing.
Removing and installing center vent

Note
The vent is a fixed component of the dash panel.
Removing and installing defrost air vent

Note
The vent is a fixed component of the dash panel.
Removing and installing side dash panel vents

Note
The vent is a fixed component of the dash panel.
Removing and installing vent, left or right
The following information applies to left-hand drive vehicles. It applies accordingly to right-hand drive vehicles.
Required Special Tools, Test and Measuring Equipment and Auxiliary Items
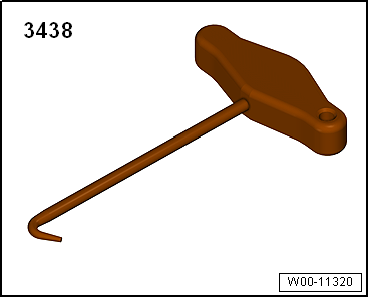
- Hook -3438-
Removing
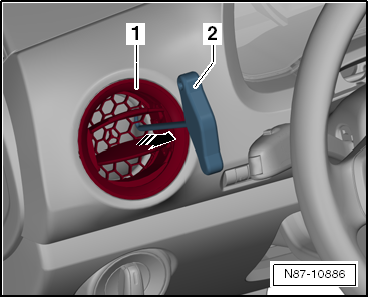
- Pull vent -1- out in -arrow direction- with hook -3438--2-.
Removing the vents on both sides is identical, only mirrored.
Installing
- Press vent in lightly until it engages.
Removing and installing air duct for defrost air vent
The following information applies to left-hand drive vehicles. It applies accordingly to right-hand drive vehicles.
Removing
- Remove instrument panel → Body assembly work, interior.
- Remove clips -2-.
- Remove air duct for defrost air vent -1- from the heater and A/C unit.
Installing
Installation is performed in the reverse order.

Removing and installing air duct for center dash vent
The following information applies to left-hand drive vehicles. It applies accordingly to right-hand drive vehicles.
Removing
- Remove instrument panel → Body assembly work, interior.
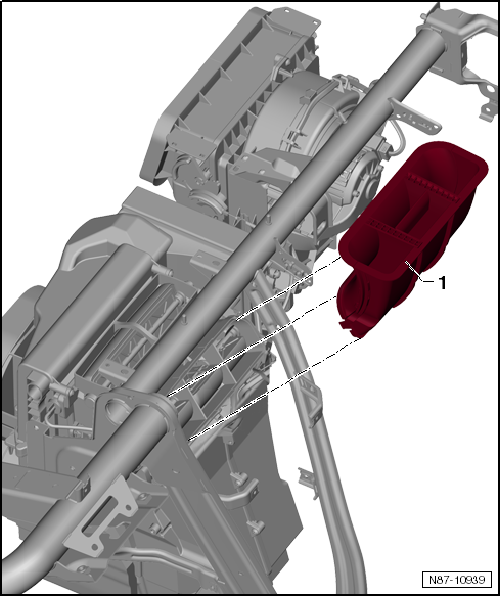
- Lift air duct for center dash vent -1- off the heater and A/C unit -2-.
Installing
Installation is performed in the reverse order.
Removing and installing footwell vent, left or right
The vents are a fixed component of the heater unit.
Checking passenger compartment forced ventilation

Note
- The used air escapes through ventilation openings in the luggage compartment trim panels.
- For the ventilation to work properly, the ventilation openings must not be covered.
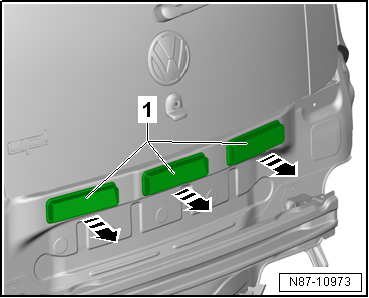
- The vent frames are located in the closing panel, behind the bumper.
Check
- The sealing lips in the vent frame -1- must move freely and close automatically.
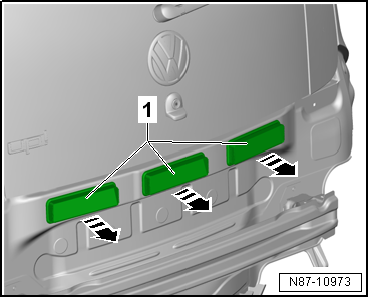
Removing and installing passenger compartment forced ventilation
Required Special Tools, Test and Measuring Equipment and Auxiliary Items
- Release Wedge -3409-
Removing
- Remove rear bumper cover → Body assembly work, exterior.

- Unclip ventilation frame -1- from the closing panel using removal wedge -3409- and remove in direction of arrow.
Installing
- Ventilation frames must audibly engage.
- Install in reverse order.
Removing and Installing Fresh Air Intake
Removing and installing fresh air intake, left-hand drive
Removing
- Remove right water box cover → Body assembly work, exterior.
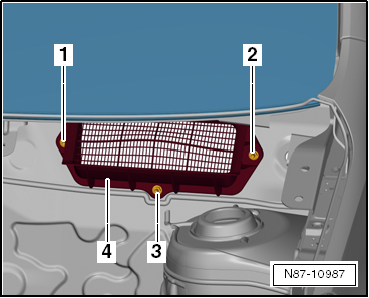
- Loosen nuts (2.5 N·m) -1-, -2- and -4-.
- Remove fresh air intake connector -3- from water box.
Installing
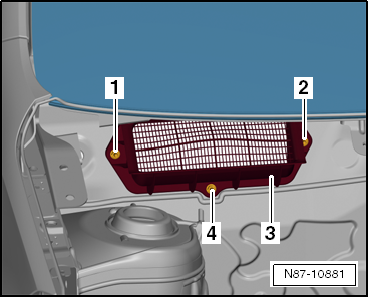
- Fit fresh air intake connector -3- and tack nuts -1- and -2- in place.
- Tighten nut -4- to 2.5 N·m.
- Tighten nuts -1- and -2- to 2.5 N·m.
- Install in reverse order.
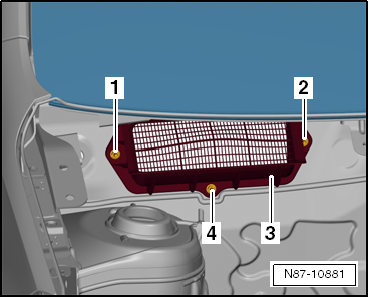
Removing and installing fresh air intake, right-hand drive
Removing
- Remove right water box cover → Body assembly work, exterior.
- Loosen nuts (2.5 N·m) -1-, -2- and -3-.
- Remove fresh air intake connector -4- from water box.
Installing

- Fit fresh air intake connector -4- and tack nuts -1- and -2- in place.
- Tighten nut -3- to 2.5 N·m.
- Tighten nuts -1- and -2- to 2.5 N·m.
- Install in reverse order.