Luggage compartment trim
Installation location overview - luggage compartment trim
Installation location overview - luggage compartment trim
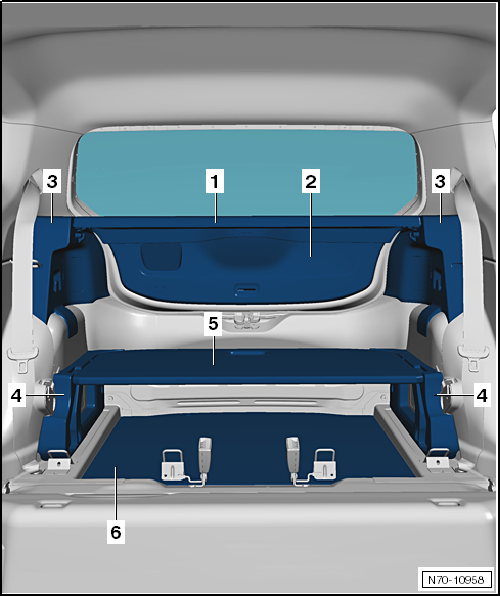
- Parcel shelf
- Remove and install
- Tailgate trim
- Remove and install
- Luggage compartment side trim
- Remove and install
- Luggage compartment floor covering bracket
- Remove and install
- Luggage compartment floor, upper
- Remove and install
- Luggage compartment floor, lower
- Remove and install
Installation location overview - luggage compartment trim, load-up!
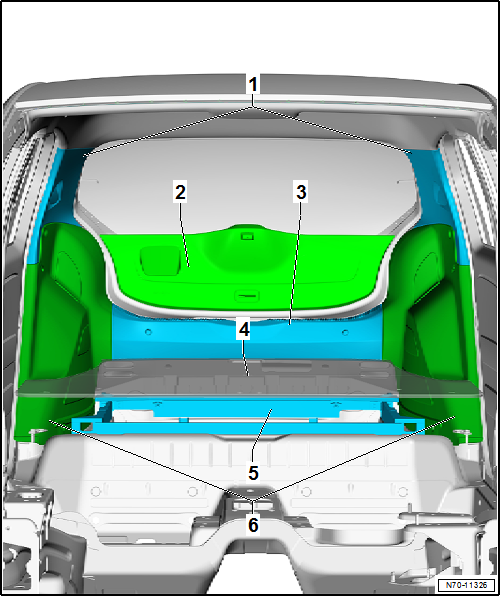
- C-pillar trim, upper
- Remove and install
- Tailgate trim
- Remove and install
- Latch carrier trim
- Remove and install
- Load floor
- Remove and install
- Load floor frame
- Remove and install
- Luggage compartment side trim
- Remove and install
Installation overview - luggage compartment side trim
Installation overview - luggage compartment side trim

Note
The illustration shows the left-side luggage compartment side trim. The right side is a mirror image.
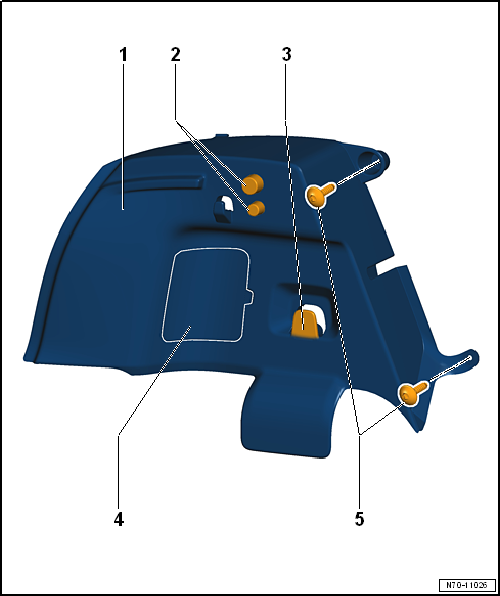
- Luggage compartment side trim
- Remove and install
- Parcel shelf mount / fastener
- for folding up and securing the parcel shelf
- Pocket hook
- Service flap
- Bolt
- 2 pieces
- 1,5 N·m
Installation overview - luggage compartment side trim, load-up!

Note
The illustration shows the left-side luggage compartment side trim. The right side is a mirror image.
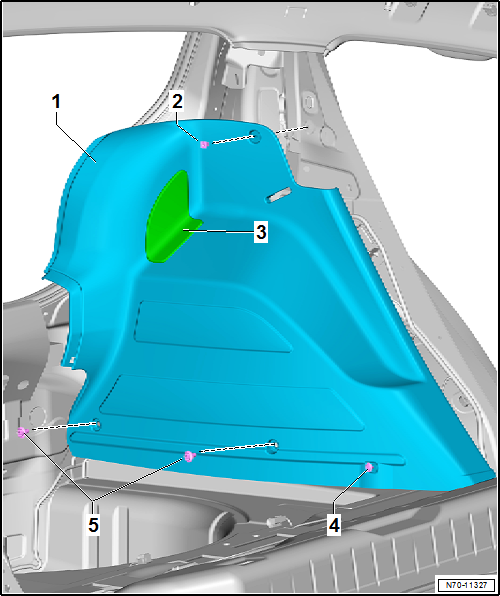
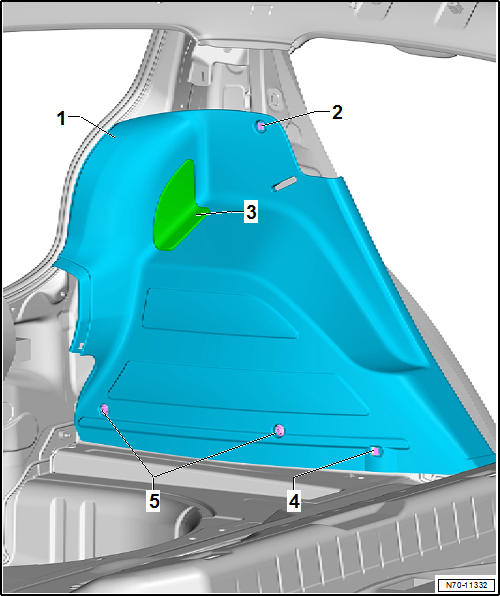
- Luggage compartment side trim
- Remove and install
- Bolt
- 1 N·m
- Service flap
- Retaining clip
- Retaining clip
- 2 pieces
Remove and install tailgate trim
Required Special Tools, Test and Measuring Equipment and Auxiliary Items
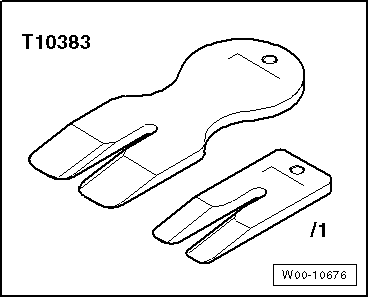
- Wedges -T10383-
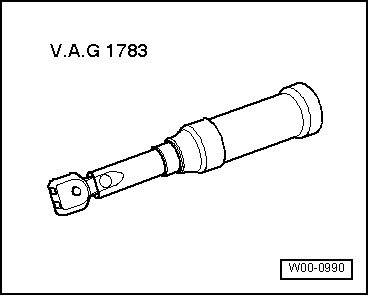
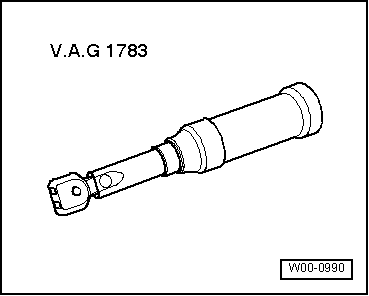
- Torque wrench -V.A.G 1783-
Removing
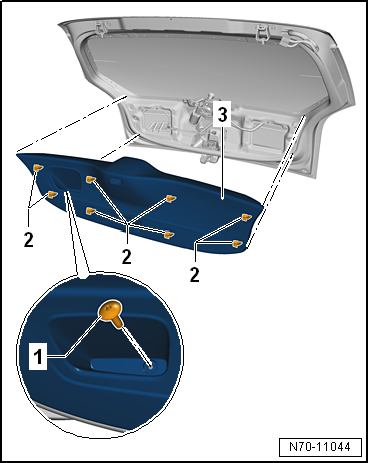
- Unscrew screw -1- in the grip recess (1.5 N·m).
- Release tailgate trim -3- from the receptacles at retaining clips -2- using wedge -T10383-.
Installing

Note
Before installation, check all fasteners for damage and replace them if necessary.
- Installation is performed in the reverse order.
Remove and install luggage compartment side trim
Remove and install luggage compartment side trim
Required Special Tools, Test and Measuring Equipment and Auxiliary Items
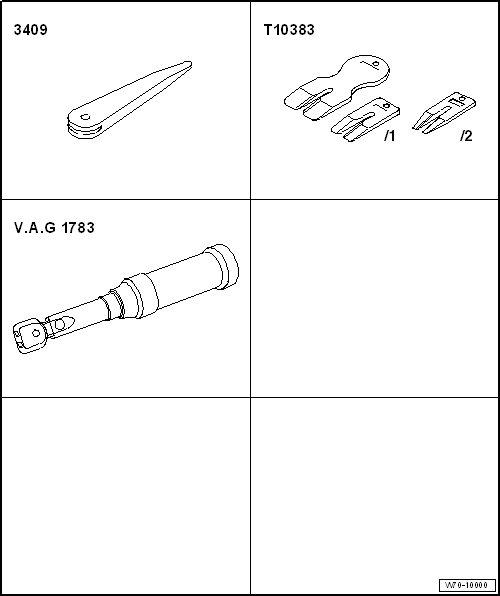
- Release Wedge -3409-
- Wedges -T10383-
- Torque wrench -V.A.G 1783-

Note
The removal and installation are described for the left side of the vehicle. Removal and installation of the right side is performed accordingly.
Removing
- Remove parcel shelf.
2-door
- Remove rear seat backrest.
- Remove side trim panel.
4-door
- Remove lower C-pillar trim panel.
Continuation for all vehicles
- Unscrew bolts -1-.
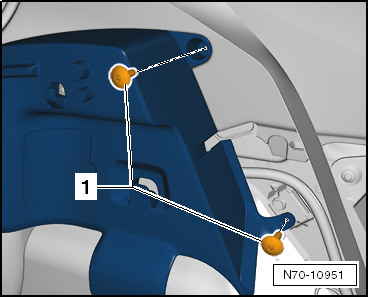
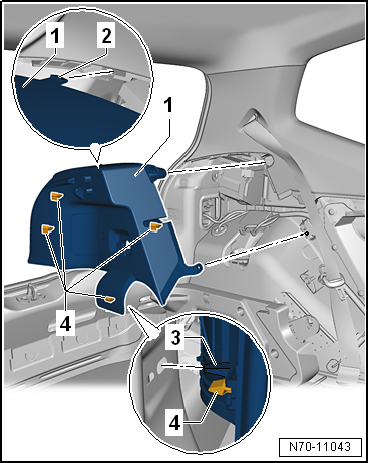
- Detach luggage compartment side trim -1- from the lip of the tailgate seal.
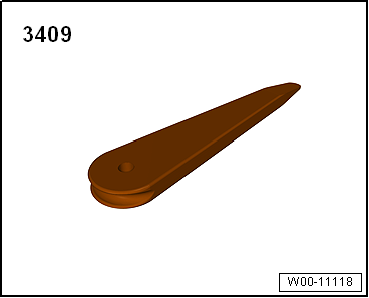
- Release luggage compartment side trim -1- at latching lug -2- using removal wedge -3409-.
- Release luggage compartment side trim -1- from the receptacles at retaining clips -4- using wedge -T10383-.
- Remove luggage compartment side trim -1-.
Installing

Note
- Before installation, check all fasteners for damage and replace them if necessary.
- After installation, make sure the trim sits in the lip of the tailgate seal.
Installation is carried out in the reverse order of removal, observing the following:
- Insert centering pin -3- into the receptacle.
Remove and install luggage compartment side trim, load-up!
Required Special Tools, Test and Measuring Equipment and Auxiliary Items
- Release Wedge -3409-
Required Special Tools, Test and Measuring Equipment and Auxiliary Items
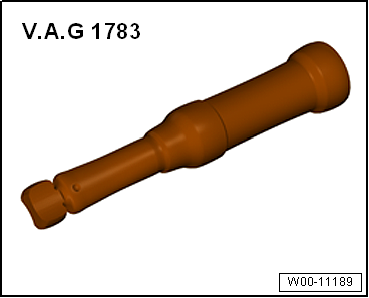
- Torque wrench -V.A.G 1783-

Note
The removal and installation are described for the left side of the vehicle. Removal and installation of the right side is performed accordingly.
Removing
- Remove load floor.
- Remove load floor frame.
- Unscrew bolt -2-.
- Detach luggage compartment side trim -1- from the lip of the tailgate seal.
- Release luggage compartment side trim -1- at retaining clips -5- using removal wedge -3409-.
- Pull luggage compartment side trim -1- toward the partition out of retaining clip -4-.
- Remove luggage compartment side trim -1-.
Installing

Note
- Before installation, check all fasteners for damage and replace them if necessary.
- After installation, make sure the trim sits in the lip of the tailgate seal.
- Make sure that retaining clip -4- sits in the guide of the luggage compartment side trim -1-.
Installation is performed in the reverse order.
Tightening torques
- "Exploded view - luggage compartment side trim, load up!"
Removing and installing luggage compartment floor
Removing and installing upper luggage compartment floor
Removing
- Lift upper luggage compartment floor -1- in direction of arrow.
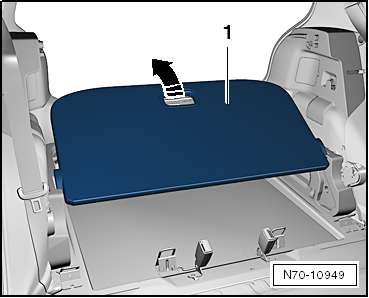
- Remove upper luggage compartment floor -1- from holders for luggage compartment floor covering.
Installing
Installation is carried out in the reverse order of removal, observing the following:

Note
Make sure that the upper luggage compartment floor is correctly inserted into the holders on the right and left.
Removing and installing lower luggage compartment floor
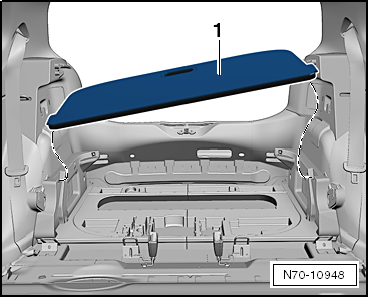
Removing
- Remove upper luggage compartment floor.
- Remove lower luggage compartment floor -1-.
Installing
Installation is performed in the reverse order.

Note
- Make sure that the lower luggage compartment floor is pushed under the seat backrest during installation.
- Does not apply to load up! There is no lower luggage compartment floor.
Removing and installing loading floor, load up!
Removing
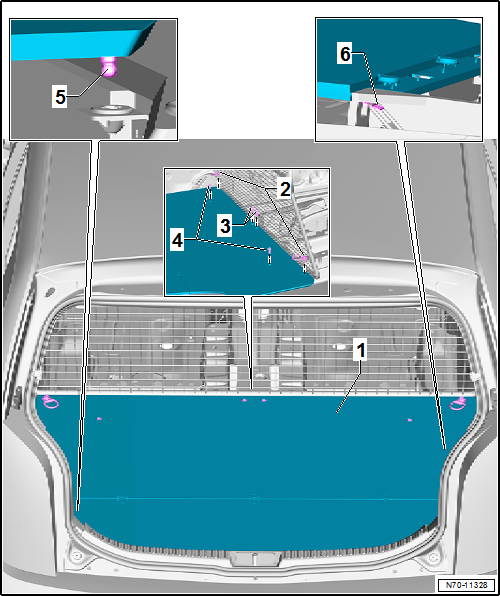
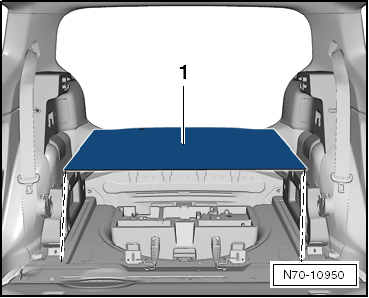
- Unscrew bolts for tie-down eyelets -2- on right and left of loading floor -1-.
- Unscrew bolts for center partition bracket -3- on loading floor -1-.
- Unscrew bolts for side partition bracket -4- on loading floor -1-.
- Lift loading floor -1- over spare wheel well out of lock -5- and fold up.
- Fold loading floor -1- together at front and rear at an angle of approx. 45º toward partition and thread out of outer ISOFIX retaining tabs -6-.
- Remove loading floor -1- from the tailgate opening.
Installing
Installation is performed in the reverse order.

Note
Make sure that the loading floor is correctly inserted into the retaining tabs of the outer ISOFIX -6- on the right and left.
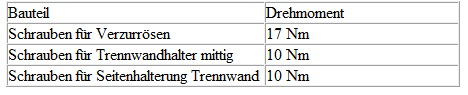
Tightening torques
Removing and installing lock carrier cover
Required Special Tools, Test and Measuring Equipment and Auxiliary Items
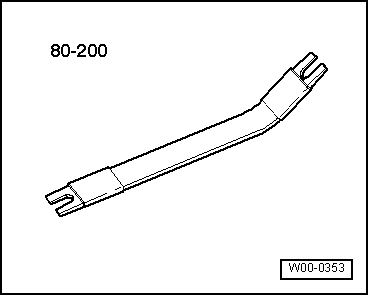
- Release lever -80 - 200-
Removing
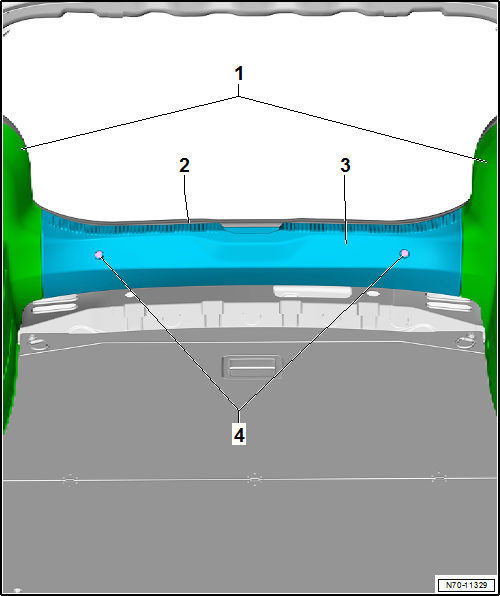
- Remove clips -4- from lock carrier cover -3- using pry lever -80 - 200-.
- Pull tailgate seal -2- off in area of lock carrier cover -3-.
- Remove cover toward the rear.
Installing

Note
- Before installation, check all fasteners for damage and replace them if necessary.
- Remove retaining clips remaining in body mounting points with removal tool -T40280- and insert them into lock carrier cover for installation.
- Make sure that the lock carrier cover is located in the bead of the tailgate seal after installation.
- Make sure that the retaining lugs of the lock carrier cover engage in the luggage compartment side trim.
Install in reverse order.
Removing and installing bracket for luggage compartment floor covering
Required Special Tools, Test and Measuring Equipment and Auxiliary Items
- Torque wrench -V.A.G 1783-

Note
The removal and installation are described for the left side of the vehicle. Removal and installation of the right side is performed accordingly.
Removing
- Remove upper luggage compartment floor.
- Fold rear seat backrest forward.
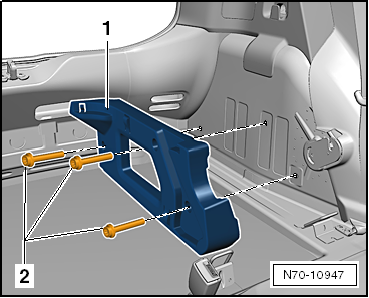
- Unscrew screws -2- (8 N·m).
- Remove bracket for luggage compartment floor covering -1-.
Installing

Note
Before installation, check all fasteners for damage and replace them if necessary.
- Installation is performed in the reverse order.
Removing and installing loading floor frame
Required Special Tools, Test and Measuring Equipment and Auxiliary Items
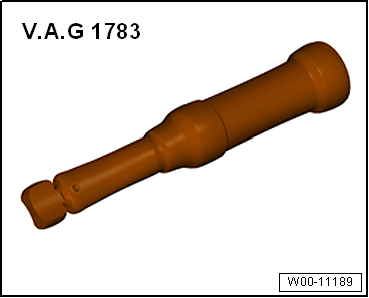
- Torque wrench -V.A.G 1783-
Removing
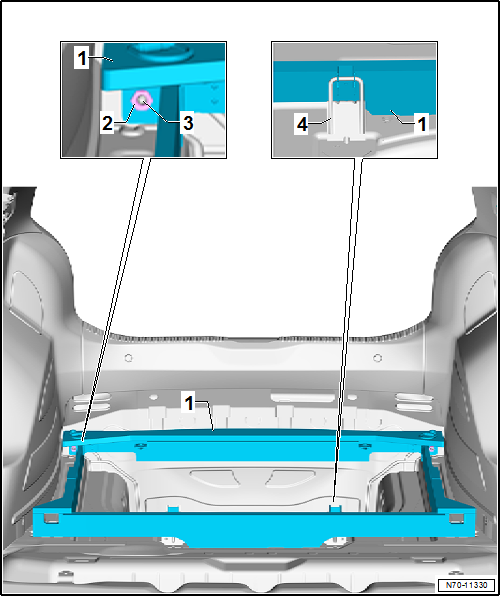
- Remove load floor.
- Unscrew nuts -3- from stud bolt -2-.
- Push loading floor frame -1- forward slightly.
- Unhook brackets from center ISOFIX mounts -4-.
- Remove loading floor frame -1- toward the rear.
Installing

Note
Before installation, check all fasteners for damage and replace them if necessary.
Installation is performed in the reverse order.
Tightening torques
