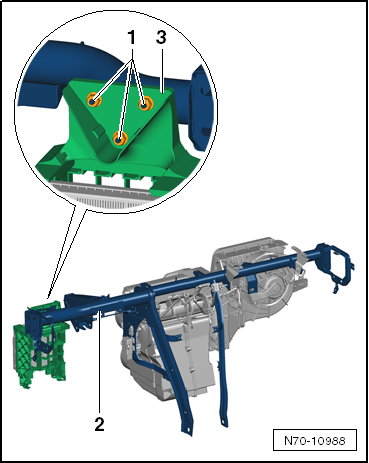
Instrument panel centre tube
Assembly overview - Instrument panel center tube

Note
When electrical wiring is released or removed and installed, it is helpful to make sketches or take photos. This ensures the original routing is restored.
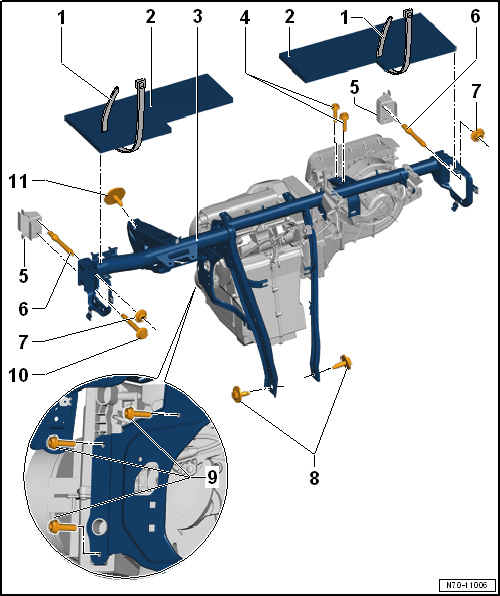
- Cable tie
- replace after every removal
- Damping material
- secured to instrument panel center tube with cable tie
- Instrument panel centre tube
- Remove and install
- Bolt
- 2 pieces
- 3,5 N·m
- Mounting bracket
- welded to body
- Stud
- 2 pieces
- 20 N·m
- Nut
- 2 pieces
- 20 N·m
- Bolt
- 2 pieces
- 20 N·m
- Bolt
- 3 pieces
- 3,5 N·m
- Bolt
- 1 piece
- 20 N·m
- Bolt
- located in left cowl panel
- Replace
- 20 N·m +90°
Removing and installing instrument panel center tube
Required special tools, testers and equipment, and auxiliary items
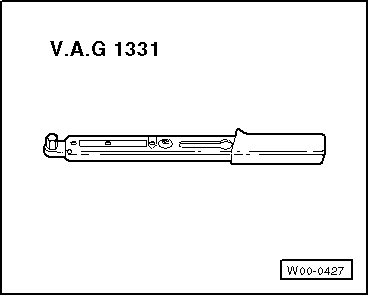
- Torque wrench -V.A.G 1331-

Note
When electrical wiring is released or removed and installed, it is helpful to make sketches or take photos. This ensures the original routing is restored.
Removing
- Remove instrument panel.
- Cut cable tie and remove damping material, left and right.
- Unscrew bolts of steering column and lower steering column → Chassis, axles, steering.
- Remove left cowl panel cover → Body assembly work, exterior.
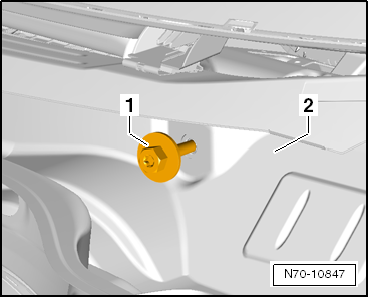
- Unscrew bolt -1- in cowl panel.

Note
Bolt -1- must be replaced when installing the instrument panel center tube!
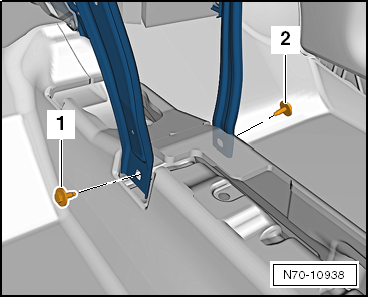
- Unscrew bolts -1- and -2-.
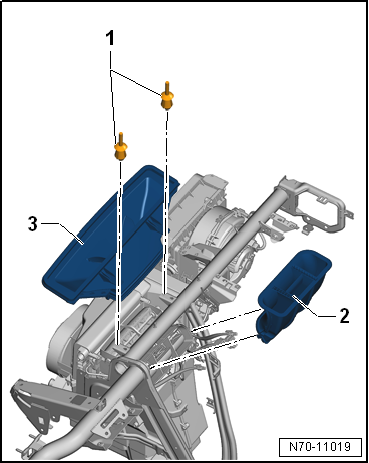
- Unlock expanding rivet -1- and remove it upward.
- Remove adapter for air outlet -3- from the instrument panel center tube.
- Unclip and remove adapter for center air outlet -2- from the heater and A/C unit.
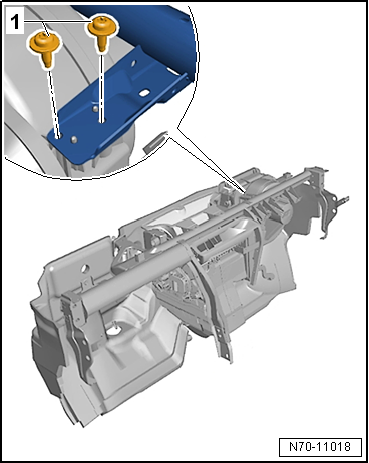
- Unscrew bolts -1-.
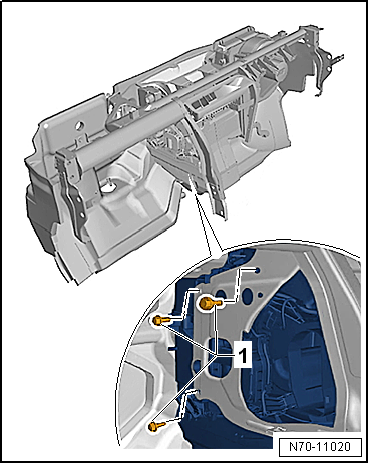
- Unscrew bolts -1-.

Note
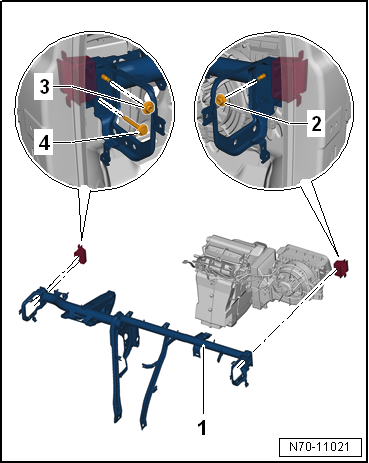
Using a scribe near nuts -2- and -3-, mark the height and side position of the instrument panel center tube in the vehicle.
- On the passenger side, unscrew nut -2-.
- On the driver side, unscrew nut -3- and bolt -4-.

Note
Before removal, check that all wiring harnesses have been disconnected from the instrument panel center tube.
- Release the wiring harness retainers on the instrument panel center tube -1-.
- Pull instrument panel center tube -2- far enough into the interior until nuts -1- of relay and fuse holder -3- are accessible.
- Unscrew nuts -1- of relay and fuse holder -3- (4.5 N·m).
- Carefully lift instrument panel center tube -2- out of the vehicle through the passenger-side door opening.
Installing

Note
- Before bolting in the instrument panel center tube, align it in the vehicle using the marks made during removal.
- Before installation, check all fasteners for damage and replace if necessary.
- Before installation, replace the cable ties of the insulation for the instrument panel center tube.
- Installation is carried out in reverse order.