Dash panel
Assembly overview - Instrument panel
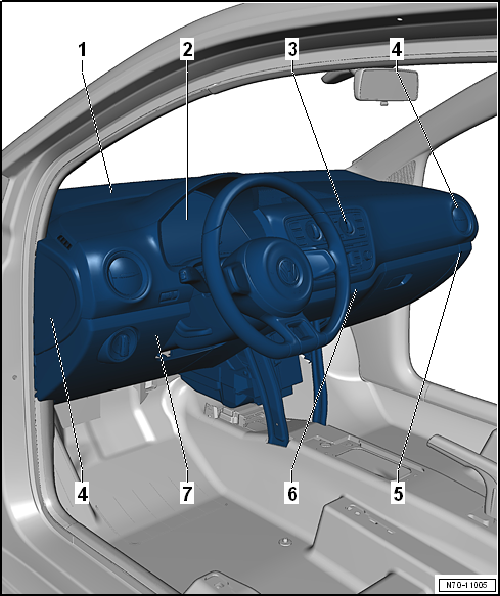
- Dash panel
- Remove and install
- Instrument cluster insert
- Removing and installing → Electrical system
- Radio/navigation system installation frame
- depending on equipment
- Remove and install
- Instrument panel side cover
- Remove and install
- Passenger side instrument panel cover/glove box
- depending on equipment
- Assembly overview - Glove box
- Removing and installing passenger side instrument panel cover
- Center console trim plate
- Remove and install
- Driver side instrument panel cover
- Remove and install
Removing and installing instrument panel side cover
Required Special Tools, Test and Measuring Equipment and Auxiliary Items
- Release Wedge -3409-

Note
Removal and installation is described for the driver side. Removal and installation on the passenger side is performed in the same way.
Removing
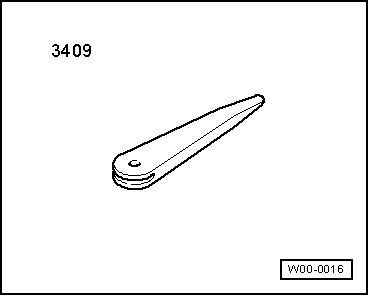
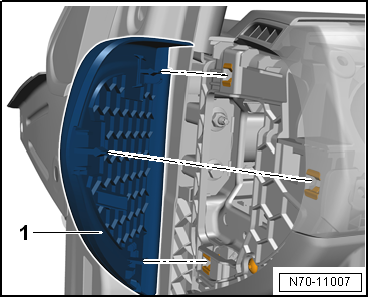
- Release instrument panel side cover -1- from the mountings on the instrument panel insert using removal wedge -3409-.
- Remove instrument panel side cover -1- from instrument panel.
Passenger side
- Depending on vehicle equipment, disconnect any existing electrical connectors.
Installing

Note
Before installation, check all fasteners for damage and replace them if necessary.
- Installation is performed in the reverse order.
Removing and installing radio/navigation system installation frame
Required Special Tools, Test and Measuring Equipment and Auxiliary Items
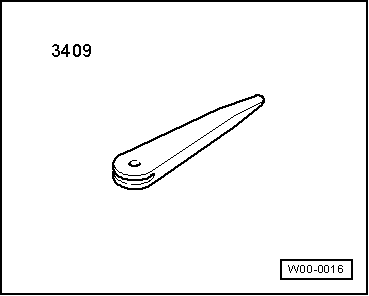
- Release Wedge -3409-
- Torque wrench -V.A.G 1783-
Removing
- Switch off ignition and all electrical consumers and remove the ignition key.

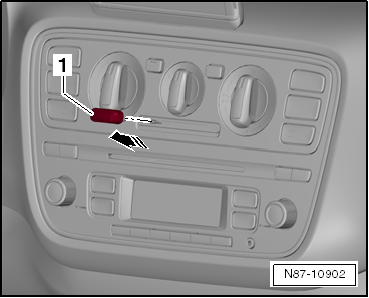
- Remove slide control for fresh air and recirculation mode -1- in direction of arrow.

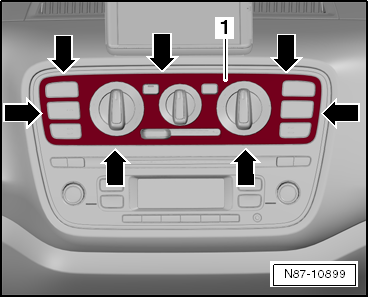
- Unclip cover -1- at the relevant points -arrows- using removal wedge -3409- and remove cover -1-.
Vehicles without radio/navigation system
- Unscrew bolts -1- (1.5 N·m).
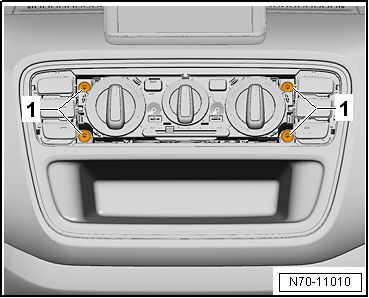
- Remove installation frame -1- from instrument panel using removal wedge -3409-.
- Disconnect electrical connectors of the switch modules, instrument panel center.
Vehicles with radio
- Remove radio → Communication.
Installing

Note
Before installation, check all fasteners for damage and replace them if necessary.

Installation is carried out in the reverse order, observing the following:

Note
Always install slider for fresh air and recirculation mode -1- with the plug base facing up.
Removing and installing instrument panel
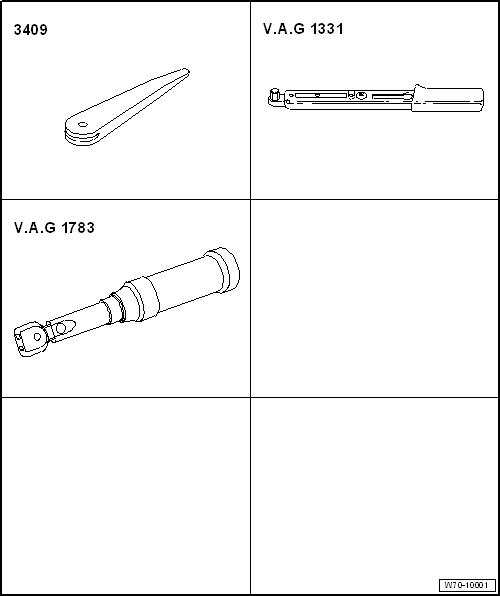
Required Special Tools, Test and Measuring Equipment and Auxiliary Items
- Release Wedge -3409-
- Torque Wrench -V.A.G 1331-
- Torque wrench -V.A.G 1783-
Removing
- Disconnect vehicle battery → Electrical system.
- Loosen steering wheel adjustment lever.
- Push steering column fully down and lock it.
- Remove instrument panel cover, driver side.
Vehicles without glove box
- Remove instrument panel cover, passenger side.
Vehicles with glove box
- Remove glove box.
Continuation for all vehicles

WARNING!
Before handling pyrotechnic components (for example, connecting the electrical connector), the person handling them must "discharge static electricity". For example, briefly touch the door striker.
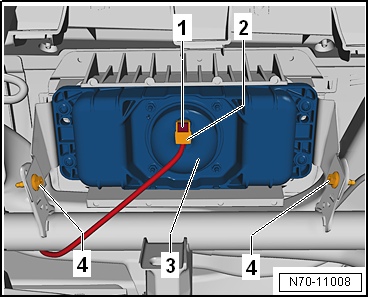
- Carefully pull out connector lock -1- of passenger airbag -3- with a small flat-blade screwdriver and disconnect electrical connector -2-.
- Unscrew bolts -4- (8 N·m).
- Loosen instrument panel insert gap cover.
- Remove instrument panel insert → Electrical system.
- Remove radio/navigation system installation frame.
- Remove operating and display unit → Heating, air conditioning.
Vehicles with navigation system
- Release wiring harness retainers and electrical connectors of interface for portable navigation and infotainment system -J983- → Communication.

Note
Interface for portable navigation and infotainment system -J983- does not need to be removed.
Continuation for all vehicles
- Remove upper A-pillar trim panels.

Note
The left and right air ducts remain on the instrument panel during removal.
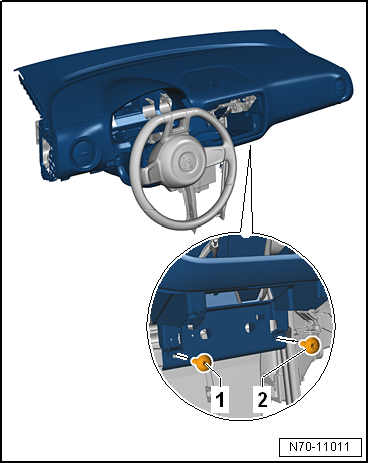
- Unscrew bolts -1- and -2- (1.5 N·m).
- Unscrew bolts -1-, -2- and -3- (1.5 N·m).

- Unscrew bolts -1-, -2- and -3- (1.5 N·m).

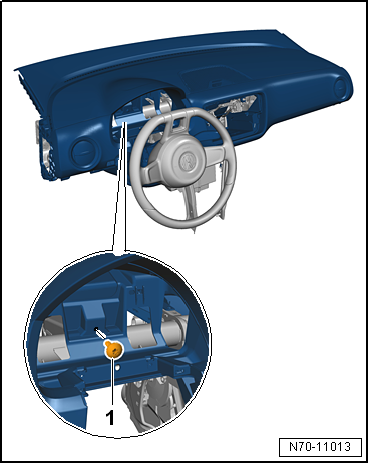
- Unscrew bolt -1- (1.5 N·m).
- Turn steering wheel so that the flat side of the steering wheel is exactly at the top.
- Pull instrument panel off the mountings at the transition to the windshield and off the center tube.

Caution!
Removing the instrument panel could damage the steering wheel.

Note
- Protect steering wheel from damage when removing the instrument panel.
- A second technician is required to remove the instrument panel.
- Lift instrument panel -2- over the steering wheel.
- Remove instrument panel -2- from instrument panel center tube -1-.
- Depending on vehicle equipment, disconnect any existing electrical connectors from instrument panel.
- Carefully remove instrument panel from vehicle interior through passenger door opening and place on a soft surface.
Installing
If the instrument panel is replaced on an e-up! 2014►, apply noise insulation to the side of the new instrument panel facing the body. Take the dimensions for cutting the noise insulation from the old part.

Note
- Before installation, check all fasteners for damage and replace them if necessary.
- When installing, observe the fastener tightening sequence for the instrument panel in reverse order.
Installation is carried out in the reverse order of removal, observing the following:

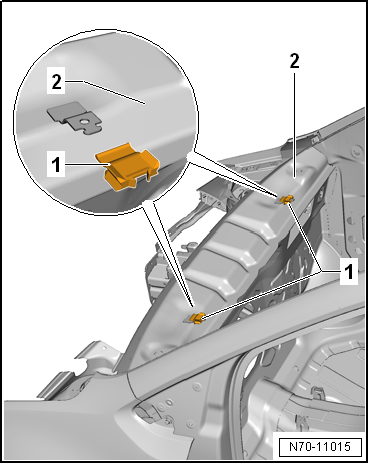
- Before installing the instrument panel, check that retainers -1- are securely locked in body -2-.

Caution!
Installing the instrument panel could damage the steering wheel.

Note
Protect steering wheel from damage when installing the instrument panel.
- With a second technician, position instrument panel -2- precisely on instrument panel center tube -3-. The instrument panel -2- must be slid into retainers -1-.
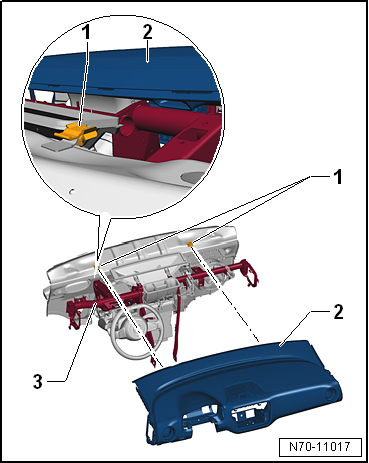
Aligning instrument panel in vehicle
Required Special Tools, Test and Measuring Equipment and Auxiliary Items
- Torque Wrench -V.A.G 1331-

Note
The instrument panel can be aligned transversely to the direction of travel.
Aligning instrument panel
- Remove cowl panel cover, refer to Body Assembly Work Exterior.
- Remove instrument panel side covers, left and right.
- Remove center console lower section.
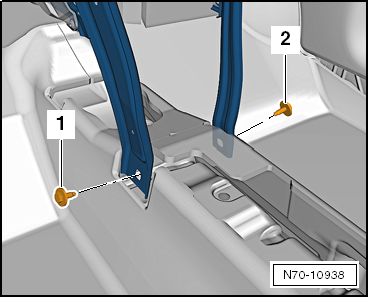
- Loosen bolts -1- and -2- by 2-3 turns (20 N·m).
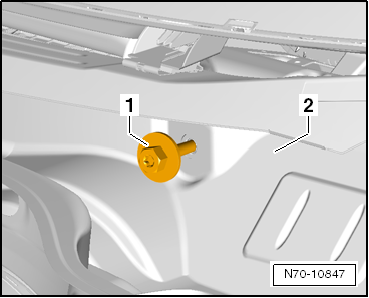
- Loosen bolt -1- in cowl panel -2- by 2-3 turns (20 N·m +90°).
- Loosen nuts -1- and bolt -2- by 2-3 turns (20 N·m).
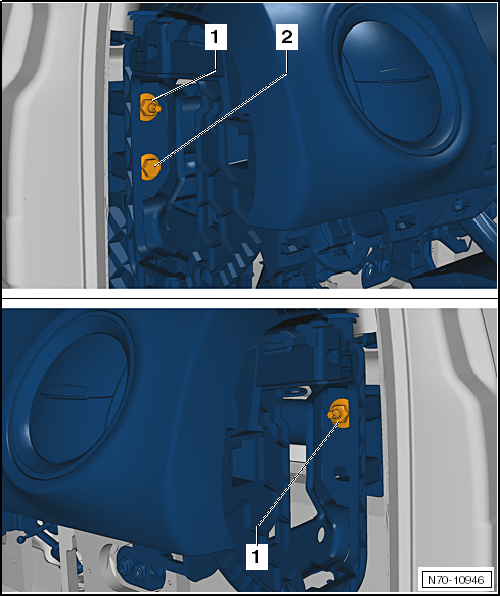
- Align instrument panel in direction -1- and -2-.
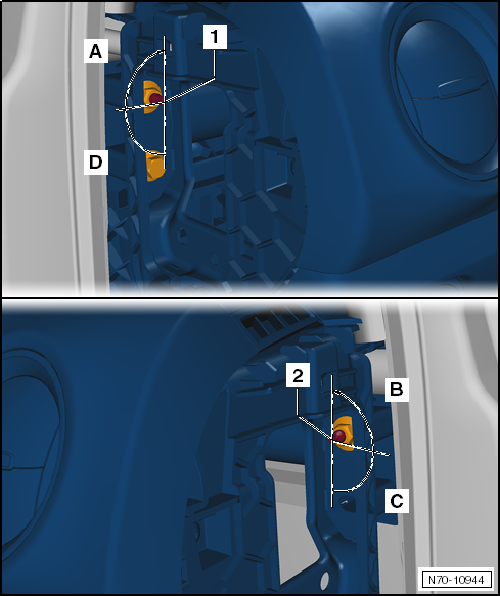
- After aligning the instrument panel in the vehicle, secure it again with the specified torques.
- Installation is performed in the reverse order.