Door Trim Panels
Assembly overview - front door trim panel
Assembly overview - front door trim panel, vehicles without electric window regulator

Note
- The assembly overview is shown for the driver's side.
- The illustration for the passenger side is to be derived accordingly.
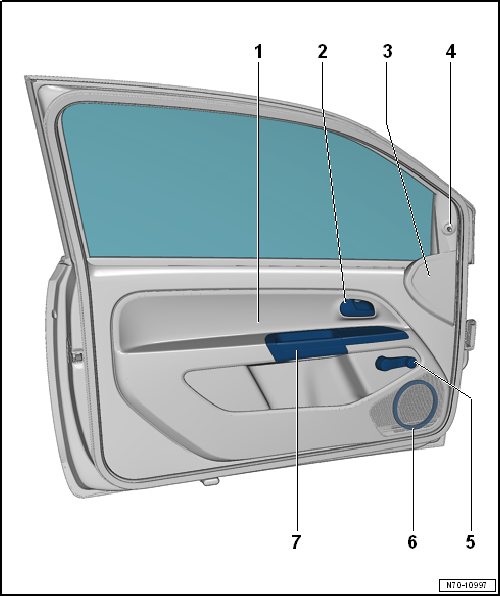
- Front door trim panel
- Remove and install
- Inner door handle
- can only be replaced together with the front door trim panel
- Mirror cover trim
- Remove and install
- Actuating button
- for manually adjustable exterior mirror
- remove and install → Body assembly work, exterior
- Window regulator handle
- remove and install → Body assembly work, exterior
- Speaker damping
- Remove and install
- Door pull handle
Assembly overview - front door trim panel, vehicles with electric window regulators

Note
- The assembly overview is shown for the driver's side.
- The illustration for the passenger side is to be derived accordingly.
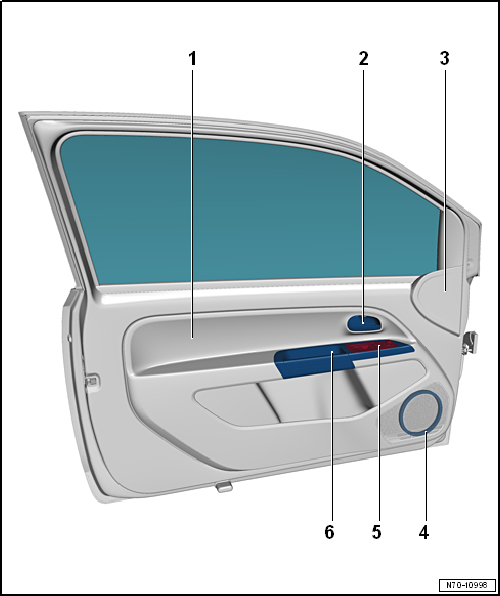
- Front door trim panel
- Remove and install
- Inner door handle
- can only be replaced together with the front door trim panel
- Mirror cover trim
- Remove and install
- Speaker damping
- Remove and install
- Switch module
- Removing and installing → Electrical system
- Door pull handle
Removing and installing front door trim panel
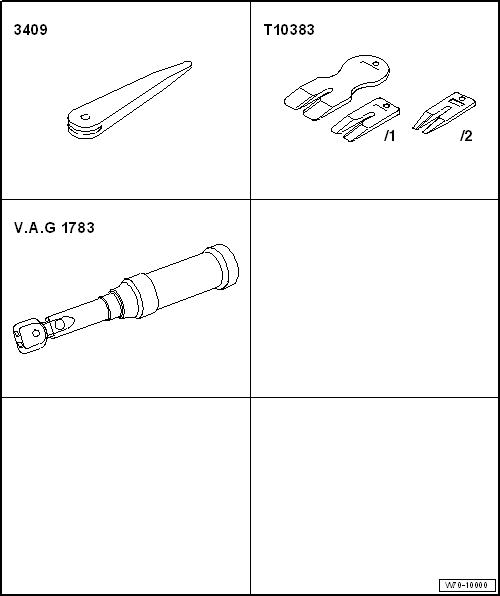
Required Special Tools, Test and Measuring Equipment and Auxiliary Items
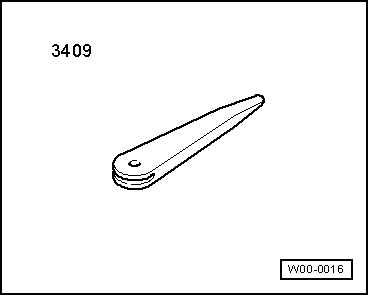
- Release Wedge -3409-
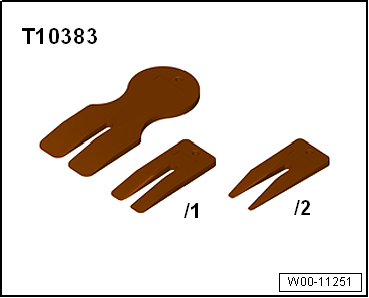
- Wedges -T10383-
- Torque wrench -V.A.G 1783-

Note
- Removal and installation is carried out for the driver's side. Removal and installation for the passenger side is to be derived accordingly.
- Removal and installation is shown for vehicles with 2 doors. Removal and installation for vehicles with 4 doors is carried out accordingly.
Removing
Vehicles without electric window regulators
- Remove window regulator handle → Body assembly work, exterior.
Vehicles with electric window regulators
- Switch off ignition and all electrical consumers and remove the ignition key.
Continuation for all vehicles
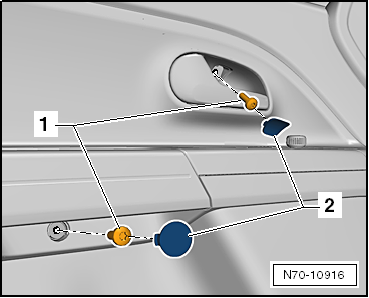
- Unclip cover caps -2- with removal wedge -3409- and unscrew bolts -1- (4.5 N·m).
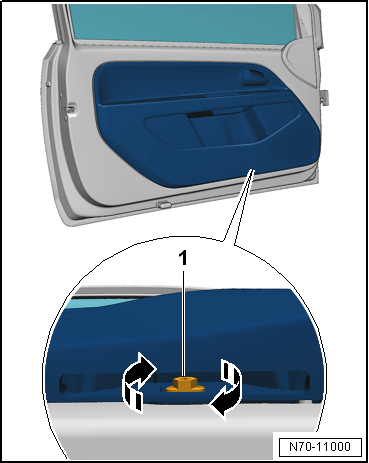
- Release retaining clip -1- by turning 90º in direction of -arrows- with open-end wrench (SW 10).
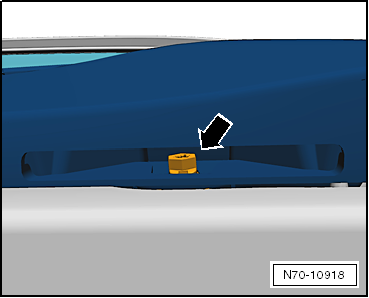
- Retaining clip -arrow- is released.
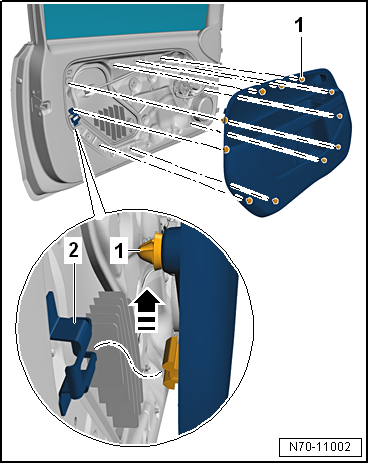
- Release door trim panel from clip connections -1- with wedges -T10383-.
- Slide door trim panel in direction of travel -arrow- out of retaining bracket -2-.
- Remove door trim panel from door.
Vehicles with electric window regulators
- Depending on vehicle equipment, disconnect any existing electrical connectors from switch module.
Continuation for all vehicles
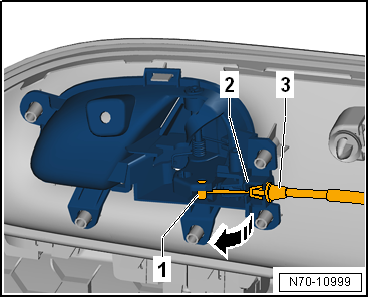
- Release latching lugs of Bowden cable -3- on inner door handle -2-.
- Pull Bowden cable -3- rearward and unhook from inner door handle -2- in direction of -arrow-.
- Unhook cable end -1- from inner door handle -2-.
Installing

Note
Before installation, check fasteners for damage and replace if necessary.
Installation is carried out in the reverse order of removal, observing the following:
- When fitting the door trim panel, first insert the retaining lug of the door trim panel into the retaining bracket.
- Always insert the round cover cap of the door trim panel screw connection with the retaining lug facing down.
Removing and installing mirror cover trim
Required Special Tools, Test and Measuring Equipment and Auxiliary Items
- Release Wedge -3409-

Note
Removal and installation is carried out for the driver's side. Removal and installation for the passenger side is to be derived accordingly.
Removing
Vehicles with manually adjustable exterior mirrors
- Remove adjustment knob → Body assembly work, exterior.
Continuation for all vehicles
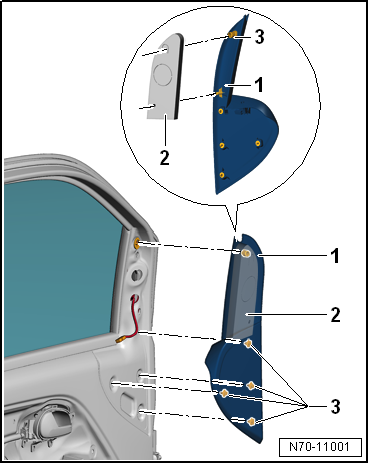
- Release mirror cover trim -1- from clip connections -3- with removal wedge -3409-.
- Remove mirror cover trim -1- with damping -2- from door.
- Depending on vehicle equipment, disconnect any existing electrical connectors.
Installing

Note
Before installation, check all fasteners for damage and replace them if necessary.
- Installation is performed in the reverse order.
Removing and installing speaker damping

Note
Removal and installation is carried out for the passenger side. Removal and installation for the driver's side is to be derived accordingly.
Removing
Speaker damping in front door trim panel
- Remove front door trim panel.
Speaker damping in rear door trim panel
- Remove rear door trim panel.
Speaker damping in side trim panel
- Remove side trim panel.
Continuation for all variants
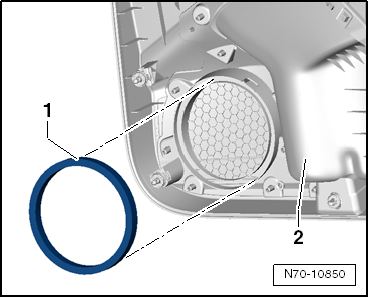
- Remove speaker damping -1- from trim panel -2-.
Installing
- Installation is performed in the reverse order.
Assembly overview - rear door trim panel
Assembly overview - rear door trim panel

Note
- The assembly overview is shown for the driver's side.
- The illustration for the passenger side is to be derived accordingly.
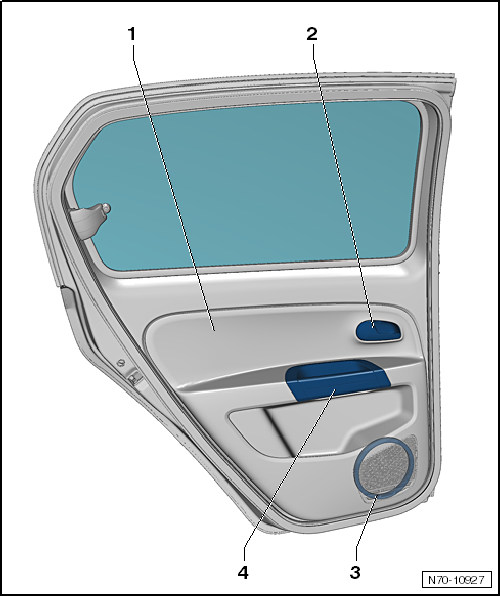
- Rear door trim panel
- Remove and install
- Inner door handle
- can only be replaced together with the rear door trim panel
- Speaker damping
- Remove and install
- Door pull handle
Assembly overview - rear door trim panel, load-up!

Note
- The assembly overview is shown for the driver's side.
- The illustration for the passenger side is to be derived accordingly.
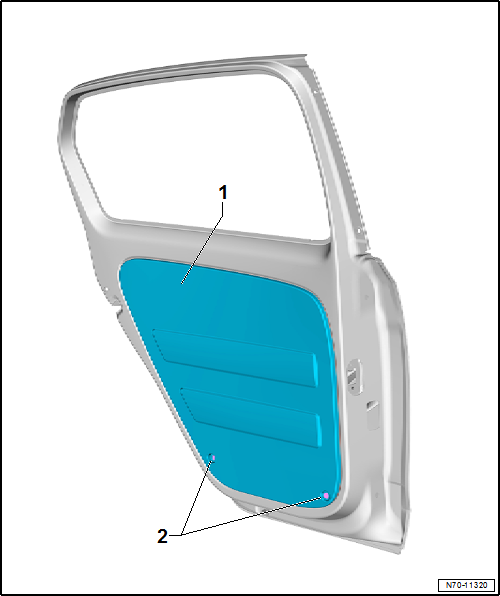
- Rear door trim panel
- Remove and install
- Retaining clip
- 2 pieces
Removing and installing rear door trim panel
Removing and installing rear door trim panel
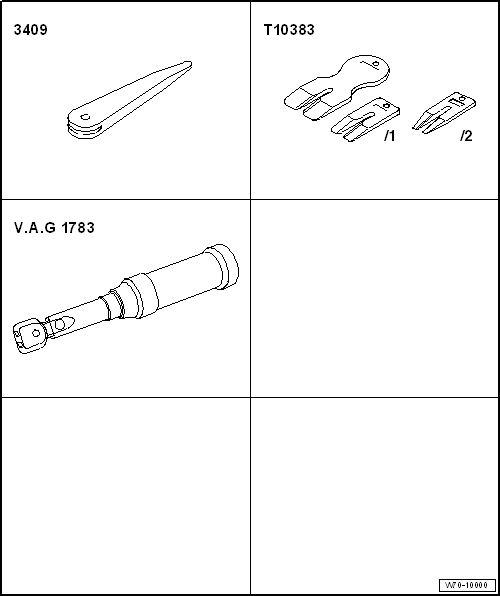
Required Special Tools, Test and Measuring Equipment and Auxiliary Items
- Release Wedge -3409-
- Wedges -T10383-
- Torque wrench -V.A.G 1783-

Note
Removal and installation is carried out for the driver's side. Removal and installation for the passenger side is to be derived accordingly.
Removing
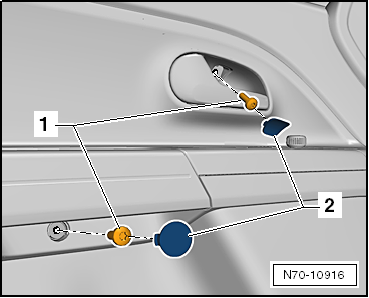
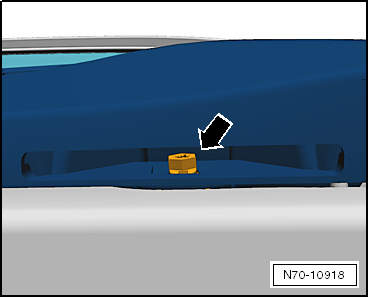
- Unclip cover caps -2- with removal wedge -3409- and unscrew bolts -1- (4.5 N·m).
- Release retaining clip -1- by turning 90º in direction of -arrows- with open-end wrench (SW 10).
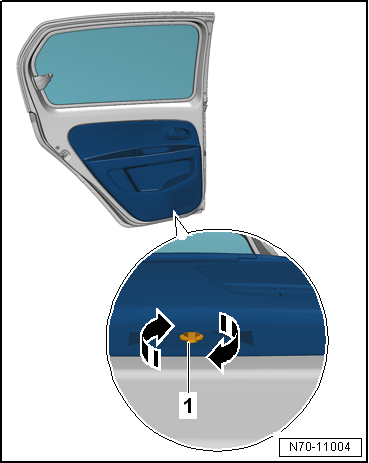
- Retaining clip -arrow- is released.
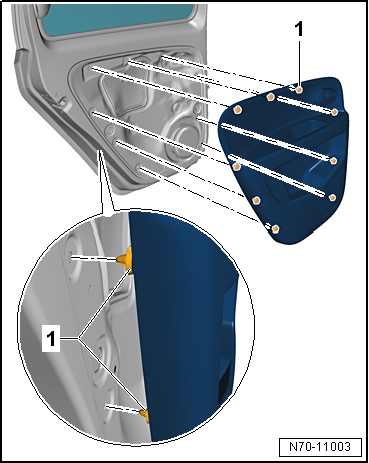
- Release door trim panel from clip connections -1- with wedges -T10383-.
- Remove door trim panel from door.
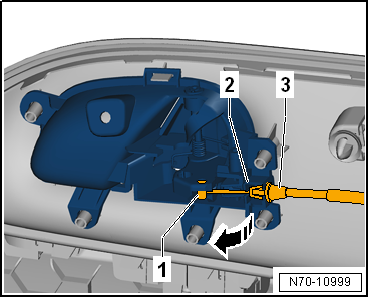
- Release latching lugs of Bowden cable -3- on inner door handle -2-.
- Pull Bowden cable -3- rearward and unhook from inner door handle -2- in direction of -arrow-.
- Unhook cable end -1- from inner door handle -2-.
Installing

Note
Before installation, check fasteners for damage and replace if necessary.
Installation is carried out in the reverse order of removal, observing the following:
- Always insert the round cover cap of the door trim panel screw connection with the retaining lug facing down.
Removing and installing rear door trim panel
Required Special Tools, Test and Measuring Equipment and Auxiliary Items
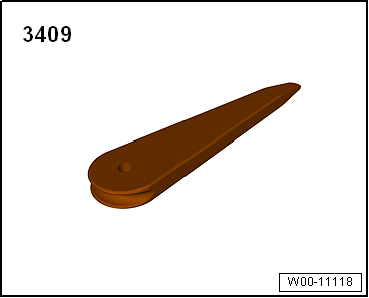
- Release Wedge -3409-
- Wedges -T10383-
Removing
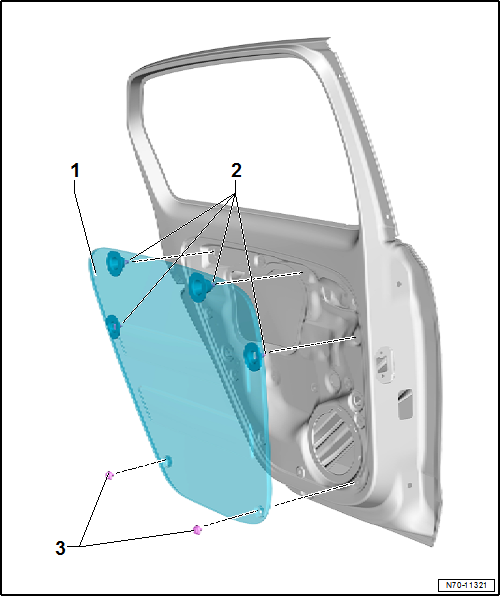
- Release door trim panel -1- from clip connections -2- using removal wedge -T10383-.
- Push out inner clips -2- using removal wedge -3409-.
- Remove outer clip connections -3- from door trim panel using removal wedge -3409-.
- Remove door trim panel -1- from door.
Installing

Note
- Removal and installation is carried out for the driver's side. Removal and installation for the passenger side is to be derived accordingly.
- Before installation, check fasteners for damage and replace if necessary.
Installation is performed in the reverse order.