Injection Timing Inspection and Adjustment
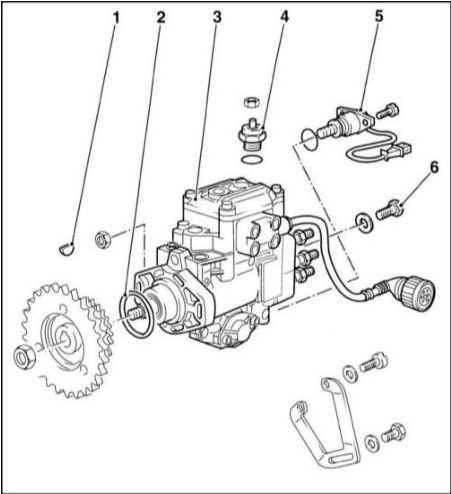
High Pressure Fuel Pump
1 — segment key
2 — O-ring
3 — high pressure fuel pump
4 — fuel shut-off solenoid valve
5 — injection timing adjustment solenoid valve
6 — pump threaded plug
A dial indicator with an adapter for installation in the HPFP is required for this inspection. The engine must be cold at start. The temperature, however, must not be below +20°C.
PROCEDURE
1. Disconnect the negative battery cable. The battery is located in the luggage compartment behind the right side trim.
* Disconnecting the battery erases data stored in electronic control modules, such as engine fault memory. Refer to the recommendations in the Battery Removal and Installation section.
2. Remove the intake manifold. Refer to Intake Manifold Removal and Installation.
3. Remove the threaded plug (1) from the HPFP. Refer to the accompanying illustration.
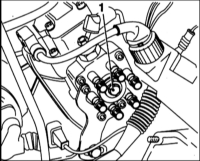
4. Install the adapter (1) (BMW-135330) and the dial indicator (2) in place of the threaded plug and tighten lightly. Refer to the accompanying illustration.
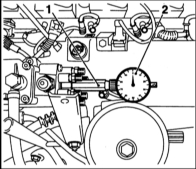
5. Turn the engine clockwise in the direction of No. 1 cylinder TDC so that the dial indicator pointer stops briefly at its lowest point. Rotation should begin at least 60 - 90° before TDC. The No. 1 cylinder piston is at TDC when both No. 1 cylinder cams on the timing chain side point upward. To turn the engine, engage 5th gear, release the parking brake and push the vehicle. Or apply the brake, place the transmission in neutral and turn the crankshaft pulley with a socket on the center bolt.
6. Set the dial indicator to "0".
7. Remove the plug (1) from the cylinder block. Refer to the accompanying illustration.
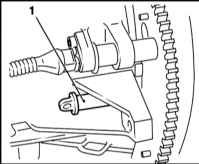
8. Turn the crankshaft 2 revolutions clockwise so that mandrel BMW-112300 or another suitable mandrel (drill bit) can be inserted through the hole in the cylinder block into the hole in the flywheel.
* Do not turn the engine against its direction of rotation. This may cause measurement errors.
9. With a new chain, the dial indicator must show a travel of 0.95 ± 0.02 mm.
* If the chain has more than 20,000 km of mileage, the dial indicator must show a travel of 0.90 ± 0.02 mm.
10. If the value does not match the required value, adjust the pump.
11. Loosen bolt (3) without removing it. Refer to the accompanying illustration.

12. Loosen nuts (1) and (2).
* Do not loosen the nuts fully. Back them off 2 - 3 turns to eliminate chain tension.
13. Turn the HPFP until the dial indicator shows the required value.
14. Tighten the nuts and bolts in sequence from 1 to 3 to the torque of 25 N·m.
15. Remove the mandrel and repeat the inspection. When doing so, turn the crankshaft only clockwise.
16. Remove the dial indicator and the mandrel.
17. Install the plug in the cylinder block.
18. Tighten the center plug with a new O-ring to the torque of 25 N·m.
19. Install the oil filler cap.
20. Install the intake manifold. Refer to Intake Manifold Removal and Installation.
21. Connect the negative battery cable. Set the clock. Program the radio stations.
22. Start the engine. If necessary, bleed air from the fuel system.
23. Drive the vehicle and check the center bolt for leaks. Tighten it if necessary.
Test yourself
A quick BMW 1 quiz: every answer comes with an explanation and a link to the manual page.