Locks, Latches and Entry Systems: Diagnosis and Testing
In this manual: Body and Paint
~70min read
1special tools
DTC Chart: BCM
The diagnosis in this manual assumes a certain level of skill and knowledge of Ford-approved diagnostic procedures. REFER TO: Diagnostic Methods (100-00 General Information, Description and Operation).
DTC Chart
Trouble Code
Description
Action
B108F: 23
Cab Lock/Unlock Switch: Low Signal Level
GO to Pinpoint Test K
B1108:77
Driver door central locking motor: Set position not available
GO to Pinpoint Test L
B1108:92
Driver door central locking motor: Malfunction or incorrect operation
GO to Pinpoint Test L
B113E: 23
Liftgate/Trunk Exterior Open Switch: Low Signal Level
GO to Pinpoint Test M
B1187:92
Liftgate Motor: Performance or Incorrect Operation
GO to Pinpoint Test M
B1D21:62
Remote Control Switch: Signal Comparison Failure
GO to Pinpoint Test N
All Other Diagnostic Trouble Codes (DTCs)
-
REFER TO: Body Control Module (BCM) (419-10 Multifunction Electronic Modules, Diagnosis and Testing).
DTC Chart: RFA Module
The diagnosis in this manual assumes a certain level of skill and knowledge of Ford-approved diagnostic procedures. REFER TO: Diagnostic Methods (100-00 General Information, Description and Operation).
RFA Module Diagnostic Trouble Code Chart
Trouble Code
Description
Action
B10K6:1F
Exterior Backbone Antenna: Intermittent Circuit
GO to Pinpoint Test S
B10D1:24
Front Left Lock Button: Constant High Signal Level
GO TO Pinpoint Test R
B10D3:24
Front Right Lock Button: Constant High Signal Level
GO TO Pinpoint Test R
B113E:24
Exterior Liftgate/Backbone: High Signal Level
GO to Pinpoint Test M
B11FD:1F
Front Left Exterior Antenna: Intermittent Circuit Contact
GO TO Pinpoint Test R
B1210:1F
Front Right Exterior Antenna: Intermittent Circuit Signal
GO TO Pinpoint Test R
U201F:00
Exterior Receiver: No Subtype Information
GO TO Pinpoint Test O
U201F:13
Exterior Receiver: Open Circuit
GO TO Pinpoint Test O
All Other Diagnostic Trouble Codes (DTCs)
-
REFER TO: Remote Function Actuator (RFA) Module (419-10 Multifunction Electronic Modules, Removal and Installation).
Symptom Charts
Symptom Chart: Handles, Locks, Latches and Entry Systems - Mechanical
The diagnosis in this manual assumes a certain level of skill and knowledge of Ford-approved diagnostic procedures. REFER TO: Diagnostic Methods (100-00 General Information, Description and Operation).
Condition
Possible Causes
Action
Door Difficult to Open or Close From Any Door Handle
Refer to Pinpoint Test
GO to Pinpoint Test A
Door Difficult to Open or Does Not Open From Outside Door Handle
Refer to Pinpoint Test
GO to Pinpoint Test B
Door Difficult to Open or Does Not Open From Inside Door Handle
Refer to Pinpoint Test
GO to Pinpoint Test C
Outside Door Handle Opening Sticks
Refer to Pinpoint Test
GO to Pinpoint Test D
Inside Door Handle Opening Sticks
Refer to Pinpoint Test
GO to Pinpoint Test E
Squeak, Rattle or Clicking From Door
Refer to Pinpoint Test
GO to Pinpoint Test F
Manual Door Lock Cylinder Does Not Work
Refer to Pinpoint Test
GO to Pinpoint Test G
Ignition Lock Cylinder Turns Hard
Refer to Pinpoint Test
GO to Pinpoint Test H
Key Is Difficult to Insert Into Ignition Lock Cylinder
Refer to Pinpoint Test
GO to Pinpoint Test H
Ignition Lock Cylinder Cannot Be Returned to OFF Position
Refer to Pinpoint Test
REFER TO: Steering Wheel and Column Electrical Components (211-05 Steering Wheel and Column Electrical Components, Diagnosis and Testing).
Symptom Chart: Handles, Locks, Latches and Entry Systems - Electrical
The diagnosis in this manual assumes a certain level of skill and knowledge of Ford-approved diagnostic procedures. REFER TO: Diagnostic Methods (100-00 General Information, Description and Operation).
Condition
Possible Causes
Action
All Door Locks Do Not Work
Refer to Pinpoint Test
GO to Pinpoint Test I
One or More Door Locks Do Not Work
Refer to Pinpoint Test
GO to Pinpoint Test J
All door locks do not operate from the door lock control switch.
Refer to Pinpoint Test
GO to Pinpoint Test K
Door lock indicator does not operate or remains on constantly.
Refer to Pinpoint Test
GO to Pinpoint Test L
Liftgate/Trunk Lid Lock Does Not Operate.
Refer to Pinpoint Test
GO to Pinpoint Test M
Liftgate Latch Does Not Latch.
Wiring, Terminals or Connectors
Liftgate latch
DISCONNECT the liftgate latch electrical connector and CHECK the latch operation using a screwdriver.
If the latch does not fully latch (2 clicks), INSTALL a new liftgate latch. REFER TO: Rear Liftgate Latch (501-14 Handles, Locks, Latches and Entry Systems, Removal and Installation).
If the latch fully latches (2 clicks), REFER TO the Wiring Diagrams manual to determine the possible cause of the short circuit.
Trunk Lid Latch Does Not Latch.
Wiring, Terminals or Connectors
Trunk Lid Latch
DISCONNECT the trunk lid latch electrical connector and CHECK the latch operation using a screwdriver.
If the latch does not fully latch (2 clicks), INSTALL a new trunk lid latch. REFER TO: Trunk Lid Latch (501-14 Handles, Locks, Latches and Entry Systems, Removal and Installation).
If the latch fully latches (2 clicks), REFER TO the Wiring Diagrams manual to determine the possible cause of the short circuit.
RKE Transmitter Does Not Operate (Without Push Button Start).
Refer to Pinpoint Test
GO to Pinpoint Test N
RKE Transmitter Does Not Operate (With Push Button Start).
Refer to Pinpoint Test
GO TO Pinpoint Test O
Individual button/function does not operate from the RKE transmitter.
Refer to Pinpoint Test
GO to Pinpoint Test P
RKE transmitter has poor range
Refer to Pinpoint Test
GO to Pinpoint Test Q
Auto Lock Does Not Operate.
Auto Lock Disabled.
ENABLE the auto lock feature. REFER TO the Owner's Literature.
Auto Unlock Does Not Operate.
Auto Unlock Disabled.
ENABLE the auto unlock feature. REFER TO the Owner's Literature.
Intelligent Access Does Not Work.
Refer to Pinpoint Test
For vehicles not equipped with push button start, CHECK the ignition chime. REFER TO: Instrument Cluster, Message Center and Warning Chimes (413-01 Instrument Cluster, Message Center and Warning Chimes, Diagnosis and Testing).
For vehicles equipped with push button start, CHECK that the passive key does not start the vehicle from various locations inside the vehicle. REFER TO: Passive Anti-Theft System (PATS) (419-01C Passive Anti-Theft System (PATS) - Vehicles With: Keyless Entry and Push Button Start, Diagnosis and Testing).
Intelligent Liftgate/Trunk Lid Unlock Does Not Operate.
Refer to Pinpoint Test
DIAGNOSE the passive key not starting the vehicle from various locations inside the vehicle. REFER TO: Passive Anti-Theft System (PATS) (419-01C Passive Anti-Theft System (PATS) - Vehicles With: Keyless Entry and Push Button Start, Diagnosis and Testing).
2-Stage Door Unlock Does Not Operate Correctly
2-Stage Door Unlock Programmed Incorrectly.
PROGRAM the 2-stage door unlock. REFER TO: 2-Stage Unlock Programming (501-14 Handles, Locks, Latches and Entry Systems, General Procedures).
Passive Door Entry Function Does Not Work
Refer to Pinpoint Test
GO TO Pinpoint Test R
Rear Liftgate/Trunk Lid Passive Entry Function Does Not Operate.
Refer to Pinpoint Test
GO to Pinpoint Test S
Pinpoint Tests
Door Difficult to Open or Close From Any Door Handle
Normal Operation and Fault Symptoms
The door latch can be actuated by the interior or exterior door handle. When actuated, the door latch releases and allows the door to open. If the door latch or door hinges have insufficient lubrication, or if the latch or door is misaligned, additional force is required to open or close the door.
Possible Causes
Door Alignment
Door Hinges
Striker Adjustment
Door Latch
PINPOINT TEST A: DOOR IS DIFFICULT TO OPEN OR CLOSE FROM ANY DOOR HANDLE
A1 CHECK OPERATION OF LATCH FROM BOTH DOOR HANDLES
Open the door using both the inside and outside door handles.
Does the door open normally from either door handle?
Yes
If the door is difficult to open from the exterior handle, GO TO Pinpoint Test B. If the door is difficult to open from the interior handle, GO TO Pinpoint Test C.
No
GO to A2
A2 CHECK LATCH OPERATION
Open the door.
Using a screwdriver, fully close the latch (2 clicks).
Make sure the latch opens easily by pulling the inside/outside door handle.
Does the latch open easily?
Yes
GO to A4
No
GO to A3
A3 CHECK LATCH OPERATION AFTER LUBRICATION
Lubricate the door latch. REFER TO: Door Latch Lubrication (501-14 Handles, Locks, Latches and Entry Systems, General Procedures).
Using a screwdriver, fully close the latch (2 clicks).
Make sure the latch opens easily by pulling the inside/outside door handle.
Does the latch open easily?
Yes
Insufficiently lubricated door latch was the concern.
No
INSTALL a new door latch. For the front door lock, REFER TO: Front Door Latch (501-14 Handles, Locks, Latches and Entry Systems, Removal and Installation). For the rear door lock, REFER TO: Rear Door Latch (501-14 Handles, Locks, Latches and Entry Systems, Removal and Installation).
A4 CHECK STRIKER ADJUSTMENT
Check the striker adjustment.
Is the striker adjusted correctly?
Yes
GO to A5
No
ADJUST the striker as necessary.
A5 CHECK DOOR ALIGNMENT
Check the door alignment.
Is the door aligned correctly?
Yes
LUBRICATE the door hinges.
No
ADJUST the door as necessary. For the front door, REFER TO: Front Door Alignment (501-03 Body Closures, General Procedures). For the rear door, REFER TO: Rear Door Alignment (501-03 Body Closures, General Procedures).
Door is difficult to open or does not open from the exterior door handle.
Normal Operation and Fault Symptoms
The exterior door handle is connected to the door latch by an actuator cable. When the exterior door handle is pulled, the actuator cable pulls the latch lever. When the latch lever moves, the door latch releases, allowing the door to open.
Possible Causes
Broken or Binding Linkage
Outside Door Handle Reinforcement
Door Latch
PINPOINT TEST B: DOOR IS DIFFICULT TO OPEN OR DOES NOT OPEN FROM THE OUTSIDE HANDLE
B1 CHECK LATCH OPERATION FROM BOTH DOOR HANDLES
NOTE: To unlatch and unlock the rear door interior handle, it must be pulled twice. Open and close the door using both the interior and exterior door handles.
Does the door open normally from either door handle?
Yes
If the door opens with difficulty/does not open from the outside door handle only, GO to B2. If the door opens with difficulty/does not open from the inside door handle only, GO to Pinpoint Test C.
No
GO to Pinpoint Test A
B2 CHECK OUTSIDE DOOR HANDLE AND CABLE OPERATION
Disconnect the outside door handle control cable from the door lock.
Pull the outside door handle while observing the linkage and cable.
Are any outside door handle or linkage components binding or broken?
Yes
GO to B3
No
INSTALL a new door latch. For the front door, REFER TO: Front Door Latch (501-14 Handles, Locks, Latches and Entry Systems, Removal and Installation). For the rear door, REFER TO: Rear Door Latch (501-14 Handles, Locks, Latches and Entry Systems, Removal and Installation).
B3 CHECK THE OUTSIDE DOOR HANDLE BOOSTER
Disconnect the outside door handle release cable from the outside door handle booster.
Pull and release the outside door handle.
Does the outside door handle operate correctly?
Yes
INSTALL a new outside door handle cable.
No
INSTALL a new exterior door handle bezel. For the front door, REFER TO: Front Door Exterior Handle Bezel (501-14 Handles, Locks, Latches and Entry Systems, Removal and Installation). For the rear door, REFER TO: Rear Door Exterior Handle Bezel (501-14 Handles, Locks, Latches and Entry Systems, Removal and Installation).
Door Difficult to Open or Does Not Open From Inside Door Handle
Normal Operation and Fault Symptoms
The inside door handle is connected to the door latch by an actuating cable. When the inside door handle is pulled, the cable pulls the latch lever. When the latch lever moves, the door latch releases, allowing the door to open.
Possible Causes
Broken or binding cable/linkage
Door Latch
Visual Inspection and Preliminary Diagnosis
For the rear doors, make sure the child safety lock is in the unlocked position.
PINPOINT TEST C: DOOR IS DIFFICULT TO OPEN OR DOES NOT OPEN FROM THE INSIDE HANDLE
C1 CHECK THE LATCH OPERATION OF BOTH DOOR HANDLES
NOTE: To lock and unlock the rear inside door handle, the handle must be pulled twice. Open the door using both the inside and outside door handles.
Does the door open normally from either door handle?
Yes
If the door is hard to open/does not open only from the inside door handle, GO to C2. If the door is hard to open/does not open only from the outside door handle, GO to Diagnostic Test B.
No
GO to Pinpoint Test A
C2 CHECK THE INSIDE DOOR HANDLE AND CABLE/LINKAGE OPERATION
Remove the door trim panel.
Reconnect the inside door handle to the unlatch cable.
Operate the inside door handle while observing the cable/linkage.
Do any of the inside door handle components or cables/linkages bind or are they broken?
Yes
REPAIR as necessary.
No
INSTALL a new door latch. For the front door, REFER TO: Front Door Latch (501-14 Handles, Locks, Latches and Entry Systems, Removal and Installation). For the rear door, REFER TO: Rear Door Latch (501-14 Handles, Locks, Latches and Entry Systems, Removal and Installation).
Outside door handle sticks
Normal Operation and Fault Symptoms
The outside door handle is connected to the door latch by an actuating cable. When the outside door handle is pulled, the actuating cable pulls the latch lever. When the latch lever moves, the door latch releases, allowing the door to open. The handle has a return spring. Make sure the handle returns to the closed position.
Possible Causes
Connecting linkage
Broken handle return spring
Door Latch
PINPOINT TEST D: OUTSIDE HANDLE OF ADDITIONAL DOOR IS STUCK
D1 CHECK THE OUTSIDE DOOR HANDLE AND CONNECTION OPERATION
Disconnect the outside door handle control cable from the door lock.
Pull the outside door handle while observing the linkage.
Do any outside door handle or linkage components bind?
Yes
GO to D2
No
INSTALL a new door latch. For the front door, REFER TO: Front Door Latch (501-14 Handles, Locks, Latches and Entry Systems, Removal and Installation). For the rear door, REFER TO: Rear Door Latch (501-14 Handles, Locks, Latches and Entry Systems, Removal and Installation).
D2 CHECK FOR A BROKEN RETURN SPRING
Disconnect the outside door handle release cable from the outside door handle booster.
Pull and release the outside door handle.
Does the outside door handle return to the closed position after being released?
Yes
INSTALL a new outside door handle cable.
No
INSTALL a new exterior door handle bezel. For the front door, REFER TO: Front Door Exterior Handle Bezel (501-14 Handles, Locks, Latches and Entry Systems, Removal and Installation). For the rear door, REFER TO: Rear Door Exterior Handle Bezel (501-14 Handles, Locks, Latches and Entry Systems, Removal and Installation).
Inside Door Handle Latches
Normal Operation and Fault Symptoms
The inside door handle is connected to the door latch by an actuating cable. When the inside door handle is pulled, the cable pulls the latch lever. When the latch lever moves, the door latch releases, allowing the door to open. The handle has a return spring. Make sure the handle returns to the closed position.
Possible Causes
Cable binding
Broken handle return spring
Door Latch
PINPOINT TEST E: INSIDE HANDLE OF ADDITIONAL DOOR IS STUCK
E1 CHECK FOR A BROKEN RETURN SPRING
Remove the inside door handle.
For front door, Refer to: Front Door Inside Handle (501-14 Door Handles, Locks, Latches and Entry Systems, Removal and Installation).
For rear door, Refer to: Rear Door Inside Handle (501-14 Door Handles, Locks, Latches and Entry Systems, Removal and Installation).
Pull and release the inside door handle.
Does the inside door handle return to the closed position after being released?
Yes
GO to E2
No
INSTALL a new inside door handle. For front door, Refer to: Front Door Inside Handle (501-14 Door Handles, Locks, Latches and Entry Systems, Removal and Installation). For rear door, Refer to: Rear Door Inside Handle (501-14 Door Handles, Locks, Latches and Entry Systems, Removal and Installation).
E2 CHECK THE INSIDE DOOR HANDLE RELEASE CABLE OPERATION
Disconnect the inside door lock release cable.
Inspect the door latch release cable for damage or binding.
Is the door lock release cable operating correctly?
Yes
INSTALL a new door latch. For the front door, REFER TO: Front Door Latch (501-14 Handles, Locks, Latches and Entry Systems, Removal and Installation). For the rear door, REFER TO: Rear Door Latch (501-14 Handles, Locks, Latches and Entry Systems, Removal and Installation).
No
INSTALL a new inside door handle cable.
Squeak, Rattle or Clicking From Door
Possible Causes
Door Alignment
Striker Adjustment
Door Latch
PINPOINT TEST F: NOISE FROM DOOR SQUEAK-RATTLE-FEEL
F1 CHECK FOR ANY EXPOSED COMPONENTS
Remove the door trim panel.
For front door, Refer to: Front Door Trim Panel (501-05 Interior Trim and Ornamentation, Removal and Installation).
For rear door, Refer to: Rear Door Trim Panel (501-05 Interior Trim and Ornamentation, Removal and Installation).
Inspect the inside of the door for loose components.
Are there any loose parts inside the door?
Yes
REPAIR as necessary.
No
GO to F2
F2 CHECK STRIKER ADJUSTMENT
Check the striker adjustment.
Is the striker adjusted correctly?
Yes
GO to F3
No
ADJUST the striker as necessary.
F3 CHECK DOOR ALIGNMENT
Check the door alignment.
Is the door aligned correctly?
Yes
GO to F4
No
ADJUST the door as necessary. For the front door, REFER TO: Front Door Alignment (501-03 Body Closures, General Procedures). For the rear door, REFER TO: Rear Door Alignment (501-03 Body Closures, General Procedures).
F4 CHECK LATCH OPERATION AFTER LUBRICATION
Lubricate the door latch. REFER TO: Door Latch Lubrication (501-14 Handles, Locks, Latches and Entry Systems, General Procedures).
Using a screwdriver, fully close the latch (2 clicks).
Open the door latch and listen for noise.
Does the original noise persist after lubricating the latch?
Yes
INSTALL a new door latch. For the front door, REFER TO: Front Door Latch (501-14 Handles, Locks, Latches and Entry Systems, Removal and Installation). For the rear door, REFER TO: Rear Door Latch (501-14 Handles, Locks, Latches and Entry Systems, Removal and Installation).
No
Insufficiently lubricated door latch was the concern.
Manual Door Lock Cylinder Inoperative
Normal Operation and Fault Symptoms
The door lock cylinder is connected to the door latch through the lock rod and can be used to manually lock/unlock the door.
Possible Causes
Bent or binding lock rod and lever
Door lock cylinder
Door Latch
PINPOINT TEST G: MANUAL LOCK CYLINDER DOES NOT WORK
G1 CHECK LOCK AND UNLOCK OPERATION
Insert the key into the lock cylinder and turn the cylinder to the lock and unlock positions.
Does the door lock cylinder rotate freely without locking or unlocking the door?
Yes
GO to G2
No
GO to G4
G2 CHECK DOOR LOCK CYLINDER (FREE SPIN)
Remove the door lock cylinder. Refer to: Front Door Lock Cylinder (501-14 Door Handles, Locks, Latches and Entry Systems, Removal and Installation).
Operate the door lock cylinder with the key while holding the lever on the lock cylinder.
Does the key turn freely in the door lock cylinder when the lever is stationary?
Yes
INSTALL a new door lock cylinder. Refer to: Front Door Lock Cylinder (501-14 Door Handles, Locks, Latches and Entry Systems, Removal and Installation).
No
GO to G3
G3 CHECK DOOR LOCK CYLINDER ROD CONNECTION
Inspect the door lock cylinder rod.
Is the door lock cylinder rod and lever disconnected?
Yes
CONNECT the door lock cylinder rod and lever.
No
INSTALL a new door latch. Refer to: Front Door Latch (501-14 Door Handles, Locks, Latches and Entry Systems, Removal and Installation).
G4 CHECK LOCK CYLINDER OPERATION AFTER LUBRICATION
Spray lock lubricant (e.g., Motorcraft® XL-1) into the lock cylinder opening for a few seconds.
Open the door lock cylinder with the key.
Does the door lock and unlock with the door lock cylinder?
Yes
The lock cylinder was insufficiently lubricated. SPRAY multi-purpose grease (e.g., Motorcraft® XL-5) into the lock cylinder for a few seconds to ensure long-term lubrication.
No
GO to G5
G5 CHECK LOCK CYLINDER FOR LOCKING
Remove the door lock cylinder. Refer to: Front Door Lock Cylinder (501-14 Door Handles, Locks, Latches and Entry Systems, Removal and Installation).
Open the door lock cylinder with the key.
Does the door lock cylinder rotate freely?
Yes
GO to G6
No
INSTALL a new door lock cylinder. Refer to: Front Door Lock Cylinder (501-14 Door Handles, Locks, Latches and Entry Systems, Removal and Installation).
G6 CHECK DOOR LOCK CYLINDER CONNECTION
Operate the door lock using the door lock cylinder linkage.
Open the door lock cylinder with the key.
Is the door lock cylinder rod and lever binding, damaged or disconnected?
Yes
REPAIR as necessary
No
INSTALL a new door latch. Refer to: Front Door Latch (501-14 Door Handles, Locks, Latches and Entry Systems, Removal and Installation).
Ignition Lock Cylinder Turns Hard
Normal Operation and Fault Symptoms
The ignition lock cylinder mechanically rotates the ignition key within the ignition lock cylinder housing. Inserting and removing the key, and rotating the lock cylinder with a correctly cut key, must be smooth and require minimal effort.
Possible Causes
Key
Ignition Lock
Ignition lock cylinder
PINPOINT TEST H: IGNITION LOCK CYLINDER IS DIFFICULT TO TURN
H1 CHECK THE KEY FOR DAMAGE
Inspect the key for incorrect cuts, burrs or damage.
Is the key correctly cut, free of burrs and damage?
Yes
GO to H2
No
REPLACE and PROGRAM a new key. Refer to: Key Programming Using Diagnostic Equipment (419-01B Passive Anti-Theft System (PATS) - Vehicles Without: Keyless Entry and Push Button Start, General Procedures). If the spare key is equipped with an RKE transmitter, PROGRAM the RKE transmitter. Refer to: Remote Keyless Entry (RKE) Transmitter Programming (501-14 Door Handles, Locks, Latches and Entry Systems, General Procedures).
H2 CHECK IGNITION LOCK CYLINDER OPERATION
Insert the key into the ignition lock cylinder and turn the key to all ignition lock positions.
Does the key turn in all ignition lock positions without excessive force?
Yes
Mechanical function of the ignition lock cylinder is good.
No
GO to H3
H3 CHECK IGNITION LOCK CYLINDER BY INSERTING KEY
Remove the ignition lock cylinder. Refer to: Ignition Lock Cylinder (501-14 Door Handles, Locks, Latches and Entry Systems, Removal and Installation).
While holding the ignition lock cylinder, press with your finger on the rear of the lock.
With pressure still applied to the rear of the lock, insert and remove the key from the ignition lock cylinder. Repeat this step several times.
Does the key insert and remove freely from the ignition lock cylinder?
Yes
GO to H4
No
INSTALL a new ignition lock cylinder. Refer to: Ignition Lock Cylinder (501-14 Door Handles, Locks, Latches and Entry Systems, Removal and Installation).
H4 CHECK IGNITION LOCK CYLINDER FOR ROTATIONAL BINDING
While holding the ignition lock cylinder, press with your finger on the rear of the lock.
With pressure still applied to the rear of the lock, use the key to turn the ignition lock cylinder to all positions.
Does the ignition lock cylinder rotate freely?
Yes
INSTALL a new ignition switch. Refer to: Ignition Switch - Vehicles Without: Keyless Entry and Push Button Start (211-05 Steering Column and Electrical Components, Removal and Installation).
No
INSTALL a new ignition lock cylinder. Refer to: Ignition Lock Cylinder (501-14 Door Handles, Locks, Latches and Entry Systems, Removal and Installation).
All Door Locks Do Not Work
For circuit and connector information, refer to Wiring Diagrams Cell 117.
Normal Operation and Fault Symptoms
Refer to: Door Handles, Locks, Latches and Entry Systems - System Operation and Component Description (501-14 Door Handles, Locks, Latches and Entry Systems, Description and Operation).
Possible Causes
Fuse
Wiring, Terminals or Connectors
Liftgate/Trunk Lid/Latch
BCM
PINPOINT TEST I: ALL DOOR LOCKS DO NOT WORK
I1 CHECK THE DOOR LOCK OPERATION WITH THE RKE (REMOTE KEYLESS ENTRY) TRANSMITTER AND THE DOOR LOCK CONTROL SWITCH
Press the LOCK and UNLOCK buttons on the RKE transmitter, then press the inside door lock control switch.
Do the door locks not operate from the RKE transmitter and the door lock control switch?
Yes
CHECK that fuse BJB 4 (20A) is in good condition. If OK, GO to I2. If not OK, GO to I5.
No
If the door locks do not operate from the door lock control switch, GO to Pinpoint Test K. If the door locks do not operate from the RKE transmitter (vehicles without push button start), GO to Pinpoint Test N. If the door locks do not operate from the RKE transmitter (vehicles with push button start), GO to Pinpoint Test O.
I2 CHECK THE BCM (BODY CONTROL MODULE) POWER SUPPLY CIRCUIT FOR THE POWER DOOR LOCK WHEN OPENING
Ignition OFF.
Disconnect C2280C.
Action: Click to display the connectors
Positive lead
Measurement/Action
Negative lead
C2280C-16
Ground
Is the voltage greater than 11 volts?
Yes
GO to I3
No
REPAIR the circuit.
I3 CHECK THE BCM (BODY CONTROL MODULE) GROUND CIRCUIT FOR THE DOOR LOCKS WHEN OPENING
Disconnect C2280B.
Action: Click to display the connectors
Positive lead
Measurement/Action
Negative lead
C2280B-16
Ground
Is the resistance less than 3 ohms?
Yes
GO to I4
No
REPAIR the circuit.
I4 CHECK THE LOCK CIRCUIT FOR AN OPEN CIRCUIT
Ignition OFF.
Disconnect the right front door latch C609.
Action Click to display connectors
Positive lead
Measurement/Action
Negative lead
C2280C-3
C609-2
Is the resistance less than 3 ohms?
Yes
GO to I8
No
REPAIR the circuit.
I5 CHECK THE BCM (BODY CONTROL MODULE) FOR A SHORT TO GROUND
Install a new fuse BJB 4 (20A).
Activate the liftgate/trunk lid unlock by pressing the liftgate/trunk lid unlock button on the RKE transmitter.
Is fuse BJB 4 (20A) in good condition?
Yes
GO to I7
No
GO to I6
I6 DISCONNECT THE BCM (BODY CONTROL MODULE) LIFTGATE/TRUNK LID UNLOCK OUTPUT CIRCUIT FOR A SHORT TO GROUND
Disconnect the liftgate/trunk lid latch C4223.
Install a new fuse BJB 4 (20A).
Activate the liftgate/trunk lid unlock by pressing the liftgate/trunk lid unlock button on the RKE transmitter.
Is fuse BJB 4 (20A) in good condition?
Yes
For 4-door vehicles, INSTALL a new trunk lid latch. Refer to: Trunk Lid Latch (501-14 Door Handles, Locks, Latches and Entry Systems, Removal and Installation). For 5-door vehicles, INSTALL a new liftgate latch. Refer to: Liftgate Latch (501-14 Door Handles, Locks, Latches and Entry Systems, Removal and Installation).
No
REPAIR the circuit.
I7 CHECK THE DOOR LOCK CIRCUIT FOR A SHORT TO GROUND
Activate the door lock actuators by pressing the lock button on the RKE transmitter.
Is fuse BJB 4 (20A) in good condition?
Yes
REPAIR the BCM unlock output circuit for a short to ground.
No
REPAIR the BCM lock output circuit for a short to ground.
I8 CHECK THE BCM (BODY CONTROL MODULE) OPERATION
Disconnect and inspect all BCM connectors.
Repair:
corrosion (install new connectors or terminals - clean the module contacts)
damaged or bent pins - install new terminal pins
pushed-out pins - install new pins as necessary
Reconnect the BCM connectors and make sure they are fully seated and locked.
Operate the system and determine if the concern is still present.
Is the concern still present?
Yes
CHECK OASIS for any applicable technical service bulletins (TSBs). If a TSB exists for this concern, STOP this test and FOLLOW the TSB instructions. If no TSBs apply to this concern, INSTALL a new BCM. REFER TO: Body Control Module (BCM) (419-10 Multifunction Electronic Modules, Removal and Installation).
No
The system is currently operating correctly. The concern may have been caused by module connections. ADDRESS the root cause of any connector or terminal issues.
One or More Door Locks Do Not Work
For circuit and connector information, refer to Wiring Diagrams Cell 117.
Normal Operation and Fault Symptoms
Refer to: Door Handles, Locks, Latches and Entry Systems - System Operation and Component Description (501-14 Door Handles, Locks, Latches and Entry Systems, Description and Operation).
Possible Causes
Wiring, Terminals or Connectors
Door Latch
BCM
PINPOINT TEST J: ONE OR MORE DOOR LOCKS DO NOT WORK
NOTICE: The following Pinpoint test uses a test lamp to simulate normal circuit loads. Use only the Rotunda test lamp (SGT27000) or a 250-300 mA incandescent test lamp. To avoid damage to connector terminals, use the Rotunda Flex Probe kit to connect the test lamp probe to the vehicle. Do not use the test lamp probe directly on any connector.
J1 CHECK THE LOCK OUTPUT CIRCUIT FOR AN OPEN
Ignition OFF.
Disconnect the suspect door latch.
For the suspect door latch, connect: Click to display connectors
Left front door lock
Lead 1
Measurement/Action
Lead 2
C525-7
Ground
Click to display the connectors
Right front door lock
Lead 1
Measurement/Action
Lead 2
C609-2
Ground
Click to display the connectors
Left rear door lock
Lead 1
Measurement/Action
Lead 2
C705-7
Ground
Click to display the connectors
Right rear door lock
Lead 1
Measurement/Action
Lead 2
C805-2
Ground
NOTE: The BCM only supplies voltage to the actuator briefly. It is important to watch the indicator lamp when pressing the lock button. Observe the indicator lamp while pressing the lock button on the RKE transmitter.
Does the test lamp illuminate momentarily?
Yes
GO to J2
No
REPAIR the circuit.
J2 CHECK THE UNLOCK OUTPUT CIRCUIT FOR AN OPEN
For the suspect door latch, connect: Click to display connectors
Left front door lock
Lead 1
Measurement/Action
Lead 2
C525-8
Ground
Click to display the connectors
Right front door lock
Lead 1
Measurement/Action
Lead 2
C609-1
Ground
Click to display the connectors
Left rear door lock
Lead 1
Measurement/Action
Lead 2
C705-8
Ground
Click to display the connectors
Right rear door lock
Lead 1
Measurement/Action
Lead 2
C805-1
Ground
NOTE: The BCM only supplies voltage to the actuator briefly. It is important to watch the indicator lamp when pressing the unlock button. Observe the indicator lamp while pressing the unlock button on the RKE transmitter.
Does the test lamp illuminate momentarily?
Yes
INSTALL a new door latch. For the front door, REFER TO: Front Door Latch (501-14 Handles, Locks, Latches and Entry Systems, Removal and Installation). For the rear door, REFER TO: Rear Door Latch (501-14 Handles, Locks, Latches and Entry Systems, Removal and Installation).
No
GO to J3
J3 CHECK BCM (BODY CONTROL MODULE) ALL UNLOCK OUTPUT CIRCUIT FOR OPEN
Disconnect C2280C.
For a suspect door latch, measure: Click to display connectors
Left front door lock
Positive lead
Measurement/Action
Negative lead
C525-8
C2280C-8
Click to display the connectors
Right front door lock
Positive lead
Measurement/Action
Negative lead
C609-1
C2280C-2
Click to display the connectors
Left rear door lock
Positive lead
Measurement/Action
Negative lead
C705-8
C2280C-2
Click to display the connectors
Right rear door lock
Positive lead
Measurement/Action
Negative lead
C805-1
C2280C-2
Is the resistance less than 3 ohms?
Yes
GO to J4
No
REPAIR the circuit.
J4 CHECK THE BCM (BODY CONTROL MODULE) OPERATION
Disconnect and inspect all BCM connectors.
Repair:
corrosion (install new connectors or terminals - clean the module contacts)
damaged or bent pins - install new terminal pins
pushed-out pins - install new pins as necessary
Reconnect the BCM connectors and make sure they are fully seated and locked.
Operate the system and determine if the concern is still present.
Is the concern still present?
Yes
CHECK OASIS for any applicable technical service bulletins (TSBs). If a TSB exists for this concern, STOP this test and FOLLOW the TSB instructions. If no TSBs apply to this concern, INSTALL a new BCM. REFER TO: Body Control Module (BCM) (419-10 Multifunction Electronic Modules, Removal and Installation).
No
The system is currently operating correctly. The concern may have been caused by module connections. ADDRESS the root cause of any connector or terminal issues.
All door locks inoperative from the door lock control switch
For circuit and connector information, refer to Wiring Diagrams Cell 117.
Normal Operation and Fault Symptoms
Refer to: Door Handles, Locks, Latches and Entry Systems - System Operation and Component Description (501-14 Door Handles, Locks, Latches and Entry Systems, Description and Operation).
DTC Fault Trigger Conditions
Trouble Code
Description
Fault Trigger Conditions
B108F: 23
Cab Lock/Unlock Switch: Low Signal Level
Sets when the BCM detects a short to ground in the door lock control switch input circuit.
Possible Causes
Wiring, Terminals or Connectors
FCIM
BCM
PINPOINT TEST K: ALL DOOR LOCKS DO NOT WORK FROM THE DOOR LOCK CONTROL SWITCH
K1 CHECK THE BCM (BODY CONTROL MODULE) DTC (DIAGNOSTIC TROUBLE CODE) B108F:23
The ignition is on.
Using a scan tool, perform the BCM self-test.
Is DTC B108F:23 present?
Yes
GO to K2
No
GO to K4
K2 FCIM (FRONT CONTROLS INTERFACE MODULE) ISOLATION SHORT TO GROUND
Ignition OFF.
Disconnect the FCIM C2402.
The ignition is on.
Using a scan tool, clear the BCM diagnostic trouble codes (DTCs).
Wait 10 seconds.
Using a scan tool, perform the BCM self-test.
Is DTC B108F:23 still present?
Yes
GO to K3
No
INSTALL a new FCIM. Refer to Section 415-00.
K3 CHECK THE DOOR LOCK SWITCH INPUT CIRCUIT FOR A SHORT TO GROUND
Ignition OFF.
Disconnect the C2280F connector.
Action: Click to display the connectors
Positive lead
Measurement/Action
Negative lead
C2280F-20
Ground
Is the resistance greater than 10000 Ohms?
Yes
GO to K7
No
REPAIR the circuit.
K4 FCIM (FRONT CONTROLS INTERFACE MODULE) BYPASS
Ignition OFF.
Disconnect the FCIM C2402.
Momentarily connect: Click to display connectors
Lead 1
Measurement/Action
Lead 2
C2402-6
C2402-5
Do the doors lock/unlock when the jumper is connected?
Yes
INSTALL a new FCIM. Refer to Section 415-00.
No
GO to K5
K5 CHECK THE FCIM (FRONT CONTROLS INTERFACE MODULE) GROUND CIRCUIT FOR AN OPEN
Action: Click to display the connectors
Positive lead
Measurement/Action
Negative lead
C2402-5
Ground
Is the resistance less than 3 ohms?
Yes
GO to K6
No
REPAIR the circuit.
K6 CHECK THE DOOR LOCK SWITCH INPUT CIRCUIT FOR AN OPEN
Disconnect the C2280F connector.
Action: Click to display the connectors
Positive lead
Measurement/Action
Negative lead
C2402-6
C2280F-20
Is the resistance less than 3 ohms?
Yes
GO to K7
No
REPAIR the circuit.
K7 CHECK BCM (BODY CONTROL MODULE) OPERATION
Disconnect and inspect all BCM connectors.
Repair:
corrosion (install new connectors or terminals - clean the module contacts)
damaged or bent pins - install new terminal pins
pushed-out pins - install new pins as necessary
Reconnect the BCM connectors and make sure they are fully seated and locked.
Operate the system and determine if the concern is still present.
Is the concern still present?
Yes
CHECK OASIS for any applicable technical service bulletins (TSBs). If a TSB exists for this concern, STOP this test and FOLLOW the TSB instructions. If no TSBs apply to this concern, INSTALL a new BCM. REFER TO: Body Control Module (BCM) (419-10 Multifunction Electronic Modules, Removal and Installation).
No
The system is currently operating correctly. The concern may have been caused by module connections. ADDRESS the root cause of any connector or terminal issues.
Door lock indicator inoperative or always on
For circuit and connector information, refer to Wiring Diagrams Cell 117.
Normal Operation and Fault Symptoms
Refer to: Door Handles, Locks, Latches and Entry Systems - System Operation and Component Description (501-14 Door Handles, Locks, Latches and Entry Systems, Description and Operation).
DTC Fault Trigger Conditions
Trouble Code
Description
Fault Trigger Conditions
B1108:77
Driver door central locking motor: Set position not available
Sets continuously when the BCM detects an incorrect feedback on the door lock/unlock monitor circuit after a central lock or unlock event. When the BCM commands the doors to lock, it expects the lock/unlock monitor circuit to be open. When the BCM commands all doors to unlock, it expects the lock/unlock monitor circuit to be grounded.
B1108:92
Driver door central locking motor: Malfunction or incorrect operation
Sets only during BCM self-test when an incorrect feedback is detected on the door lock/unlock monitor circuit. The BCM activates the internal lock and unlock relays to lock and unlock all doors. When the BCM commands the doors to lock, it expects the lock/unlock monitor circuit to be open. When the BCM commands the doors to unlock, it expects the lock/unlock monitor circuit to be grounded.
Possible Causes
Wiring, Terminals or Connectors
Door Latch
FCIM
BCM
PINPOINT TEST L: DOOR LOCK INDICATOR DOES NOT WORK OR IS ALWAYS ON
L1 CHECK THE DOOR LOCK ACTUATOR OPERATION
Ignition OFF.
Check the door lock operation using the interior door lock control switch.
Do the door locks operate normally?
Yes
GO to L2
No
IDENTIFY the symptom and REFER to the Symptom Chart: Handles, Locks, Latches and Entry Systems in this section.
L2 CHECK THE COURTESY LAMP OPERATION
Open and then close each door in turn while observing the courtesy lamps.
Do the courtesy lamps operate correctly?
Yes
GO to L3
No
REFER TO: Interior Lamps (417-02 Interior Lamps, Diagnosis and Testing).
L3 CHECK THE DOOR LOCK INDICATOR OPERATION WITH THE DOORS UNLOCKED
The ignition is on.
Unlock the doors using the RKE transmitter.
Is the door lock indicator on?
Yes
GO to L4
No
GO to L8
L4 CHECK THE BCM (BODY CONTROL MODULE) DTC (DIAGNOSTIC TROUBLE CODE) B1108:77 OR B1108:92 (INDICATOR ALWAYS ON)
Using a scan tool, perform the BCM self-test.
Is DTC B1108:77 or B1108:92 present?
Yes
GO to L5
No
GO to L6
L5 CHECK THE UNLOCK FEEDBACK CIRCUIT FOR AN OPEN
Ignition OFF.
Using the RKE transmitter, open the doors.
Disconnect C2280G.
Action: Click to display the connectors
Positive lead
Measurement/Action
Negative lead
C2280G-8
Ground
Is the resistance less than 3 ohms?
Yes
GO to L19
No
REPAIR the circuit.
L6 CHECK THE BCM (BODY CONTROL MODULE) DOOR LOCK INDICATOR OUTPUT
Ignition OFF.
Disconnect the FCIM C2402.
Using the RKE transmitter, open the doors.
The ignition is on.
Action: Click to display the connectors
Positive lead
Measurement/Action
Negative lead
C2402-2
Ground
Is there voltage present?
Yes
GO to L7
No
INSTALL a new FCIM. Refer to Section 415-00.
L7 CHECK THE BCM (BODY CONTROL MODULE) DOOR LOCK INDICATOR OUTPUT FOR A SHORT TO VOLTAGE
Ignition OFF.
Disconnect the C2280E connector.
The ignition is on.
Action: Click to display the connectors
Positive lead
Measurement/Action
Negative lead
C2402-2
Ground
Is there voltage present?
Yes
REPAIR the circuit.
No
GO to L19
L8 CHECK THE DOOR LOCK INDICATOR OPERATION WITH THE DOORS LOCKED
Lock the doors with the RKE transmitter.
Is the door lock indicator on?
Yes
GO to L18
No
GO to L9
L9 CHECK THE BCM (BODY CONTROL MODULE) DTC (DIAGNOSTIC TROUBLE CODE) B1108:77 OR B1108:92 (INDICATOR INOPERATIVE)
Using a scan tool, perform the BCM self-test.
Is DTC B1108:77 or B1108:92 present?
Yes
GO to L13
No
GO to L10
L10 CHECK THE VOLTAGE AT THE FCIM (FRONT CONTROLS INTERFACE MODULE)
Ignition OFF.
Disconnect the FCIM C2402.
The ignition is on.
Using the RKE transmitter, lock the doors.
Action: Click to display the connectors
Positive lead
Measurement/Action
Negative lead
C2402-2
Ground
Is the voltage greater than 11 volts?
Yes
INSTALL a new FCIM. Refer to Section 415-00.
No
GO to L11
L11 CHECK THE BCM (BODY CONTROL MODULE) DOOR LOCK INDICATOR OUTPUT FOR A SHORT TO GROUND
Ignition OFF.
Disconnect the C2280E connector.
Action: Click to display the connectors
Positive lead
Measurement/Action
Negative lead
C2402-2
Ground
Is the resistance greater than 10000 Ohms?
Yes
GO to L12
No
REPAIR the circuit.
L12 CHECK THE BCM (BODY CONTROL MODULE) DOOR LOCK INDICATOR OUTPUT WITH THE DOOR OPEN
Action: Click to display the connectors
Positive lead
Measurement/Action
Negative lead
C2402-2
C2280E-12
Is the resistance less than 3 ohms?
Yes
GO to L19
No
REPAIR the circuit.
L13 CHECK THE LEFT FRONT DOOR LATCH FOR A SHORT TO GROUND
Ignition OFF.
Disconnect the left front door latch C525.
The ignition is on.
Lock the doors with the RKE transmitter.
Is the door lock indicator on?
Yes
INSTALL a new left front door latch. REFER TO: Front Door Latch (501-14 Handles, Locks, Latches and Entry Systems, Removal and Installation).
No
GO to L14
L14 CHECK THE RIGHT FRONT DOOR LATCH FOR A SHORT TO GROUND
Ignition OFF.
Disconnect the right front door latch C609.
The ignition is on.
Lock the doors with the RKE transmitter.
Is the door lock indicator on?
Yes
INSTALL a new right front door latch. REFER TO: Front Door Latch (501-14 Handles, Locks, Latches and Entry Systems, Removal and Installation).
No
GO to L15
L15 CHECK THE LEFT REAR DOOR LATCH FOR A SHORT TO GROUND
Ignition OFF.
Disconnect the left rear door latch C705.
The ignition is on.
Lock the doors with the RKE transmitter.
Is the door lock indicator on?
Yes
INSTALL a new left rear door latch. REFER TO: Rear Door Latch (501-14 Handles, Locks, Latches and Entry Systems, Removal and Installation).
No
GO to L16
L16 CHECK THE RIGHT REAR DOOR LATCH FOR A SHORT TO GROUND
Ignition OFF.
Disconnect the right rear door latch C805.
The ignition is on.
Lock the doors with the RKE transmitter.
Is the door lock indicator on?
Yes
INSTALL a new right rear door latch. REFER TO: Rear Door Latch (501-14 Handles, Locks, Latches and Entry Systems, Removal and Installation).
No
GO to L17
L17 CHECK THE UNLOCK FEEDBACK CIRCUIT FOR A SHORT TO GROUND
Ignition OFF.
Disconnect C2280G.
Action: Click to display the connectors
Positive lead
Measurement/Action
Negative lead
C2280G-8
Ground
Is the resistance greater than 10000 Ohms?
Yes
GO to L19
No
REPAIR the circuit
L18 CHECK THE UNLOCK FEEDBACK CIRCUIT FOR AN OPEN (INDICATOR ILLUMINATES WHEN THE INDIVIDUAL DOOR IS UNLOCKED)
Ignition OFF.
Disconnect the suspect door latch.
Disconnect C2280G.
For a suspect door latch, measure: Click to display connectors
Left Front Door
Positive lead
Measurement/Action
Negative lead
C525-4
C2280G-8
Click to display the connectors
Right Front Door
Positive lead
Measurement/Action
Negative lead
C609-5
C2280G-8
Click to display the connectors
Left Rear Door
Positive lead
Measurement/Action
Negative lead
C705-4
C2280G-8
Click to display the connectors
Right Rear Door
Positive lead
Measurement/Action
Negative lead
C805-5
C2280G-8
Is the resistance less than 3 ohms?
Yes
INSTALL a new door latch. For the front door, REFER TO: Front Door Latch (501-14 Handles, Locks, Latches and Entry Systems, Removal and Installation). For the rear door, REFER TO: Rear Door Latch (501-14 Handles, Locks, Latches and Entry Systems, Removal and Installation).
No
REPAIR the circuit.
L19 CHECK BCM (BODY CONTROL MODULE) OPERATION
Disconnect and inspect all BCM connectors.
Repair:
corrosion (install new connectors or terminals - clean the module contacts)
damaged or bent pins - install new terminal pins
pushed-out pins - install new pins as necessary
Reconnect the BCM connectors and make sure they are fully seated and locked.
Operate the system and determine if the concern is still present.
Is the concern still present?
Yes
CHECK OASIS for any applicable technical service bulletins (TSBs). If a TSB exists for this concern, STOP this test and FOLLOW the TSB instructions. If no TSBs apply to this concern, INSTALL a new BCM. REFER TO: Body Control Module (BCM) (419-10 Multifunction Electronic Modules, Removal and Installation).
No
The system is currently operating correctly. The concern may have been caused by module connections. ADDRESS the root cause of any connector or terminal issues.
Liftgate/Trunk Lid Lock Does Not Operate.
For circuit and connector information, refer to Wiring Diagrams Cell 117.
Normal Operation and Fault Symptoms
Refer to: Door Handles, Locks, Latches and Entry Systems - System Operation and Component Description (501-14 Door Handles, Locks, Latches and Entry Systems, Description and Operation).
DTC Fault Trigger Conditions
Trouble Code
Description
Fault Trigger Conditions
B113E: 23
Liftgate/Trunk Exterior Open Switch: Low Signal Level
Sets when the BCM detects a short to ground in the liftgate/tailgate unlock switch input circuit.
B1187:92
Liftgate Motor: Performance or Incorrect Operation
Sets during the self-test when the BCM applies power to the internal liftgate/tailgate release relay to unlatch the latch but does not detect the liftgate/tailgate ajar input. When the BCM commands the liftgate/tailgate latch to unlatch during the self-test, it checks the liftgate/tailgate ajar input circuit, expecting the input circuit to indicate that the liftgate/tailgate is open.
RFA Module DTC Setting Conditions
Trouble Code
Description
Fault Trigger Conditions
B113E:24
Liftgate/Tailgate Open Switch: Constantly High Signal
Sets when the RFA module detects a short to ground in the liftgate/tailgate unlock switch input circuit.
Possible Causes
Wiring, Terminals or Connectors
Liftgate/Tailgate Open Switch
Liftgate/Trunk Latch
BCM
Visual Inspection and Preliminary Diagnosis
Inspect the liftgate/tailgate open switch for damage.
PINPOINT TEST M: LIFTGATE/DECKLID RELEASE DOES NOT WORK
M1 CHECK THE DOOR LOCK OPERATION
The ignition is on.
Lock and unlock the doors using the interior door lock control switch.
Do the door locks operate?
Yes
GO to M2
No
GO to Pinpoint Test I
M2 CHECK THE LIFTGATE/TAILGATE UNLATCH SWITCH T_GATE_SW PID (PARAMETER IDENTIFICATION)
Using the diagnostic scan tool, view the BCM parameter identification (PID) data.
Using the diagnostic scanner, monitor the BCM T_GATE_SW PID input signal from the liftgate/tailgate open switch while pressing and releasing the liftgate/tailgate open switch.
Does the PID operate correctly?
Yes
GO to M9
No
If the PID shows the switch is always pressed, GO to M3. If the PID shows the switch is never pressed, GO to M6.
M3 DISCONNECT THE LIFTGATE/TAILGATE OPEN SWITCH, USING THE LIFTGATE/TAILGATE OPEN SWITCH (T_GATE_SW) PID (PARAMETER IDENTIFICATION)
Ignition OFF.
Disconnect the liftgate/tailgate open switch C4224.
The ignition is on.
Using the diagnostic scanner, monitor the BCM T_GATE_SW PID.
Does the PID continue to indicate that the switch is pressed?
Yes
If the vehicle has passive entry, GO to M4. If the vehicle does not have passive entry, GO to M5.
No
For 4-door vehicles, CHECK the harness connector for any short to ground. REPAIR as necessary. If the jumper is good, INSTALL a new liftgate open switch. REFER TO: Liftgate Open Switch (501-14 Handles, Locks, Latches and Entry Systems, Removal and Installation). For 5-door vehicles, CHECK the harness connector for any short to ground. REPAIR as necessary. If the jumper is good, INSTALL a new liftgate open switch. REFER TO: Liftgate Open Switch (501-14 Handles, Locks, Latches and Entry Systems, Removal and Installation).
M4 ISOLATE THE RFA (REMOTE FUNCTION ACTUATOR) MODULE, USING THE LIFTGATE/TAILGATE OPEN SWITCH (T_GATE_SW) PID (PARAMETER IDENTIFICATION)
Ignition OFF.
Disconnect the RFA module C3503B.
Disconnect the Smart Keyless Entry ignition relay.
Connect:
Lead 1
Measurement/Action
Lead 2
Smart Keyless Entry Relay, Cavity 3
Smart Keyless Entry Relay, Cavity 5
Using the diagnostic scanner, monitor the BCM T_GATE_SW PID liftgate/tailgate unlock switch input signal.
Does the PID continue to indicate that the switch is pressed?
Yes
REMOVE the fused jumper. CONNECT the Smart Keyless Entry ignition relay. GO to M5
No
REMOVE the fused jumper. CONNECT the Smart Keyless Entry ignition relay. GO to M13
M5 CHECK THE LIFTGATE/TAILGATE OPEN SWITCH INPUT CIRCUIT FOR A SHORT TO GROUND
Ignition OFF.
Disconnect C2280G.
Action: Click to display the connectors
Positive lead
Measurement/Action
Negative lead
C2280G-6
Ground
Is the resistance greater than 10000 Ohms?
Yes
GO to M14
No
REPAIR the circuit.
M6 BYPASS THE LIFTGATE/TAILGATE UNLATCH SWITCH AND CHECK THE LIFTGATE/TAILGATE OPEN SWITCH T_GATE_SW PID (PARAMETER IDENTIFICATION)
Ignition OFF.
Disconnect the liftgate/tailgate open switch C4224.
The ignition is on.
Connect: Click to display connectors
Lead 1
Measurement/Action
Lead 2
C4224-3
C4224-4
Using the diagnostic scanner, monitor the BCM T_GATE_SW PID liftgate/tailgate unlock switch input signal.
Does the PID show the switch is pressed?
Yes
For 4-door vehicles, REMOVE the fused jumper. CHECK the harness connector for opens. REPAIR as necessary. If the harness is good, INSTALL a new liftgate open switch. REFER TO: Liftgate Open Switch (501-14 Handles, Locks, Latches and Entry Systems, Removal and Installation). For 5-door vehicles, REMOVE the fused jumper. CHECK the harness connector for opens. REPAIR as necessary. If the harness is good, INSTALL a new liftgate open switch. REFER TO: Liftgate Open Switch (501-14 Handles, Locks, Latches and Entry Systems, Removal and Installation).
No
REMOVE the fused jumper wire. GO to M7
M7 CHECK THE LIFTGATE/TAILGATE OPEN SWITCH GROUND CIRCUIT FOR AN OPEN
Ignition OFF.
Action: Click to display the connectors
Positive lead
Measurement/Action
Negative lead
C4224-4
Ground
Is the resistance less than 3 ohms?
Yes
GO to M8
No
REPAIR the circuit.
M8 CHECK THE LIFTGATE/TAILGATE OPEN SWITCH INPUT CIRCUIT FOR AN OPEN
Disconnect C2280G.
Connect: Click to display connectors
Lead 1
Measurement/Action
Lead 2
C4224-3
C4224-4
Action: Click to display the connectors
Positive lead
Measurement/Action
Negative lead
C2280G-6
Ground
Is the resistance less than 3 ohms?
Yes
REMOVE the fused jumper. GO to M14
No
REMOVE the fuse jumper wire. REPAIR the circuit.
M9 CHECK THE BCM (BODY CONTROL MODULE) LIFTGATE/TAILGATE OUTPUT CIRCUIT FOR CONTINUITY
NOTICE: The following step uses a test lamp to simulate normal circuit loads. Use only the Rotunda test lamp (SGT27000) or a 250-300 mA incandescent test lamp. To prevent damage to the connector terminals, use the Rotunda Flex Probe kit for the test lamp probe connection to the vehicle. Do not use the test lamp probe directly on any connector.
Ignition OFF.
Disconnect the liftgate/trunk lid latch C4223.
Connect: Click to display connectors
Lead 1
Measurement/Action
Lead 2
C4223-1
C4223-2
Unlock the doors using the interior door lock control switch.
NOTE: The BCM only briefly applies voltage to the latch. It is important to watch the indicator lamp while pressing the liftgate/tailgate open switch. Press and release the liftgate/tailgate open switch while observing the indicator lamp.
Does the test lamp illuminate momentarily?
Yes
For 4-door vehicles, INSTALL a new trunk lid latch. Refer to: Trunk Lid Latch (501-14 Door Handles, Locks, Latches and Entry Systems, Removal and Installation). For 5-door vehicles, INSTALL a new liftgate latch. Refer to: Liftgate Latch (501-14 Door Handles, Locks, Latches and Entry Systems, Removal and Installation).
No
For 4-door vehicles, GO to M10 For 5-door vehicles, VERIFY that fuse 26 CJB (7.5A) is good. If good, GO to M10. If not good, REFER TO the Wiring Diagrams to determine the possible causes of the short circuit.
M10 CHECK THE LIFTGATE/TAILGATE LATCH GROUND CIRCUIT FOR AN OPEN
Ignition OFF.
Action: Click to display the connectors
Positive lead
Measurement/Action
Negative lead
C4223-2
Ground
Is the resistance less than 3 ohms?
Yes
GO to M11
No
REPAIR the circuit.
M11 CHECK THE BCM (BODY CONTROL MODULE) LIFTGATE/TAILGATE LOCK OUTPUT CIRCUIT FOR A SHORT TO GROUND
Disconnect C2280C.
Action: Click to display the connectors
Positive lead
Measurement/Action
Negative lead
C4223-1
Ground
Is the resistance greater than 10000 Ohms?
Yes
GO to M12
No
REPAIR the circuit.
M12 CHECK THE BCM (BODY CONTROL MODULE) LIFTGATE/TAILGATE LATCH OUTPUT CIRCUIT FOR AN OPEN
Action: Click to display the connectors
Positive lead
Measurement/Action
Negative lead
C2280C-7
C4223-1
Is the resistance less than 3 ohms?
Yes
GO to M14
No
REPAIR the circuit.
M13 CHECK THE RFA (REMOTE FUNCTION ACTUATOR) MODULE OPERATION FOR CORRECTNESS
Disconnect and inspect all RFA module connectors.
Repair:
corrosion (install new connectors or terminals - clean the module contacts)
damaged or bent pins - install new terminal pins
pushed-out pins - install new pins as necessary
Reconnect the RFA module connectors and make sure they are properly seated and latched.
Operate the system and determine if the concern is still present.
Is the concern still present?
Yes
CHECK OASIS for any applicable Technical Service Bulletins (TSBs). If a TSB exists for this condition, STOP this test and FOLLOW the TSB instructions. If no TSB applies to this concern, INSTALL a new RFA module. REFER TO: Remote Function Actuator (RFA) Module (419-10 Multifunction Electronic Modules, Removal and Installation).
No
The system is currently operating correctly. The concern may have been caused by module connections. ADDRESS the root cause of any connector or terminal issues.
M14 CHECK THE BCM (BODY CONTROL MODULE) OPERATION FOR CORRECTNESS
Disconnect and inspect all BCM connectors.
Repair:
corrosion (install new connectors or terminals - clean the module contacts)
damaged or bent pins - install new terminal pins
pushed-out pins - install new pins as necessary
Reconnect the BCM connectors and make sure they are fully seated and locked.
Operate the system and determine if the concern is still present.
Is the concern still present?
Yes
CHECK OASIS for any applicable technical service bulletins (TSBs). If a TSB exists for this concern, STOP this test and FOLLOW the TSB instructions. If no TSBs apply to this concern, INSTALL a new BCM. REFER TO: Body Control Module (BCM) (419-10 Multifunction Electronic Modules, Removal and Installation).
No
The system is currently operating correctly. The concern may have been caused by module connections. ADDRESS the root cause of any connector or terminal issues.
RKE transmitter does not work (without push-button start)
Normal Operation and Fault Symptoms
Refer to: Door Handles, Locks, Latches and Entry Systems - System Operation and Component Description (501-14 Door Handles, Locks, Latches and Entry Systems, Description and Operation).
DTC Fault Trigger Conditions
Trouble Code
Description
Fault Trigger Conditions
B1D21:62
Remote Control Switch: Signal Comparison Failure
Set when the BCM detects that the rolling counter received from the RKE transmitter is not synchronized with the rolling counter stored in the module.
Possible Causes
Integrated Key Transmitter (IKT) battery
Integrated Key Transmitter (IKT)
Integrated Key Transmitter (IKT) button was pressed a significant number of times while out of vehicle range
Inspect the Integrated Key Transmitter (IKT) for damage.
Check for aftermarket RKE transmitters.
PINPOINT TEST N: RKE (REMOTE KEYLESS ENTRY) TRANSMITTER DOES NOT WORK (WITHOUT PUSH-BUTTON START)
NOTE: Aftermarket or dealer-installed systems may adversely affect RKE system operation. Disconnect these systems before diagnosing any RKE system concern. At least 2 Integrated Key Transmitters (IKT) must be present when diagnosing the RKE system.
N1 CHECK RKE (REMOTE KEYLESS ENTRY) SYSTEM OPERATION WITH IGNITION OFF
The ignition is on.
Check the RKE function of the Integrated Key Transmitter (IKT).
Does the system now operate correctly?
Yes
The RKE function may have been disabled by the BCM to conserve battery charge. The RKE function is re-enabled when the ignition is turned on. INFORM the customer that the Integrated Key Transmitter (IKT) operates correctly.
No
GO to N2
N2 CHECK RKE (REMOTE KEYLESS ENTRY) FUNCTION OF THE TRANSMITTER
Press each button on the suspect Integrated Key Transmitter (IKT) (twice for liftgate/tailgate release).
Does any RKE function work?
Yes
GO to Pinpoint Test P
No
GO to N3
N3 CHECK FOR A NON-FUNCTIONING INTEGRATED KEY TRANSMITTER (IKT) BATTERY
Open the non-functioning Integrated Key Transmitter (IKT).
Do not clean the grease from the battery terminals on the back of the circuit board.
Make sure the correct battery (CR2032) is being used.
Remove the Integrated Key Transmitter (IKT) battery and measure the voltage.
Is the voltage greater than 2.5 volts?
Yes
If only one Integrated Key Transmitter (IKT) is present, GO to N4. If multiple Integrated Key Transmitters (IKT) are not functioning, GO to N5.
No
INSTALL a new battery. DO NOT reprogram the Integrated Key Transmitter (IKT) (damaged or discharged batteries do not erase RKE transmitters from memory).
N4 PROGRAM THE NON-FUNCTIONING INTEGRATED KEY TRANSMITTER (IKT)
Program the RKE transmitter portion of the Integrated Key Transmitter (IKT). REFER TO: Remote Keyless Entry (RKE) Transmitter Programming (501-14 Door Locks, Latches and Entry Systems, General Procedures).
Check the RKE function of the Integrated Key Transmitter (IKT).
Is the RKE function working?
Yes
System is OK. The concern was caused by an unprogrammed RKE transmitter.
No
REPLACE the Integrated Key Transmitter (IKT). PROGRAM the RKE transmitter portion of the Integrated Key Transmitter (IKT). REFER TO: Remote Keyless Entry (RKE) Transmitter Programming (501-14 Door Locks, Latches and Entry Systems, General Procedures). PROGRAM the PATS portion of the Integrated Key Transmitter (IKT). REFER TO: Key Programming with Diagnostic Equipment (419-01B Passive Anti-Theft System (PATS) - Vehicles With: Keyless Entry and Push-Button Start, General Procedures). CHECK the system for correct operation. If the concern persists, GO to N6.
N5 PROGRAM ALL RKE (REMOTE KEYLESS ENTRY) TRANSMITTERS
Program all RKE transmitters. REFER TO: Remote Keyless Entry (RKE) Transmitter Programming (501-14 Door Locks, Latches and Entry Systems, General Procedures).
Check the RKE function of the suspect Integrated Key Transmitters (IKT).
Is the RKE function working?
Yes
System is OK. The concern was caused by unprogrammed RKE transmitters.
No
GO to N6
N6 CHECK THE BCM (BODY CONTROL MODULE) OPERATION FOR CORRECTNESS
Disconnect and inspect all BCM connectors.
Repair:
corrosion (install new connectors or terminals - clean the module contacts)
damaged or bent pins - install new terminal pins
pushed-out pins - install new pins as necessary
Reconnect the BCM connectors and make sure they are fully seated and locked.
Operate the system and determine if the concern is still present.
Is the concern still present?
Yes
CHECK OASIS for any applicable technical service bulletins (TSBs). If a TSB exists for this concern, STOP this test and FOLLOW the TSB instructions. If no TSBs apply to this concern, INSTALL a new BCM. REFER TO: Body Control Module (BCM) (419-10 Multifunction Electronic Modules, Removal and Installation).
No
The system is currently operating correctly. The concern may have been caused by module connections. ADDRESS the root cause of any connector or terminal issues.
RKE transmitter does not work (with push-button start)
For circuit and connector information, refer to Wiring Diagrams Cell 117.
Normal Operation and Fault Symptoms
Refer to: Door Handles, Locks, Latches and Entry Systems - System Operation and Component Description (501-14 Door Handles, Locks, Latches and Entry Systems, Description and Operation).
RFA Module DTC Setting Conditions
Trouble Code
Description
Fault Trigger Conditions
U201F:00
Exterior Receiver: No Subtype Information
Sets when the RFA module misses messages from the radio frequency (RF) receiver.
U201F:13
Exterior Receiver: Open Circuit
Sets when the RFA module loses communication with the radio frequency (RF) receiver.
Possible Causes
Fuse
Wiring, Terminals or Connectors
Passive Key
Passive key battery
Passive key button was pressed a significant number of times while out of vehicle range.
Passive key programming
Network Concern
Radio Frequency (RF) Receiver
RFA module
Visual Inspection and Preliminary Diagnosis
Inspect fuse CJB 7 (7.5A) and make sure it is in good condition.
Inspect the passive key for damage.
Check for aftermarket passive keys.
PINPOINT TEST O: RKE (REMOTE KEYLESS ENTRY) TRANSMITTER DOES NOT WORK (WITH PUSH-BUTTON START)
NOTE: Aftermarket or dealer-installed systems may adversely affect RKE system operation. Disconnect these systems before diagnosing any RKE system concern.
NOTE: At least 2 programmed customer keys must be present when diagnosing the RKE system.
O1 CHECK THE KEYS FOR CORRECTNESS
Make sure at least 2 passive keys are present and suitable for the vehicle.
Are at least 2 correct passive keys present?
Yes
GO to O2
No
The system cannot be tested without at least 2 correct passive keys. INFORM the customer that at least 2 correct passive keys must be present to continue diagnosing the system.
O2 CHECK PASSIVE KEY PROGRAMMING
NOTE: Make sure that only one passive key is in the vehicle when attempting to start the vehicle. Failure to follow this instruction may result in incorrect test results. Place the suspect passive key next to the steering column shroud. PATS transceiver and attempt to start the vehicle. Repeat this step with the second key.
Does the vehicle start with both keys?
Yes
GO to O3
No
DIAGNOSE PATS. REFER TO: Passive Anti-Theft System (PATS) (419-01C Passive Anti-Theft System (PATS) - Vehicles With: Keyless Entry and Push Button Start, Diagnosis and Testing).
Press each RKE button (twice for liftgate/luggage compartment unlatching) on the suspect key.
Does any RKE function work?
Yes
GO to Pinpoint Test P
No
GO to O5
O5 RESYNCHRONIZE THE NON-WORKING KEY
Ignition OFF.
Within 30 seconds, press any button on the suspect passive key 4 times in succession.
Is the RKE function working?
Yes
The system is OK. The concern was caused by a passive key desynchronization.
No
GO to O6
O6 RESYNCHRONIZE THE NON-WORKING KEY USING THE SECOND KEY
Press any button on the working passive key.
Within 30 seconds, press any button on the suspect passive key.
Check the RKE functionality of the suspect key.
Is the RKE function working?
Yes
The system is OK. The concern was caused by a passive key desynchronization.
No
GO to O7
O7 CHECK KEY BATTERY LOW MESSAGE
The ignition is on.
Wait 10 seconds for the vehicle systems to power up and the IPC to complete its self-test.
Press and release the unlock button on the passive key. Repeat this several times and observe the message center.
Does the key battery low message display in the message center?
Yes
INSTALL a new battery. DO NOT reprogram the passive key (discharged or damaged batteries do not erase keys from memory).
No
GO to O8
O8 CHECK PASSIVE KEY BATTERY
Open the non-functioning passive key.
Do not clean the grease from the battery terminals on the back of the circuit board.
Make sure the correct battery (CR2032) is being used.
Remove the Integrated Key Transmitter (IKT) battery and measure the voltage.
Is the voltage greater than 2.5 volts?
Yes
REPLACE the suspect passive key. PROGRAM the key. REFER TO: Key Programming Using Diagnostic Equipment (419-01C Passive Anti-Theft System (PATS) - Vehicles With: Keyless Entry and Push Button Start, General Procedures).
No
INSTALL a new battery. DO NOT reprogram the passive key (discharged or damaged batteries do not erase keys from memory).
O9 CHECK BCM (BODY CONTROL MODULE) AND RFA (REMOTE FUNCTION ACTUATOR) MODULE COMMUNICATION
The ignition is on.
Using a scan tool, perform the network test.
Do the BCM and RFA module pass the network test?
Yes
GO to O10.
No
REFER TO: Communication Network (418-00 Communication Network, Diagnosis and Testing).
O10 CHECK RADIO FREQUENCY (RF) RECEIVER VOLTAGE SUPPLY CIRCUIT FOR AN OPEN
Ignition OFF.
Disconnect the radio frequency (RF) receiver C9026.
Action: Click to display the connectors
Positive lead
Measurement/Action
Negative lead
C9026-3
Ground
Is the voltage greater than 11 volts?
Yes
GO to O11.
No
CHECK the CJB fuse 7 (7.5A) for correct operation. If OK, REPAIR the circuit. If not OK, REFER TO the Wiring Diagrams Manual to determine the possible causes of the short circuit.
O11 CHECK RADIO FREQUENCY (RF) RECEIVER GROUND CIRCUIT FOR AN OPEN
Action: Click to display the connectors
Positive lead
Measurement/Action
Negative lead
C9026-2
Ground
Is the resistance less than 3 ohms?
Yes
GO to O12.
No
REPAIR the circuit.
O12 CHECK RADIO FREQUENCY RECEIVER COMMUNICATION CIRCUIT FOR A SHORT TO VOLTAGE
Disconnect the RFA module C3503B.
Disconnect the Smart Keyless Entry ignition relay.
Connect:
Lead 1
Measurement/Action
Lead 2
Smart Keyless Entry Relay, Cavity 3
Smart Keyless Entry Relay, Cavity 5
Action: Click to display the connectors
Positive lead
Measurement/Action
Negative lead
C9026-1
Ground
Is there voltage present?
Yes
REMOVE the fuse jumper wire. REPAIR the circuit.
No
REMOVE the fusible link. GO to O13
O13 CHECK RADIO FREQUENCY (RF) RECEIVER COMMUNICATION CIRCUIT FOR A SHORT TO GROUND
Connect the Smart Keyless Entry ignition relay.
Action: Click to display the connectors
Positive lead
Measurement/Action
Negative lead
C9026-1
Ground
Is the resistance greater than 10000 Ohms?
Yes
GO to O14
No
REPAIR the circuit.
O14 CHECK RADIO FREQUENCY (RF) RECEIVER COMMUNICATION CIRCUIT FOR AN OPEN
Action: Click to display the connectors
Positive lead
Measurement/Action
Negative lead
C9026-1
C3503B-3
Is the resistance less than 3 ohms?
Yes
INSTALL a new radio frequency (RF) receiver. REFER TO Radio Frequency (RF) Receiver in this section. CHECK the system for normal operation. If the concern persists, GO to O15.
No
REPAIR the circuit.
O15 CHECK RFA (REMOTE FUNCTION ACTUATOR) MODULE FOR PROPER OPERATION
Disconnect and inspect all RFA module connectors.
Repair:
corrosion (install new connectors or terminals - clean the module contacts)
damaged or bent pins - install new terminal pins
pushed-out pins - install new pins as necessary
Reconnect the RFA module connectors and make sure they are properly seated and latched.
Operate the system and determine if the concern is still present.
Is the concern still present?
Yes
CHECK OASIS for any applicable Technical Service Bulletins (TSBs). If a TSB exists for this condition, STOP this test and FOLLOW the TSB instructions. If no TSB applies to this concern, INSTALL a new RFA module. REFER TO: Remote Function Actuator (RFA) Module (419-10 Multifunction Electronic Modules, Removal and Installation).
No
The system is currently operating correctly. The concern may have been caused by module connections. ADDRESS the root cause of any connector or terminal issues.
Individual RKE transmitter button/function does not operate
Normal Operation and Fault Symptoms
Refer to: Door Handles, Locks, Latches and Entry Systems - System Operation and Component Description (501-14 Door Handles, Locks, Latches and Entry Systems, Description and Operation).
Possible Causes
Door lock system concern
Liftgate/luggage compartment opening system concerns
Key
Visual Inspection and Preliminary Diagnosis
Inspect the key for damage.
PINPOINT TEST P: INDIVIDUAL BUTTON/FUNCTION DOES NOT WORK WITH RKE (REMOTE KEYLESS ENTRY) TRANSMITTER
P1 CHECK THE DOOR LOCK OPERATION
Lock and unlock the doors using the interior door lock control switch.
Do the door locks operate?
Yes
GO to P2
No
GO to Pinpoint Test I
P2 CHECK HORN OPERATION USING THE HORN FUNCTION (PARAMETER IDENTIFICATION)
The ignition is on.
Using the diagnostic scan tool, view the BCM parameter identification (PID) data.
Using the diagnostic scan tool, command the BCM. PID HORN turns on and off.
Does the horn sound on command?
Yes
GO to P3
No
REFER TO: Horn (413-06 Horn, Diagnosis and Testing).
P3 CHECK THE HAZARD LAMP OPERATION
Ignition OFF.
Turn on the hazard warning function and observe the turn signal indicators.
Do the hazard warning lamps operate correctly?
Yes
GO to P4
No
REFER TO: Turn Signal and Hazard Warning Lamps (417-01 Exterior Lighting, Diagnosis and Testing).
P4 CHECK LIFTGATE/LUGGAGE COMPARTMENT OPENING
Ignition OFF.
Unlock the doors using the interior door lock control switch.
Press the liftgate/luggage compartment unlatch button located at the rear of the vehicle.
Does the liftgate/luggage compartment open?
Yes
For vehicles not equipped with push button start, REPLACE the suspect integrated key head transmitter (IKT). PROGRAM the key. REFER TO: Key Programming Using Diagnostic Equipment (419-01B Passive Anti-Theft System (PATS) - Vehicles Without: Keyless Entry and Push Button Start, General Procedures). PROGRAM the RKE transmitter. REFER TO: Remote Keyless Entry (RKE) Transmitter Programming (501-14 Doors, Locks and Entry Systems, General Procedures). For vehicles equipped with push button start, REPLACE the suspect passive key. PROGRAM the passive key. REFER TO: Key Programming Using Diagnostic Equipment (419-01C Passive Anti-Theft System (PATS) - Vehicles With: Keyless Entry and Push Button Start, General Procedures).
No
GO to Pinpoint Test M
RKE transmitter has poor range
Normal Operation and Fault Symptoms
Refer to: Door Handles, Locks, Latches and Entry Systems - System Operation and Component Description (501-14 Door Handles, Locks, Latches and Entry Systems, Description and Operation).
For vehicles without push button start, the integrated key head transmitter (IKT) sends a radio signal to the internal antenna of the BCM. If the BCM detects that the signal comes from a programmed integrated key head transmitter (IKT), it then performs the selected action. The RKE radio signal has a normal operating range of 20 m (66 ft).
For vehicles with Push Button Start, the passive key sends a radio signal to the Radio Frequency (RF) receiver. The RF receiver sends passive key information to the RFA module over the communication circuit. If the RFA module (BCM) detects that the signal is from a programmed passive key, it performs the selected action. The RKE radio signal has a normal operating range of 20 m (66 ft).
Possible Causes
Key
Key battery
Aftermarket system
High-power devices
Television/radio transmitting towers
Radio Frequency (RF) receiver (vehicles with Push Button Start)
BCM (vehicles without Push Button Start)
Visual Inspection and Preliminary Diagnosis
Inspect the key for damage.
Inspect the key battery.
Inspect for aftermarket RKE systems.
PINPOINT TEST Q: RKE (REMOTE KEYLESS ENTRY) TRANSMITTER HAS POOR RANGE PERFORMANCE
NOTE: At least 2 programmed keys must be present to begin RKE system diagnosis.
NOTE: Aftermarket or dealer-installed systems may adversely affect RKE system operation. Disconnect these systems before diagnosing any RKE system concern.
Q1 CHECK THAT THE KEYS ARE CORRECT
Make sure at least 2 keys of the correct type for the vehicle are available.
Are the correct keys present?
Yes
GO to Q2
No
The system cannot be tested without the correct keys. INFORM the customer that the correct keys must be present to continue with system diagnosis.
Q2 CHECK ALL KEYS FOR POOR RANGE PERFORMANCE
NOTE: The 20 m (66 ft) range measurement is not a standard, but a guideline that clearly indicates normal range performance of the vehicle. Check all keys for normal range (less than 20 m (65.62 ft)).
Do all keys have poor range?
Yes
GO to Q4
No
GO to Q3
Q3 CHECK THE KEY BATTERY
Open the key.
Make sure the correct battery (CR2032) is being used.
Remove the key battery and measure the voltage.
Is the voltage greater than 2.5 volts?
Yes
For vehicles without Push Button Start, REPLACE the suspect key. PROGRAM the PATS key transponder. REFER to: Key Programming with Diagnostic Equipment (419-01B Passive Anti-Theft System (PATS) - Vehicles Without: Keyless Entry and Push Button Start, General Procedures). PROGRAM the RKE transmitter portion of the key. REFER to: Remote Keyless Entry (RKE) Transmitter Programming (501-14 Handles, Locks, Latches and Entry Systems, General Procedures). For vehicles equipped with Push Button Start, REPLACE the suspect key. PROGRAM the key. REFER to: Key Programming with Diagnostic Equipment (419-01C Passive Anti-Theft System (PATS) - Vehicles With: Keyless Entry and Push Button Start, General Procedures).
No
INSTALL a new battery (make sure the battery is seated correctly). DO NOT reprogram the key (weak or discharged batteries do not erase keys from memory).
Q4 CHECK VEHICLE LOCATION AND APPROACH ANGLES AROUND THE VEHICLE
Confirm that the poor performance is consistent in nature and not related to a single approach angle.
RKE transmitter range may be reduced in certain locations. For example, if the vehicle is within 0.8 km (0.5 mile) of a high-power device or radio/TV tower, the operating range of the keys may be reduced.
Is the poor range consistent around the vehicle?
Yes
For vehicles without Push Button Start, GO to Q5. For vehicles equipped with Push Button Start, INSTALL a new Radio Frequency (RF) receiver. REFER to: Radio Frequency (RF) Receiver (501-14 Handles, Locks, Latches and Entry Systems, Removal and Installation).
No
The system is currently operating correctly. Range may have been affected by environmental interference such as high-power devices or radio/TV towers.
Q5 CHECK BCM (BODY CONTROL MODULE) OPERATION
Disconnect and inspect all BCM connectors.
Repair:
corrosion (install new connectors or terminals - clean the module contacts)
damaged or bent pins - install new terminal pins
pushed-out pins - install new pins as necessary
Reconnect the BCM connectors and make sure they are fully seated and locked.
Operate the system and determine if the concern is still present.
Is the concern still present?
Yes
CHECK OASIS for any applicable technical service bulletins (TSBs). If a TSB exists for this concern, STOP this test and FOLLOW the TSB instructions. If no TSBs apply to this concern, INSTALL a new BCM. REFER TO: Body Control Module (BCM) (419-10 Multifunction Electronic Modules, Removal and Installation).
No
The system is currently operating correctly. The concern may have been caused by module connections. ADDRESS the root cause of any connector or terminal issues.
Passive Door Entry Function Does Not Work
For circuit and connector information, refer to Wiring Diagrams Cell 117.
Normal Operation and Fault Symptoms
Refer to: Door Handles, Locks, Latches and Entry Systems - System Operation and Component Description (501-14 Door Handles, Locks, Latches and Entry Systems, Description and Operation).
RFA Module DTC Setting Conditions
Trouble Code
Description
Fault Trigger Conditions
B10D1:24
Front Left Lock Button: Constant High Signal Level
Sets when the RFA module detects a short to ground (for example, a stuck-pressed button) in the driver door handle lock/unlock button input circuit.
B10D3:24
Front Right Lock Button: Constant High Signal Level
Sets when the RFA module detects a short to ground (for example, a stuck-pressed button) in the passenger door handle lock/unlock button input circuit.
B11FD:1F
Front Left Exterior Antenna: Intermittent Circuit Contact
Sets when the RFA module detects an open or short circuit in one of the driver door handle antenna circuits.
B1210:1F
Front Right Exterior Antenna: Intermittent Circuit Signal
Sets when the RFA module detects an open or short circuit in one of the passenger door handle antenna circuits.
Possible Causes
Wiring, Terminals or Connectors
Outside door handle (with lock/unlock button and antenna)
RFA module
Visual Inspection and Preliminary Diagnosis
Inspect the outside door handles for damage.
PINPOINT TEST R: PASSIVE ENTRY DOOR FUNCTION DOES NOT WORK
R1 CHECK DOOR LOCK OPERATION
Lock and unlock the doors using the interior door lock control switch.
Do the doors lock and unlock?
Yes
GO to R2
No
GO to Pinpoint Test I
R2 CHECK RKE (REMOTE KEYLESS ENTRY) OPERATION
Press the lock and unlock buttons on the passive key.
Do the doors lock and unlock?
Yes
GO to R3
No
GO TO Pinpoint Test O
R3 CHECK DOOR HANDLE SWITCH (FL_LK_BUT OR FR_LK_BUT) PID (PARAMETER IDENTIFICATION)
The ignition is on.
Using the diagnostic scan tool, view the RFA module parameter identifications (PIDs).
Monitor the RFA module PID FL_LK_BUT (left front door handle) or FR_LK_BUT (right front door handle) while pressing and releasing the suspect passive entry button on the outside door handle.
Does the PID show "Active" when the button is pressed and "Inactive" when released?
Yes
GO to R9
No
If the PID always shows Active, GO to R4. If the PID always shows Inactive, GO to R6.
R4 CHECK DOOR HANDLE SWITCH (FL_LK_BUT OR FR_LK_BUT) PID (PARAMETER IDENTIFICATION) WITH SUSPECT DOOR HANDLE DISCONNECTED
Ignition OFF.
Disconnect the suspect outside front door handle.
The ignition is on.
Using the diagnostic scan tool, monitor the RFA module PID FL_LK_BUT or FR_LK_BUT.
Does the PID show activity?
Yes
GO to R5
No
INSTALL a new outside front door handle. REFER to: Outside Front Door Handle (501-14 Handles, Locks, Latches and Entry Systems, Removal and Installation).
R5 CHECK THE OUTSIDE DOOR HANDLE LOCK/UNLOCK SWITCH INPUT CIRCUIT FOR A SHORT TO GROUND
Ignition OFF.
Disconnect the RFA module C3503B.
Action: Click to display the connectors
Left front door handle
Positive lead
Measurement/Action
Negative lead
C543-4
Ground
Click to display the connectors
Right front door handle
Positive lead
Measurement/Action
Negative lead
C634-4
Ground
Is the resistance greater than 10000 Ohms?
Yes
GO to R13
No
REPAIR the circuit.
R6 FRONT OUTSIDE DOOR HANDLE ISOLATION
Ignition OFF.
Disconnect the suspect outside front door handle.
For the suspect outside door handle, connect: Click to display connectors
Left front outside door handle
Lead 1
Measurement/Action
Lead 2
C543-4
C543-7
Click to display the connectors
Right front outside door handle
Lead 1
Measurement/Action
Lead 2
C634-4
C634-7
The ignition is on.
Using the diagnostic scan tool, monitor the RFA module PID FL_LK_BUT or FR_LK_BUT.
Does the PID show activity?
Yes
REMOVE the fusible link. INSTALL a new outside front door handle. REFER to: Outside Front Door Handle (501-14 Handles, Locks, Latches and Entry Systems, Removal and Installation).
No
REMOVE the fusible link. GO to R7.
R7 CHECK THE FRONT OUTSIDE DOOR HANDLE GROUND CIRCUIT FOR AN OPEN
Ignition OFF.
For the suspect exterior door handle, measure: Click to display connectors
Left front outside door handle
Positive lead
Measurement/Action
Negative lead
C543-7
Ground
Click to display the connectors
Right front outside door handle
Positive lead
Measurement/Action
Negative lead
C634-7
Ground
Is the resistance less than 3 ohms?
Yes
GO to R8
No
REPAIR the circuit.
R8 CHECK THE FRONT DOOR EXTERIOR HANDLE LOCK/UNLOCK INPUT CIRCUIT FOR AN OPEN
Disconnect the RFA module C3503B.
For the suspect exterior door handle, measure: Click to display connectors
Left front outside door handle
Positive lead
Measurement/Action
Negative lead
C543-4
C3503B-12
Click to display the connectors
Right front outside door handle
Positive lead
Measurement/Action
Negative lead
C634-4
C3503B-11
Is the resistance less than 3 ohms?
Yes
GO to R13
No
REPAIR the circuit.
R9 CHECK THE EXTERIOR DOOR HANDLE INTERNAL ANTENNA
Ignition OFF.
Disconnect the suspect outside front door handle.
For the suspect exterior door handle, measure:
Positive lead
Measurement/Action
Negative lead
C543, pin 2, component side
C543, pin 3, component side
C634, pin 2, component side
C634, pin 3, component side
Is the resistance between 3 and 5 ohms?
Yes
GO to R10, REPAIR the faulty circuit.
No
INSTALL a new exterior door handle. REFER TO: Front Door Exterior Handle (501-14 Door Handles, Locks, Latches and Entry Systems, Removal and Installation).
R10 CHECK THE EXTERIOR DOOR HANDLE ANTENNA CIRCUITS FOR A SHORT TO VOLTAGE
Disconnect the RFA module C3503E.
The ignition is on.
For the suspect exterior door handle, measure: Click to display connectors
Left front outside door handle
Positive lead
Measurement/Action
Negative lead
C543-2
Ground
C543-3
Ground
Click to display the connectors
Right front outside door handle
Positive lead
Measurement/Action
Negative lead
C634-2
Ground
C634-3
Ground
Is there voltage present?
Yes
REPAIR the faulty circuit.
No
GO to R11
R11 CHECK THE EXTERIOR DOOR HANDLE ANTENNA CIRCUITS FOR A SHORT TO GROUND
Ignition OFF.
For the suspect exterior door handle, measure: Click to display connectors
Left front outside door handle
Positive lead
Measurement/Action
Negative lead
C543-2
Ground
C543-3
Ground
Click to display the connectors
Right front outside door handle
Positive lead
Measurement/Action
Negative lead
C634-2
Ground
C634-3
Ground
Is the resistance greater than 10000 ohms?
Yes
GO to R12
No
REPAIR the faulty circuit.
R12 CHECK THE EXTERIOR DOOR HANDLE ANTENNA CIRCUITS FOR AN OPEN
For the suspect exterior door handle, measure: Click to display connectors
Left front outside door handle
Positive lead
Measurement/Action
Negative lead
C543-2
C3503E-8
C543-3
C3503E-1
Click to display the connectors
Right front outside door handle
Positive lead
Measurement/Action
Negative lead
C634-2
C3503E-10
C634-3
C3503E-3
Is the resistance less than 3 ohms?
Yes
INSTALL a new front door exterior handle. REFER TO: Front Door Exterior Handle (501-14 Door Handles, Locks, Latches and Entry Systems, Removal and Installation). VERIFY the system operates correctly. If the concern persists, GO to R13.
No
REPAIR the faulty circuit.
R13 CHECK THE RFA (REMOTE FUNCTION ACTUATOR) MODULE FOR PROPER OPERATION
Disconnect and inspect all RFA module connectors.
Repair:
corrosion (install new connectors or terminals - clean the module contacts)
damaged or bent pins - install new terminal pins
pushed-out pins - install new pins as necessary
Reconnect the RFA module connectors and make sure they are properly seated and latched.
Operate the system and determine if the concern is still present.
Is the concern still present?
Yes
CHECK OASIS for any applicable Technical Service Bulletins (TSBs). If a TSB exists for this condition, STOP this test and FOLLOW the TSB instructions. If no TSB applies to this concern, INSTALL a new RFA module. REFER TO: Remote Function Actuator (RFA) Module (419-10 Multifunction Electronic Modules, Removal and Installation).
No
The system is currently operating correctly. The concern may have been caused by module connections. ADDRESS the root cause of any connector or terminal issues.
Passive entry to the liftgate/trunk lid does not operate
For circuit and connector information, refer to Wiring Diagrams Cell 117.
Normal Operation and Fault Symptoms
Refer to: Door Handles, Locks, Latches and Entry Systems - System Operation and Component Description (501-14 Door Handles, Locks, Latches and Entry Systems, Description and Operation).
RFA Module DTC Setting Conditions
Trouble Code
Description
Fault Trigger Conditions
B10K6:1F
Exterior Backbone Antenna: Intermittent Circuit
Set when the RFA module detects an open or short circuit in one of the rear antenna circuits of the passive entry system.
Possible Causes
Wiring, Terminals or Connectors
Rear Passive Entry Antenna
RFA module
PINPOINT TEST S: PASSIVE ENTRY LIFTGATE/DECKLID FUNCTION DOES NOT WORK
S1 CHECK THE LIFTGATE/TRUNK LID LATCH RELEASE
The ignition is on.
Unlock the doors using the interior door lock control switch.
Press the liftgate/trunk lid release button located at the rear of the vehicle.
Does the liftgate/trunk lid latch release?
Yes
GO to S2
No
GO to Pinpoint Test M
S2 CHECK RKE (REMOTE KEYLESS ENTRY) OPERATION
Close the liftgate/trunk lid.
Press the liftgate/trunk lid release button on the key twice.
Does the liftgate/trunk lid latch release?
Yes
GO to S3
No
GO TO Pinpoint Test O
S3 CHECK THE LIFTGATE/TRUNK LID UNLATCH SWITCH (TR_UNLK_H_SW) PID (PARAMETER IDENTIFICATION)
The ignition is on.
Using the diagnostic scan tool, view the RFA module parameter identifications (PIDs).
Using the diagnostic scan tool, monitor the RFA module TR_UNLK_H_SW PID.
Press and release the liftgate/trunk lid unlatch button.
Does the PID read correctly when the liftgate/trunk lid release switch is pressed?
Yes
GO to S5
No
GO to S4
S4 CHECK THE LIFTGATE/TRUNK LID SWITCH INPUT CIRCUIT FOR AN OPEN
Ignition OFF.
Disconnect the liftgate/tailgate open switch C4224.
Disconnect the RFA module C3503B.
Action: Click to display the connectors
Positive lead
Measurement/Action
Negative lead
C4224-3
C3503B-9
Is the resistance less than 3 ohms?
Yes
GO to S9
No
REPAIR the circuit.
S5 CHECK THE REAR PASSIVE ENTRY ANTENNA
Ignition OFF.
Disconnect the rear passive entry antenna C4082.
Action:
Positive lead
Measurement/Action
Negative lead
C4082 pin 1, component side
C4082 pin 2, component side
Is the resistance between 3 and 5 ohms?
Yes
INSTALL a new rear keyless entry antenna. REFER TO: Rear Keyless Entry Antenna (501-14 Door Handles, Locks, Latches and Entry Systems, Removal and Installation).
No
GO to S6
S6 CHECK THE REAR PASSIVE ENTRY ANTENNA CIRCUITS FOR A SHORT TO VOLTAGE
Disconnect the RFA module C3503E.
The ignition is on.
Action: Click to display the connectors
Positive lead
Measurement/Action
Negative lead
C4082-1
Ground
C4082-2
Ground
Is there voltage present?
Yes
REPAIR the faulty circuit.
No
GO to S7
S7 CHECK THE REAR PASSIVE ENTRY ANTENNA CIRCUITS FOR A SHORT TO GROUND
Ignition OFF.
Action: Click to display the connectors
Positive lead
Measurement/Action
Negative lead
C4082-1
Ground
C4082-2
Ground
Is the resistance greater than 10000 ohms?
Yes
GO to S8
No
REPAIR the faulty circuit.
S8 CHECK THE REAR PASSIVE ENTRY ANTENNA CIRCUITS FOR AN OPEN
Action: Click to display the connectors
Positive lead
Measurement/Action
Negative lead
C4082-1
C3503E-16
C4082-2
C3503E-7
Is the resistance less than 3 ohms?
Yes
INSTALL a new rear passive entry antenna. REFER TO: Passive Entry Rear Antenna (501-14 Door Handles, Locks, Latches and Entry Systems, Removal and Installation). VERIFY the system operates correctly. If the concern persists, GO to S9.
No
REPAIR the faulty circuit.
S9 CHECK THE RFA (REMOTE FUNCTION ACTUATOR) MODULE FOR PROPER OPERATION
Disconnect and inspect all RFA module connectors.
Repair:
corrosion (install new connectors or terminals - clean the module contacts)
damaged or bent pins - install new terminal pins
pushed-out pins - install new pins as necessary
Reconnect the RFA module connectors and make sure they are properly seated and latched.
Operate the system and determine if the concern is still present.
Is the concern still present?
Yes
CHECK OASIS for any applicable Technical Service Bulletins (TSBs). If a TSB exists for this condition, STOP this test and FOLLOW the TSB instructions. If no TSB applies to this concern, INSTALL a new RFA module. REFER TO: Remote Function Actuator (RFA) Module (419-10 Multifunction Electronic Modules, Removal and Installation).
No
The system is currently operating correctly. The concern may have been caused by module connections. ADDRESS the root cause of any connector or terminal issues.
?
Test yourself
A quick Ford Fiesta quiz: every answer comes with an explanation and a link to the manual page.


 Smart Keyless Entry Relay, Cavity 3
 C543, pin 2, component side
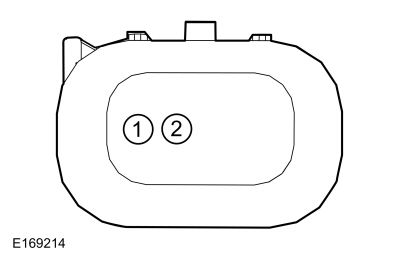 C4082 pin 1, component side