Brake System
Rear disc brake repair procedures
In this manual: Brake System
41steps
~251min
5/5difficulty
1special tools
Done 0 of 41
Removal
- Loosen the wheel nuts slightly. Raise the vehicle and make sure it is securely supported.
- Remove the rear wheel and tire (A) from the front hub.
Tightening torque: 107.9 - 128 N·m
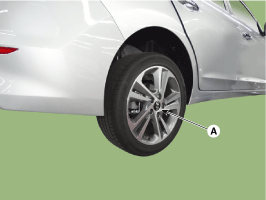

- Be careful not to damage the hub bolts when removing the rear wheel and tire (A).
- Remove the parking brake cable fixing clip (A).
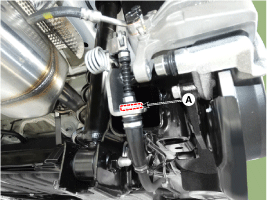
- Pull the wrench in the direction shown by the arrow below to loosen the cable. Then remove the parking brake cable (A).
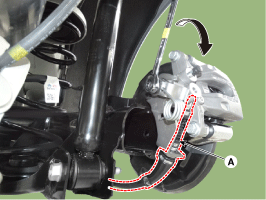
- Loosen the guide rod bolt (B) and swing the caliper body (A) upward so that it does not interfere.
Tightening torque: 21.6 ~ 31 N·m
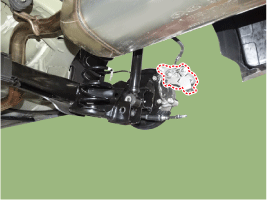
- Remove the pad return spring (A).
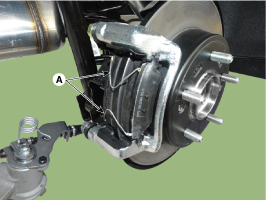
- Separate the brake pad (A) and the pad retainer (B).
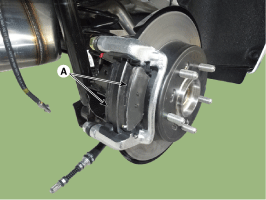
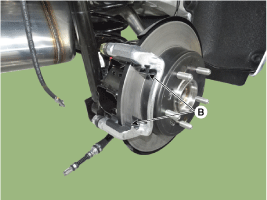
- Loosen the caliper mounting bolts and remove the rear caliper assembly (A).
Tightening torque: 63.7 ~ 74 N·m
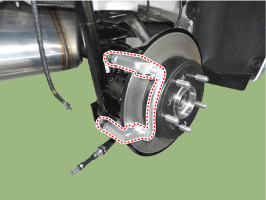
- Remove the rear brake disc by loosening the screws.
Tightening torque: 4.9 - 5.9 N·m
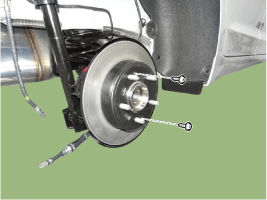
Replacement
Brake pad replacement- Remove the parking brake cable fixing clip (A).
- Pull the wrench in the direction shown by the arrow below to loosen the cable, then remove the parking brake cable (A).
- Loosen the guide rod bolt (B) and swing the caliper body (A) upward so that it does not interfere.
Tightening torque: 21.6 ~ 31 N·m
- Remove the pad return spring (A).
- Replace the brake pad (A) and the pad retainer.
- Install the pad return spring (A).
- Pad return springs must be replaced with new ones every time the pads are replaced.
- Technicians must be careful not to deform the pad return springs.
- Deformed pad return springs may cause improper braking and increased fuel consumption.
- Use SST (09580-0U000) when installing the brake caliper assembly.
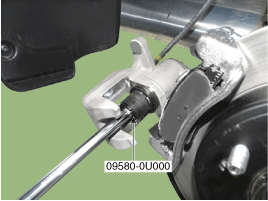
- Install the caliper body (A), then tighten the guide rod bolt (B).
Tightening torque: 21.6 ~ 31 N·m
- Pull the wrench in the direction shown by the arrow below to loosen the cable, then remove the parking brake cable (A).
- Install the parking brake cable fixing clip (A).
Inspection
Rear brake disc thickness inspection
- Inspect the brake pads for wear and discoloration.
- Inspect the brake disc for damage and cracks.
- Remove all rust and contamination from the surface and measure the disc thickness at at least 8 points spaced equally (5 mm) from the outer edge of the brake disc. Brake disc thickness Standard: 10 mm (0.394 in.) Maximum operating limit: 8.4 mm (0.331 in.) Runout: less than 0.005 mm (0.0002 in.)
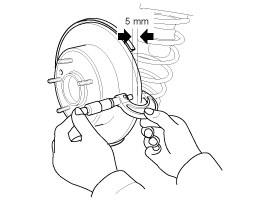
- If wear exceeds the limit, replace the discs and pads as a set on both the left and right sides of the vehicle.
Rear brake pad inspection
- Inspect the pad wear. Measure the pad thickness and replace the pad if it is less than the specified value. Pad thickness Standard: 10 mm (0.394 in.) Maximum operating limit: 2.0 mm (0.0787 in.)
- Check the pad and metal backing for damage and grease contamination.
Rear brake disc runout inspection
- Position a dial indicator approximately 5 mm (0.2 in.) from the outer edge of the brake disc and measure the disc runout.
Brake disc runout Limit: 0.04 mm (0.0016 in.) or less (new)
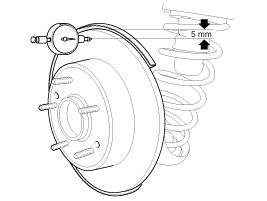
- If brake disc runout exceeds the limit, replace the disc, then measure the runout again.
- If runout exceeds the specification, install the brake disc rotated 180°, then inspect the brake disc runout again.
- If runout cannot be corrected by changing the brake disc position, replace the brake disc.
Installation
- To install, reverse the removal procedure.
- Use SST (09580-0U000) when installing the brake caliper assembly.
- Screw the piston into the caliper body until it is fully retracted.
- Do not use any power tools for this task.
- After installation, bleed the brake system. (Refer to Brake System - "Brake Bleeding") (Refer to Brake System - "ABS Bleeding") (Refer to Brake System - "ESP Bleeding")
Parking brake adjustment
|
- Remove the floor console to access the adjusting nut.
- Loosen the parking brake cable until both operating levers stop in the fully released position.
- Bring the brake pads into operating position by depressing the brake pedal several times until resistance is felt.
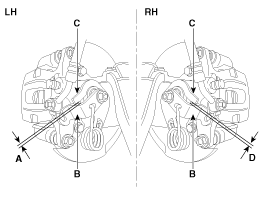
- Tighten the parking brake cable by turning the adjusting nut until the operating levers on both calipers lift from the stopper upward by distances (A) and (D) between the operating lever (B) and the stopper (C).
Distance (A+D): Max. 3 mm (0.12 in.)
- Install the floor console.
- The parking brake lever in the vehicle must be in the fully released position.
- If the parking brake cables have been replaced, apply the parking brake with maximum force several times to stretch the parking brake cables, then adjust as described above.
- Check that the wheels turn freely.
- Road test.
Test yourself
A quick Hyundai Elantra AD quiz: every answer comes with an explanation and a link to the manual page.
Was this page helpful?