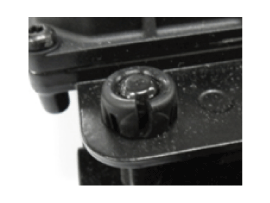
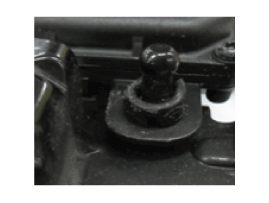
Remove the bumper. (Refer to Body – "Front Bumper")
Disconnect the connector from the Smart Cruise Control Unit.
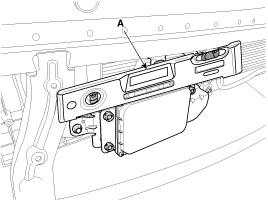
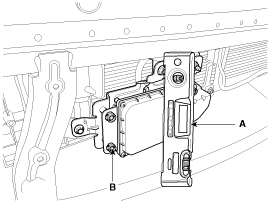
Remove the Smart Cruise Control Unit (A) from the vehicle after loosening the mounting bolts.
Installation
Install in the reverse order of removal.
When installing the sensor, align the sensor direction with the vehicle's direction of travel and adjust the upper part of the sensor horizontally using a level (A).
Align the Smart Cruise Control sensor. (Refer to "Smart Cruise Control Sensor Alignment")
Install the bumper cover. (Refer to Body - "Front Bumper Cover")
Smart Cruise Control (SCC) Sensor Alignment
The purpose of alignment is to ensure proper SCC performance. For the sensor to operate correctly, the sensor must be accurately aligned. Sensor alignment has a major effect on road recognition, lane prediction and target processing. When the sensor is misaligned, SCC performance cannot be guaranteed. Therefore, if the sensor needs to be reinstalled or a new sensor is installed on the vehicle, the sensor must be aligned by service personnel.
The sensor must be aligned when:
Sensor is reinstalled after removal
A new sensor is installed on the vehicle.
Sensor or adjacent parts are affected by a collision.
The sensor cannot detect the vehicle ahead.
The sensor cannot detect the vehicle ahead.
Remove heavy items, such as luggage in the trunk, from the vehicle.
Check the wheel alignment.
Check the sensor cover for contamination.
The radar sensor must be aligned in the vertical and horizontal directions. Vertical alignment should be performed using a level/inclinometer, and horizontal alignment should be performed while driving on the road.
To maintain a horizontal position between the vehicle and the ground, park the vehicle on a lift or on a level surface.
Remove the front bumper cover. (Refer to Body - "Front Bumper Cover")
Check the vertical alignment of the sensor using a level/inclinometer. (Tolerance: within ±1.25°) If the vertical angle of the sensor is outside the tolerance, turn the adjusting screw (B) to adjust it within the tolerance.
For vertical alignment of the sensor, use a digital inclinometer for greater accuracy. If not available, a bubble-type level gauge can be used.
Install the bumper cover. (Refer to Body - "Front Bumper Cover")
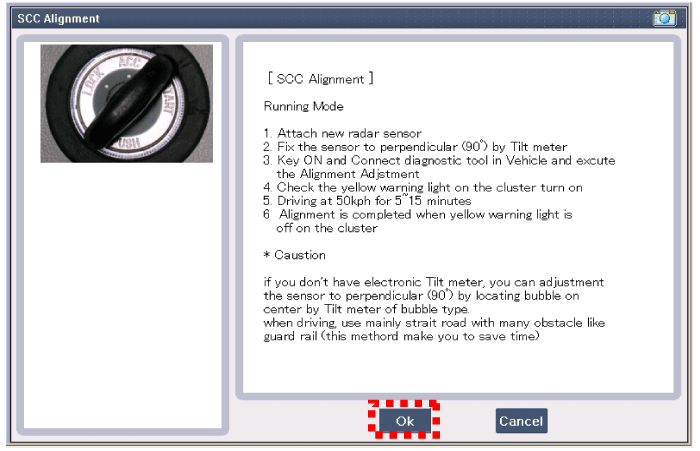
To perform horizontal alignment of the sensor, connect GDS after starting the engine and select "SCC Alignment".
Erase the DTC before performing the sensor alignment procedure.
Select "Driving Mode" to start sensor alignment.
Drive the vehicle after alignment is started on the GDS. Make sure the red indicator in the instrument cluster is illuminated.
Sensor alignment will continue for approximately 5~15 minutes. Depending on traffic or road conditions, the duration of the procedure may be shortened or lengthened. To complete the alignment in the minimum time, if possible, drive the vehicle under the following road conditions.
To shorten the alignment duration:
Drive at a speed above 65 km/h.
Drive on a straight road without curves or grades.
Drive on a thick, wide asphalt road.
Drive on a road with repetitive stationary targets.
Drive on a dry road in good condition without rain or snow.
The alignment process may be interrupted if any of the following conditions occur:
When the vehicle encounters a curve with a radius of less than 100 m (328.0 ft).
Drive below the minimum required speed or stop (waiting at a red light, etc.).
When the vehicle is in a tunnel or under an overpass.
When excessive steering wheel movements occur, such as turning right or left or sudden lane changes.
Drive on a road with several repetitive stationary targets.
When driving the vehicle for sensor alignment, observe the following:
Observe the speed limits on the road.
Do not excessively follow previous driving/road conditions to shorten the alignment duration. Drive the vehicle safely while considering road conditions.
Do not operate the GDS while driving and do not look at the GDS display for a long time. You may lose focus on steering control.
Operate the GDS only when the vehicle is stopped.
After sensor alignment is completed, the indicator light in the instrument cluster turns off.
If sensor alignment is not completed, check the horizontal angle using the GDS. If the vertical angle of the sensor is outside ±3°, inspect the rear beam or mounting area. If there are no deviations, replace the SCC Unit with a new one. After replacing the SCC Unit with a new one, perform sensor alignment again.
Inspection
Inspection Procedures for Smart Cruise Control System Malfunction
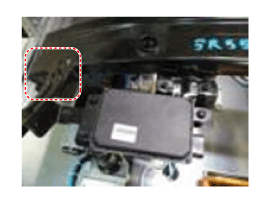
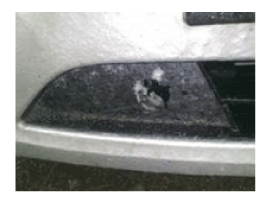
Check the bumper appearance and accident history. (Vehicle appearance, service history and bumper replacement) > If the vehicle has been in an accident, there is a high probability that the SCC mounting part is twisted. [Alignment problem cases caused by minor collision][Normal condition][Poor condition]
Check whether the radar sensor cover on the bumper is contaminated. > If the cover is contaminated, SCC is likely to be cancelled by foreign matter during operation. [Cases caused by snow spots]
After starting the engine, check the SCC warning message in the cluster and the DTC. (Refer to Trouble Code Manual)
?
Test yourself
A quick Hyundai Genesis DH quiz: every answer comes with an explanation and a link to the manual page.