Engine Mechanical System
Timing Chain Cover Repair Procedures
In this manual: Engine Mechanical System
20steps
~120min
4/5difficulty
Done 0 of 20
DEPOSIT
- Disconnect the negative battery cable.
- Remove the engine cover. (Refer to Engine and Transaxle - "Engine Cover")
- Remove the right front wheel. (Refer to Suspension System - "Wheel")
- Remove the engine undercover. (Refer to Engine and Transaxle Assembly - "Engine Undercover")
- Remove the drive belt. (Refer to Valve Timing System - "Drive Belt")
- Remove the alternator (Refer to Engine Electrical System - "Alternator").
- Remove the thermostat housing. Refer to Cooling System - "Thermostat".
- Remove the tensioner pulley. (Refer to Timing System - "Tensioner Pulley")
- Remove the water pump. (Refer to Cooling System - "Water Pump".)
- Remove the crankshaft damper pulley. (Refer to Timing System - "Crankshaft Damper Pulley")
- Remove the cylinder head cover. (Refer to Cylinder Head - "Cylinder Head Cover")
- Remove the crankshaft position sensor (CKPS). (Refer to Engine Control System - "Crankshaft Position Sensor")
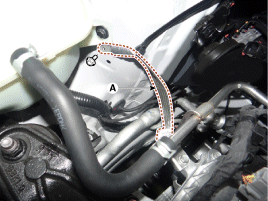
- Remove the upper bracket (A) of the warm-up catalytic converter (WCC).
Tightening torque: 18.6~24 N·m

- Disconnect the engine ground cable (A).
Tightening torque: 10.8 ~ 13.7 N·m
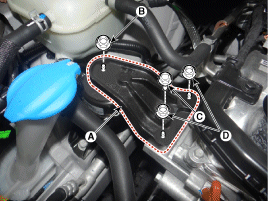
- Remove the engine mount bracket (A). Tightening torque: Nut (B): 88.2 ~ 108 N·m Bolt (C) and nuts (D): 58.8 ~ 74 N·m
- Remove the oil level gauge. (Refer to Lubrication System - "Oil Level Gauge and Tube")
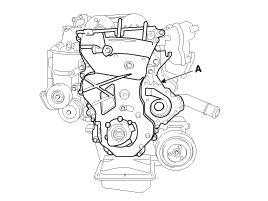
- Remove the timing chain cover (A).
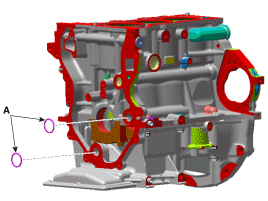
- Remove the O-ring (A) from the ladder frame and cylinder block.
REMEDY
- Install the timing chain cover.
- There must be no engine oil or other contaminants on the seal contact areas of the timing chain cover and the mating surfaces (cylinder head, cylinder block).
- Before installing the timing chain cover, apply liquid sealant to the joint between the cylinder head and cylinder block. Assemble the part within 5 minutes after applying the sealant.
Bead width: 4.0 mm (0.16 in.)
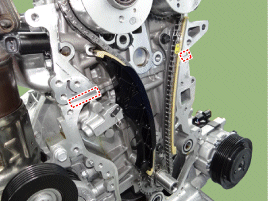
- After applying liquid sealant to the timing chain housing, install the gasket within 5 minutes. Sealant must be applied continuously to each area listed below. Bead width A: 1.5~2.5 mm (0.06~0.10 in.) B: 2.5~3.5 mm (0.09~0.14 in.) C: 3.0~4.0 mm (0.12~0.16 in.)
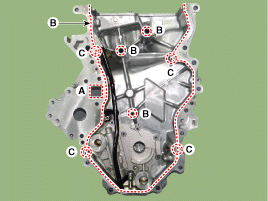
- Use the locating pins on the cylinder block and the holes in the timing chain cover as guides to install the timing chain cover in the correct position. Tightening torque: B: 9.8 ~ 11.8 N·m - 1 piece A: 18.6 ~ 24 N·m - 12 pieces C: 44.1 ~ 54 N·m - 3 pieces

- Install the remaining parts in the reverse order of removal.
Test yourself
A quick Hyundai i20 quiz: every answer comes with an explanation and a link to the manual page.
Was this page helpful?