Engine Mechanical System
Timing Chain Repair Procedures
In this manual: Engine Mechanical System
15steps
~90min
4/5difficulty
Done 0 of 15
DEPOSIT
- Turn the crankshaft damper pulley and align its groove with the alignment mark on the timing chain cover to set the No. 1 piston to top dead center on the compression stroke.

- Remove the timing chain cover. (Refer to Timing System - "Timing Chain Cover")
- Before removing the timing chain, make alignment marks on the timing chain at the sprocket positions, because the TDC mark on the chain may be reset.

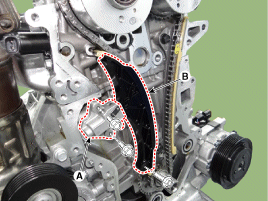
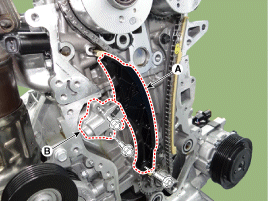
- Remove the automatic timing chain tensioner (A), then remove the tensioner arm (B).
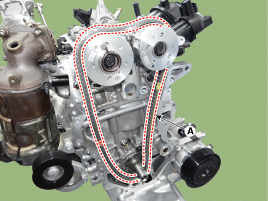
- Remove the timing chain (A).
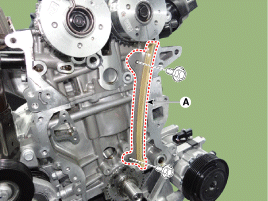
- Remove the timing chain guide (A).
Inspection
- Inspect the tensioner arm and chain guide for abnormal wear, cracks, or damage. Replace if necessary.
- Make sure the tensioner plunger moves freely.
REMEDY
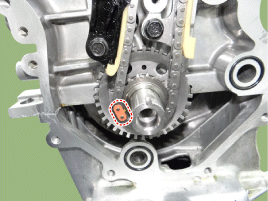
- Position the crankshaft pin (A) at approximately 3° from the vertical centerline. The No. 1 cylinder piston is then at top dead center on the compression stroke.

- Align the timing marks of the exhaust camshaft sprocket and CVVT on the upper surface of the cylinder head. The No. 1 cylinder piston is then at top dead center on the compression stroke.

- Install the timing chain guide (A).
Tightening Torque: 18.6 ~ 22 N·m
- Install the timing chain "A".
- Install the timing chain tensioner arm (A) and timing chain tensioner (B), then remove the stopper pin.
Tightening torque: 9.8–11.8 N·m
- After rotating the crankshaft 2 turns in the normal direction (clockwise when viewed from the front), check the timing marks.
- Install the remaining parts in the reverse order of removal.
Test yourself
A quick Hyundai i20 quiz: every answer comes with an explanation and a link to the manual page.
Was this page helpful?