Engine Control System/Fuel System
Alternator Repair Procedures
In this manual: Engine Control System/Fuel System
24steps
~149min
5/5difficulty
1special tools
Done 0 of 24
Removal
- Turn the ignition switch OFF and disconnect the negative (-) battery terminal.
- Disconnect the generator "B" terminal (A) after loosening the nut.
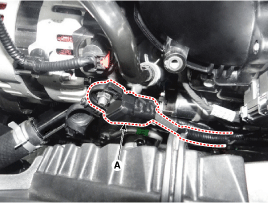
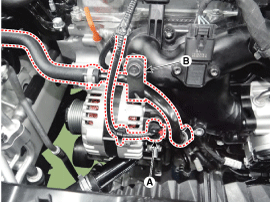
- Disconnect the alternator connector (A).
- Release the coolant hose bracket (B) after loosening the mounting bolt.
- Remove the engine room cover. (Refer to Engine Mechanical System - "Engine Room Cover")
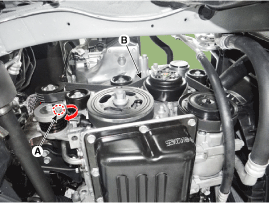
- Using a hex key, loosen the tensioner (A) by turning it clockwise.
- Remove the drive belt (B).
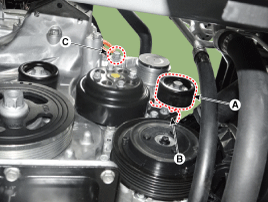
- Remove the pulley (A) after loosening the lock bolt.
- Remove the generator mounting bracket (B) after loosening the lower mounting bolts.
- Remove the upper alternator mounting bolt (C).
- Remove the alternator (A).
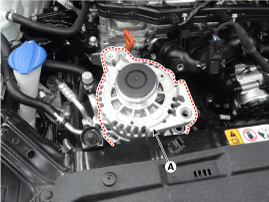
Installation
- Install in the reverse order of removal. Generator upper mounting bolt: 29.4–41 N·m Generator lower mounting bolt: 21.6–32 N·m
Disassembly
- Remove the rear cover (A).
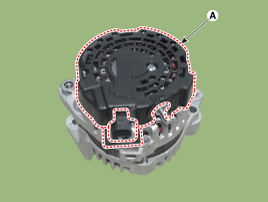
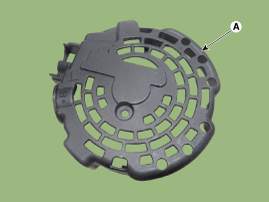
- Remove after loosening the mounting bolts.
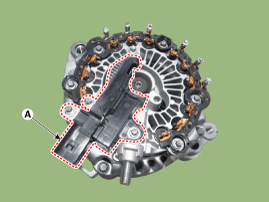
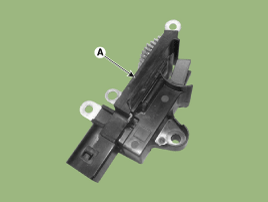
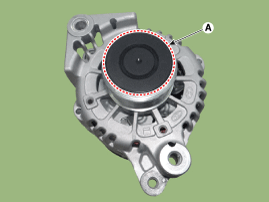
- Remove the OAP cover (A).
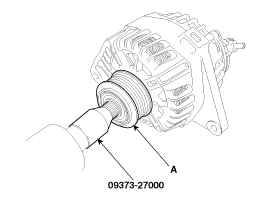
- Using SST (09373-27000), remove the OAP pulley (A).
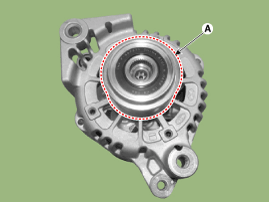
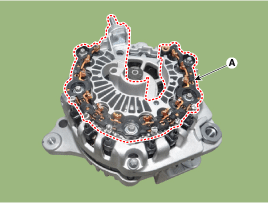
- Remove the rectifier assembly (A) after disconnecting the stator wires.
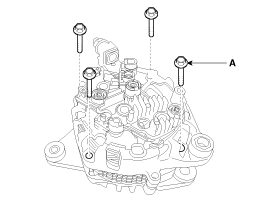
- Loosen the through bolts (A).
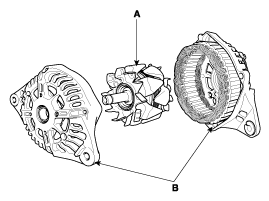
- Separate the rotor (A) and housing (B).
Inspection
[Rotor]- Check the slip rings (C) for continuity.
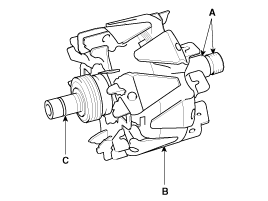
- Make sure there is no continuity between the slip rings and the rotor (B) or the rotor shaft (A).
- If the rotor fails the continuity check, replace the generator.
- Check for continuity between each pair of wires (A).
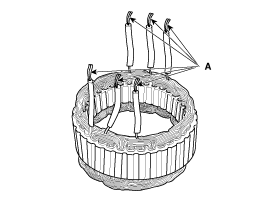
- Make sure there is no continuity between each terminal and the coil core.
- If the coil fails the continuity check, replace the generator.
Installation
- Assemble in the reverse order of disassembly.
Test yourself
A quick Hyundai Kona quiz: every answer comes with an explanation and a link to the manual page.
Was this page helpful?