Brake System
Front Disc Brake Repair Procedures
In this manual: Brake System
25steps
~155min
5/5difficulty
1special tools
Done 0 of 25
Removal
- Loosen the wheel nuts slightly. Raise the vehicle and make sure it is securely supported.
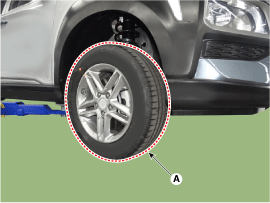
- Remove the front wheel and tire (A) from the front hub.
Tightening torque: 107.9–128 N·m
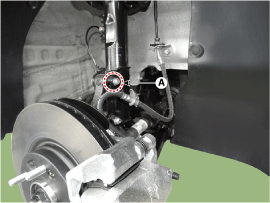
- Remove the brake hose bracket bolt (A).
Tightening torque: 8.8–13.7 N·m
- Loosen the brake hose bolt (A) from the caliper, separating the brake hose.
Tightening torque: 24.5–29 N·m
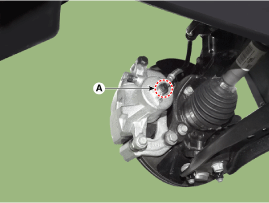
- Remove the caliper body (A) by loosening the guide rod bolt.
Tightening Torque: 21.6–31 N·m
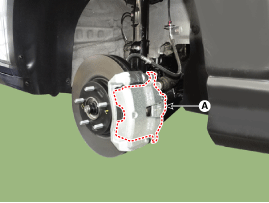
- Remove the pad return spring (A).
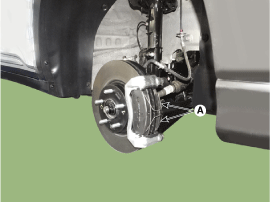
- Remove the brake pad (A).
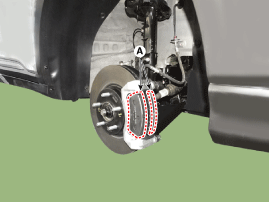
- Remove the pad retainer (A).
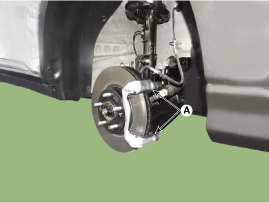
- Remove the caliper support (A) by loosening the caliper mounting bolts.
Tightening torque: 78.5–98 N·m
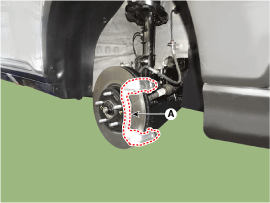
- Remove the front brake disc (A) by loosening the screws.
Tightening torque: 4.9–5.8 N·m
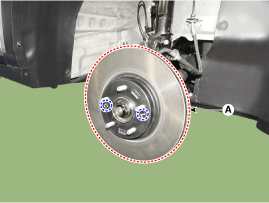
Replacement
Guide Rod Pin and Boot- Loosen the wheel nuts slightly. Raise the vehicle and make sure it is securely supported.
- Remove the front wheel and tire (A) from the front hub.
Tightening torque: 107.8–127 N·m
- Remove the caliper body (A) by loosening the guide rod bolt.
- Replace the guide rod pin boot (A) with a new one.
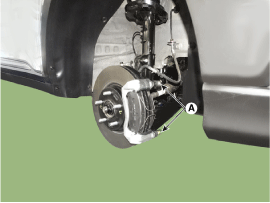
- Install the caliper body (A), then tighten the guide rod bolt.
Tightening Torque: 21.6–31 N·m
- Install the front wheel and tire (A).
Tightening torque: 107.8–127 N·m
Installation
- To install, reverse the removal procedure.
- Use SST (09581-2T100) when installing the brake caliper assembly.
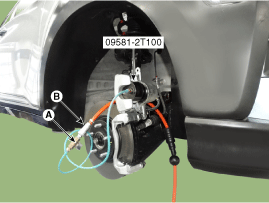
- After installation, bleed the brake system. (Refer to Brake System - "Brake Bleeding") (Refer to Brake System - "ABS Bleeding") (Refer to Brake System - "ESP Bleeding")
Inspection
Front Brake Disc Thickness Inspection- Inspect the brake disc for damage and cracks.
- Remove all rust and contamination from the surface and measure the disc thickness at no fewer than 8 points at equal distances (5 mm) from the outer edge of the brake disc. Front brake disc thickness - 15 inch Standard: 23.0 mm (0.90 in) - 15 inch Service limit: 21.4 mm (0.84 in) - 16 inch Standard: 25.0 mm (0.98 in) - 16 inch Service limit: 23.0 mm (0.90 in) - 17 inch Standard: 28.0 mm (1.10 in) - 17 inch Service limit: 26.4 mm (1.04 in) Deviation: Less than 0.005 mm (0.0002 in)
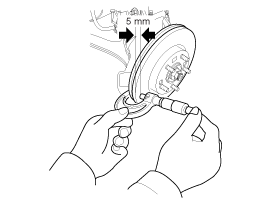
- If wear exceeds the service limit, replace the discs and pads as a set, left and right of the vehicle.
- Position the dial indicator approximately 5 mm (0.2 in) from the outer edge of the brake disc and measure the disc runout.
Brake disc runout Limit: 0.04 mm (0.0016 in) or less (new)
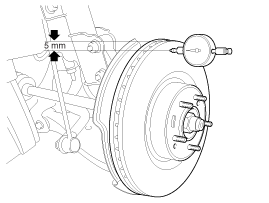
- If brake disc runout exceeds the limit, replace the disc, then measure the runout again.
- If runout cannot be corrected by changing the position of the brake disc, replace the brake disc.
Test yourself
A quick Hyundai Kona quiz: every answer comes with an explanation and a link to the manual page.
Was this page helpful?