Inspect and adjust the valve clearance with the engine cold (engine coolant temperature: 20 °C) and the cylinder head installed on the cylinder block.
Remove the cylinder head cover. (Refer to Cylinder Head Assembly - Cylinder Head Cover)
Set the No. 1 cylinder to TDC/compression.
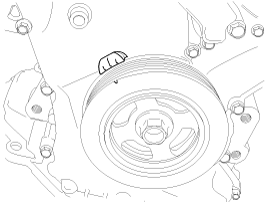
Turn the crankshaft pulley clockwise and align its groove with the "T" alignment mark on the lower timing chain cover.
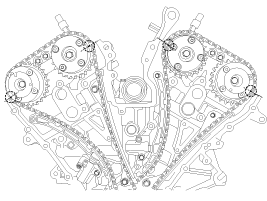
Make sure the camshaft sprocket mark is in a straight line with the cylinder head surface, as shown in the illustration. If not, turn the crankshaft clockwise one revolution (360°).
Do not turn the engine counterclockwise.
Inspect the valve clearance.
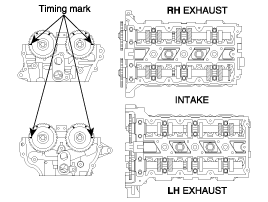
With the No. 1 cylinder at TDC, check the clearance only on the valves shown in the illustration below.Measurement method.
a.
Using a feeler gauge, measure the clearance between the tappet and the camshaft base circle.
b.
Record the valve clearance measurements that are out of specification. They will be used later to determine the required tappet replacement.
Valve clearance (engine coolant temperature: 20 °C [68°F]) [Specification] Intake: 0.17 ~ 0.23 mm (0.0067 ~ 0.0090 in) Exhaust: 0.27 ~ 0.33 mm (0.0106 ~ 0.0129 in)
Turn the crankshaft pulley clockwise one full revolution (360°) and align the groove with the "T" timing mark on the lower timing chain cover.
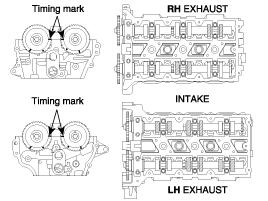
With No. 4 cylinder at TDC, check only the valves shown in the illustration below. (Refer to step 1 of the procedure.)
Adjust the intake and exhaust valve clearance.
Set the No. 1 cylinder to TDC/compression.
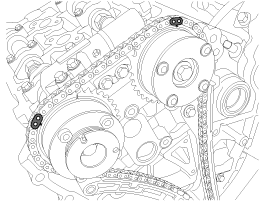
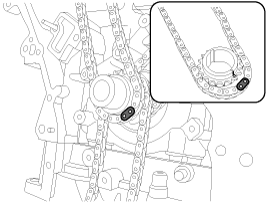
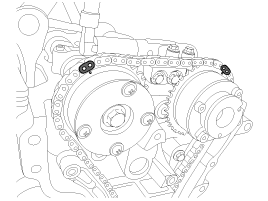
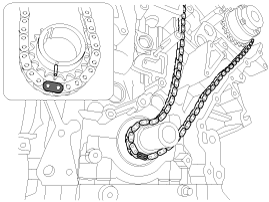
Remove the timing chain.
Before removing the timing chain, mark the right/left timing chain according to the sprocket position, because the TDC identification mark on the chain may be worn off.
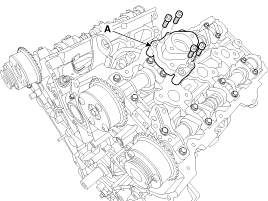
Remove the fuel pump bracket (A).
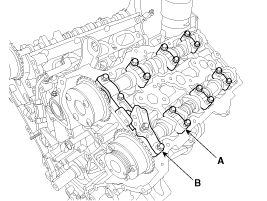
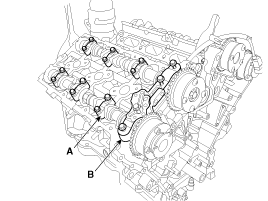
Remove the left/right camshaft bearing cap (A) and the thrust bearing cap (B).
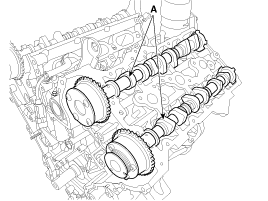
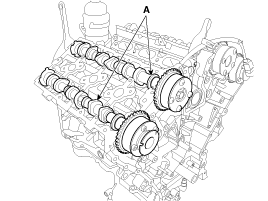
Remove the left/right camshaft assembly (A).
Remove the tappets.
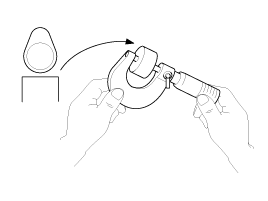
Measure the thickness of the removed tappet using a micrometer.
Calculate the thickness of the new tappet so that the valve clearance meets the specified value. T: Thickness of the removed tappet. A: Measured valve clearance. N: Thickness of the new tappet. Intake: N = T + [A - 0.20 mm (0.0079 in.)] Exhaust: N = T + [A - 0.30 mm (0.0118 in.)]
Select a new tappet with a thickness as close as possible to the calculated value.
Tappets are available in 41 sizes in 0.015 mm (0.0006 in.) increments from 3.00 mm (0.118 in.) to 3.600 mm (0.1417 in.).
Install the new tappet into the cylinder head.
Apply engine oil to the selected tappet on the side and top surface.
Install the intake and exhaust camshafts.
Install the bearing caps. (Refer to Cylinder Head Assembly – "CVVT and Camshaft")
Install the timing chain. (Refer to Timing System - Timing Chain)
Turn the crankshaft two revolutions in the normal direction of rotation (clockwise) and align the timing marks on the crankshaft and camshaft sprockets.
Recheck the valve clearance. Valve clearance (engine coolant temperature: 20 °C [68°F]) [Specification] Intake: 0.17 ~ 0.23 mm (0.0067 ~ 0.0090 in.) Exhaust: 0.27 ~ 0.33 mm (0.0106 ~ 0.0129 in.)
?
Test yourself
A quick Kia Cadenza VG Owner's Manual quiz: every answer comes with an explanation and a link to the manual page.