Air cleaner
Components and Component Location
Components
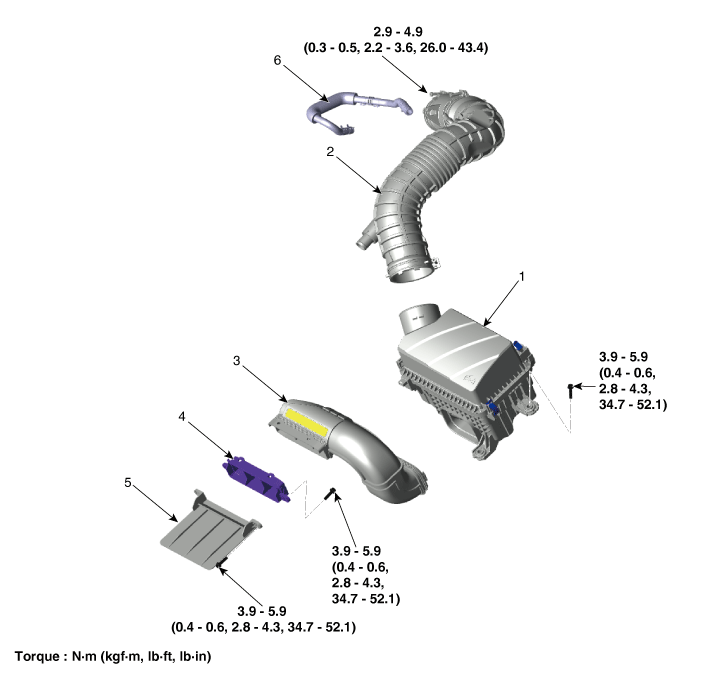
| 1. Air Cleaner Assembly 2. Air Intake Hose 3. Air Duct |
4. Air Intake Screen 5. Air Duct Extension 6. Breather Hose |
Repair Procedures
Removal and Installation
Air Cleaner Assembly
Disconnect the negative battery cable.
Remove the engine cover.
(See Engine and Transaxle Assembly - Engine Cover)
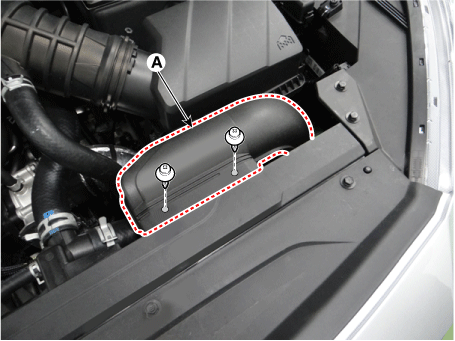
Remove the air duct (A).
Remove the air cleaner assembly.
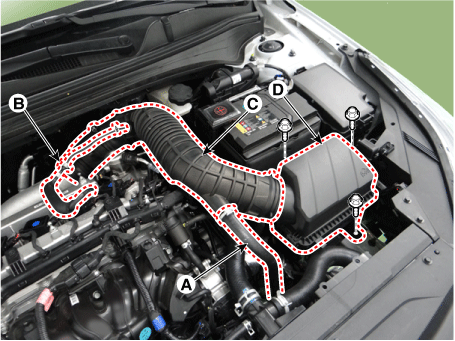
Disconnect the RCV hose and tube (A).
Disconnect the breather hose (B).
Disconnect the air intake hose (C).
Tightening torque:
2.9–4.9 N·m (0.3–0.5 kgf·m, 2.2–3.6 ft-lbf, 26.0 - 43.4 in-lbf)
Remove the air cleaner assembly (D).
Tightening torque:
3.9–5.9 N·m (0.4–0.6 kgf·m, 2.9–4.3 ft-lbf, 35.4 - 53.1 in-lbf)
Install in the reverse order of removal.
Air Cleaner Element Replacement
Open the air cleaner element cover (A) by releasing the clip.
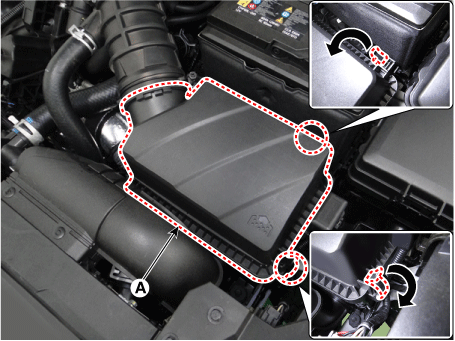
Replace the air cleaner element (A) with a new one.
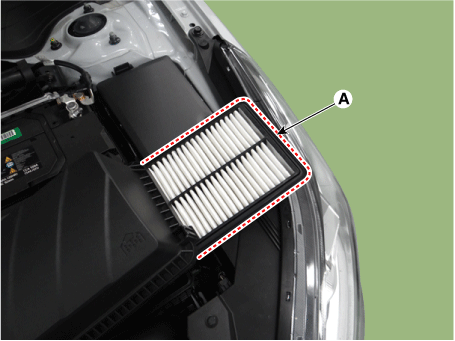
Close the air cleaner cover by engaging the clips.
Air Intake Screen
Remove the air duct (A).
Remove the air intake screen (A).
Tightening torque:
3.9–5.9 N·m (0.4–0.6 kgf·m, 2.9–4.3 ft·lbf, 35.4–53.1 in·lbf)
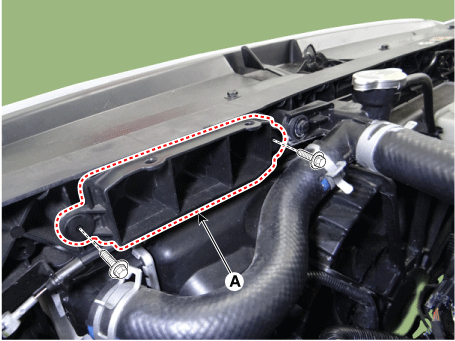
Install in the reverse order of removal.
Air Intake Screen
Disconnect the negative battery cable.
Remove the front bumper assembly.
(Refer to Body (Interior and Exterior) - "Front Bumper Assembly")
Remove the air duct extension (A).
Tightening torque:
3.9–5.9 N·m (0.4–0.6 kgf·m, 2.9–4.3 ft·lbf, 35.4–53.1 in·lbf)
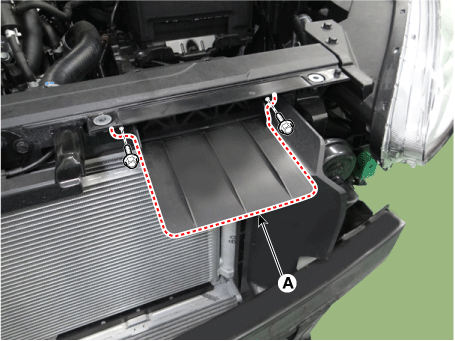
Install in the reverse order of removal.
Inspection
Remove the air cleaner element.
Check whether the air cleaner element is excessively dirty. If so, replace the air cleaner element.
If the air cleaner element needs cleaning, blow it with compressed air as shown in the illustration.
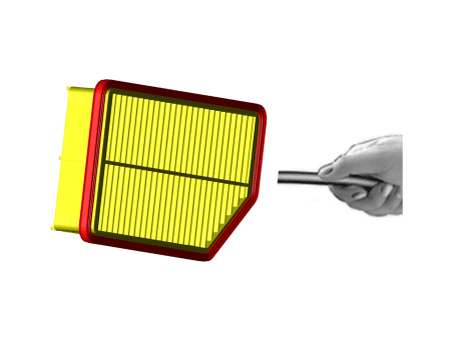
Install the air cleaner element.
Test yourself
A quick Kia Forte BD quiz: every answer comes with an explanation and a link to the manual page.