Headliner Assembly
Components and Component Location
Component Location
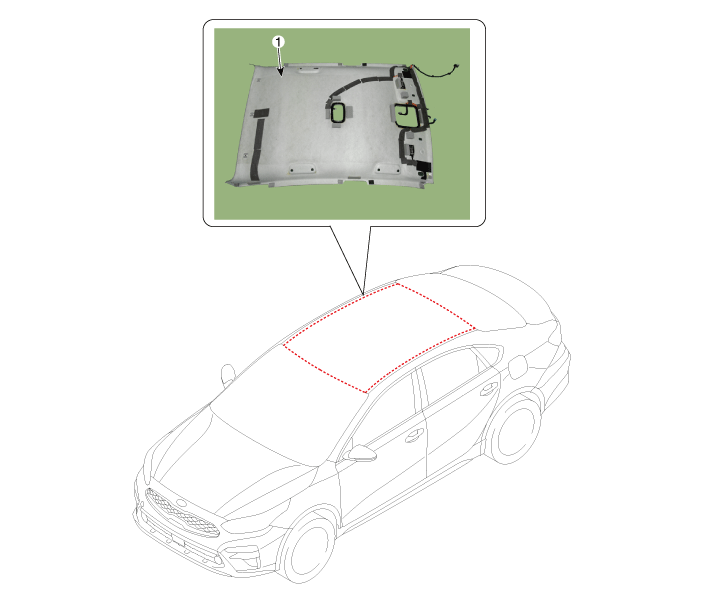
| 1. Headliner assembly |
Repair Procedures
Replacement
Remove the door weatherstrip.
Remove the front seat.
(Refer to Front Seat - "Front Seat Assembly")
Remove the rear seat cushion assembly.
(Refer to Rear Seat - "Rear Seat Cushion Cover")
Remove the front pillar trim.
(Rear Interior Trim - "Front Pillar Trim Panel")
Remove the lower center pillar garnish.
(Rear Interior Trim - "Center Pillar Garnish")
Remove the upper quarter pillar garnish.
(Rear Interior Trim - "Center Pillar Garnish")
Remove the rear pillar trim.
(Rear Interior Trim - "Rear Pillar Garnish")
Remove the sun visor and holder.
(Rear Headliner - "Sun Visor")
Remove the assist grip.
(Rear Headliner - "Assist Grip")
Remove the overhead console lamp.
(Rear Body Electrical System - "Overhead Console Lamp")
Remove the room lamp.
(Rear Body Electrical System - "Room Lamp")
Disconnect the auto anti-fog sensor cover (A), ECM mirror cover (B) and LKAS cover (C).
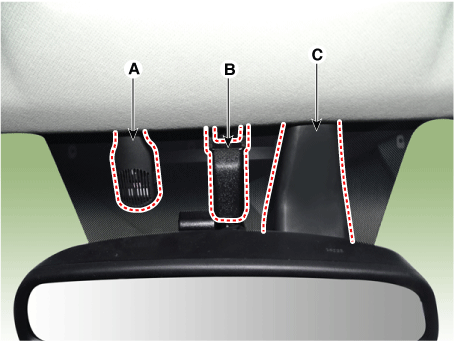
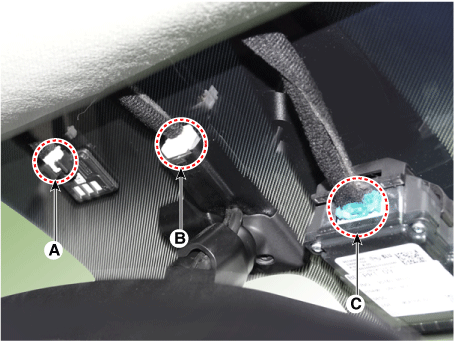
Disconnect the auto anti-fog sensor connector (A), ECM mirror cover connector (B) and LKAS connector (C).
Disconnect the headliner main connector (A) and the mounting clips (B) at the front pillar.
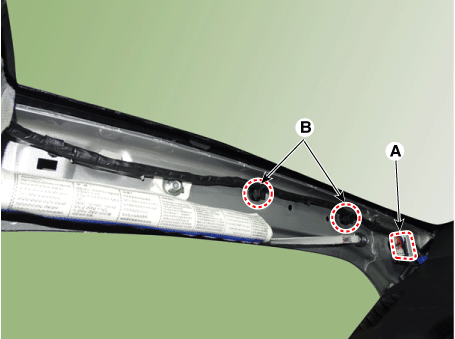
Remove the headliner clip and remove the headliner assembly (A).
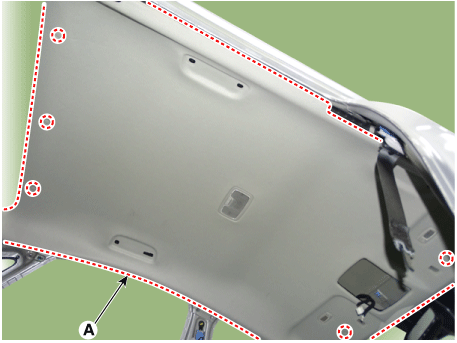
Remove the headliner assembly (A) from the body panel and take it out of the vehicle through the front door.
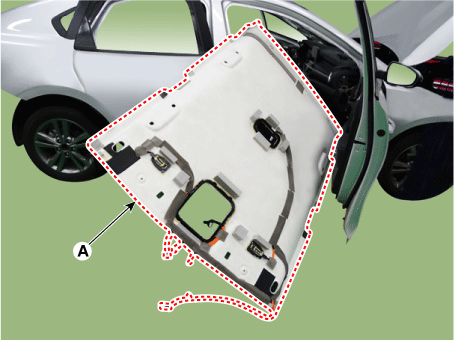
Remove the vanity light.
(Refer to Body Electrical System - "Vanity Lamp")
Disconnect the headliner wiring harness (A) from the headliner (B).
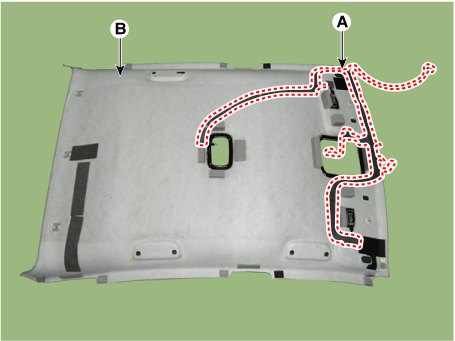
To install, reverse the removal procedure.
Test yourself
A quick Kia Forte BD quiz: every answer comes with an explanation and a link to the manual page.