Headliner Assembly
Components and Component Location
Component Location

| 1. Headliner assembly |
Repair Procedures
Replacement
Remove the front seat.
(Refer to Front Seat - "Front Seat Assembly")
Remove the rear seat.
(Refer to Rear Seat - "Rear Seat Assembly")
Separate the pillar trim, then remove the front pillar garnish (A) by pressing the mounting clip in the direction indicated by the arrow.

Using a trim removal tool, remove the front door sill trim (A).

After removing the mounting clip, remove the rear door sill garnish (A).

Remove the seat belt (B) from the EFD system (A) using SST (0K888-D4200).

Remove the center pillar lower garnish (A).

Remove the upper center pillar garnish (A).

Remove the luggage compartment floor covering (A).

Remove the center tray (A).

Remove the rear cross garnish (A).

After loosening the mounting screws, separate the luggage compartment side trim (A).

Remove the luggage compartment side trim after disconnecting the luggage compartment lamp connector (A).

Remove the rear pillar trim (A).

Separate the overhead console lamp (A) after loosening the mounting screws.

Remove the overhead console lamp after disconnecting the connectors (A).

Separate the sun visor cover (A).

Separate the sun visor (A) after loosening the mounting screw.

Remove the sun visor after disconnecting the connector (A).

Remove the clip (A) after loosening the mounting screw.

Remove the rain sensor cover (A) using a remover.
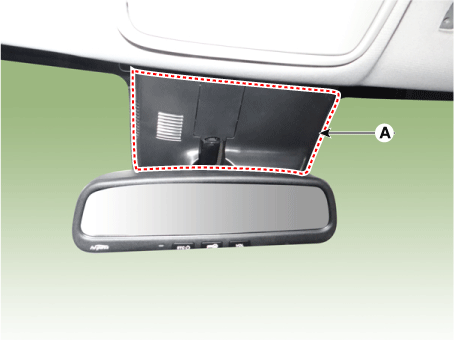
Disconnect the auto heater sensor, ECM mirror sensor, and LDWS connectors (C).

Remove the room lamp lens (A) using a remover.

Separate the room lamp (A) after loosening the mounting screws.

Remove the map lamp by disconnecting the connector (A).
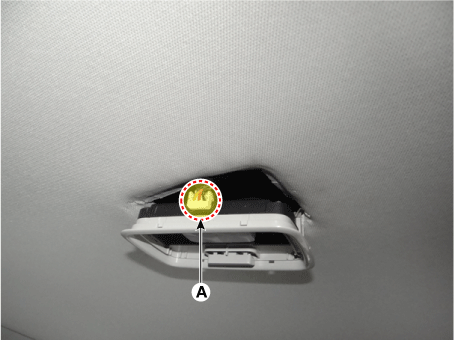
Disconnect the main headliner connectors (A) and the mounting clips at the front pillar.
[Driver]

[Passenger]

Disconnect the connectors (A) and the mounting clips at the rear pillar. [RH]

Remove the headliner clip and remove the headliner assembly (A).
[Front]

[Rear]

Remove the headliner assembly (A) from the vehicle through the rear door.

Remove the vanity light.
(Refer to Body Electrical System - "Vanity Lamp")
Disconnect the headliner wiring harness (A) from the headliner (B).
Install in the reverse order of removal.
Test yourself
A quick Kia Stinger CK quiz: every answer comes with an explanation and a link to the manual page.