Using the Tire Mobility Kit
1. Remove the maximum speed label (1) from the sealant bottle (2) and place it in a visible location in the vehicle, e.g. on the steering wheel, to remind you not to drive too fast.
2. Filling the sealant: Strictly follow the specified sequence, otherwise the sealant may be pushed out under pressure.
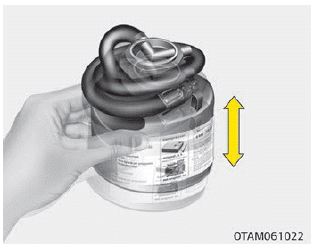
3. Shake the sealant bottle.
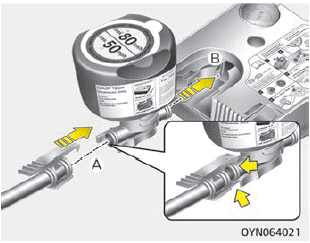
4. Connect the filler hose (3) to the connector on the sealant bottle (A).
5. Make sure that the button (9) on the compressor is not pressed.
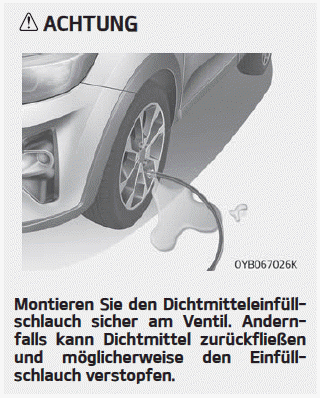
6. Drehen Sie die Ventilkappe vom Ventil des defekten Reifens ab und schrauben Sie den Füllschlauch (3) der Dichtmittelflasche auf das Ventil.
7. Place the sealant bottle in the compressor housing so that it stands upright (B).
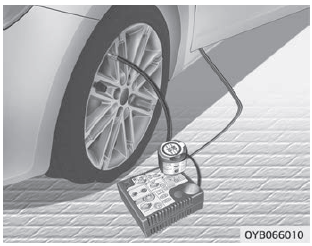
8. Make sure the compressor is switched off (position 0).
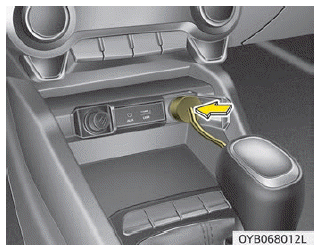
9. Connect the compressor to the vehicle power outlet using the cable and connectors.
WARNING
Use only the power outlet on the front passenger side.
10. When the ignition switch or the ENGINE START/STOP button is in the ON position, switch on the compressor and let it run for approx. 3 minutes to fill the sealant. The tire pressure after filling is not critical.
11. Schalten Sie den Kompressor aus.
12. Trennen Sie den Schlauch von der Dichtmittelflasche und vom Reifenventil.
Legen Sie das Reifen-Mobilitäts-Kit wieder in das Staufach im Fahrzeug.
WARNING
If the engine is run in an insufficiently ventilated or enclosed area (e.g. in a closed garage), there is a risk of carbon monoxide poisoning and suffocation.
Test yourself
A quick Kia Stonic quiz: every answer comes with an explanation and a link to the manual page.