Front strut assembly
Components and Component Location
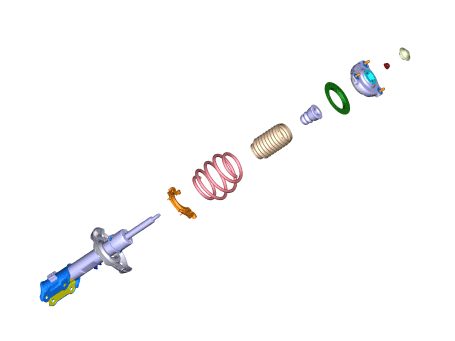
Components
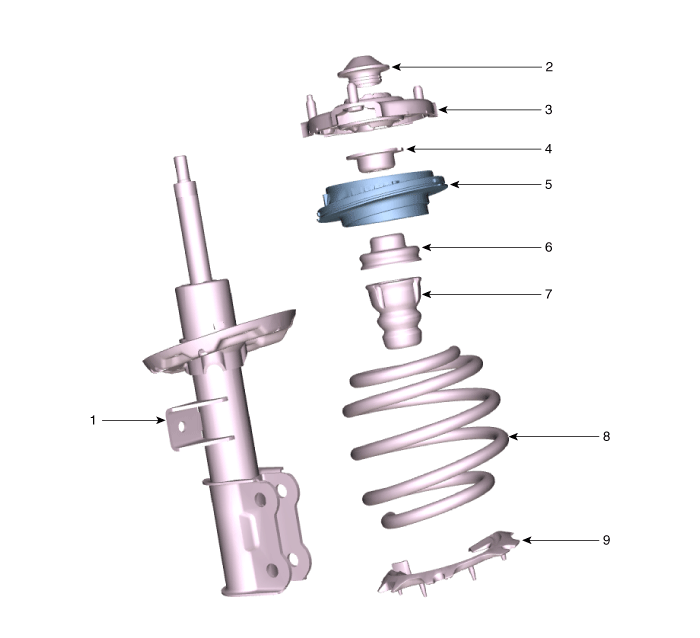
| 1. Strut Assembly 2. Insulator Dust Cover 3. Insulator 4. Spring Upper Pad 5. Strut Bearing |
6. Strut Bearing Pad 7. Bumper Rubber 8. Coil Spring 9. Spring Lower Pad |
Repair Procedures
Removal
Disconnect the negative (-) battery cable.
Loosen the front strut upper mounting nuts (A).
Tightening torque: 53.9 - 69 N·m
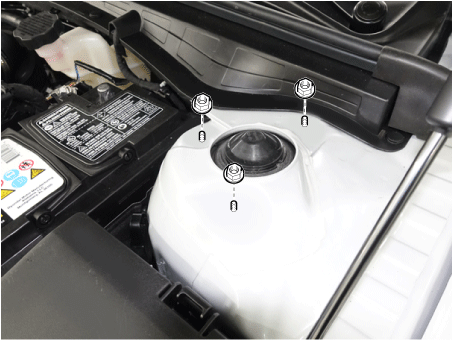
Remove the front wheel and tire.
(Refer to Tires/Wheels — "Wheel")
Loosen the mounting bolt (A) and remove the brake hose bracket from the strut assembly.
Tightening torque: 8.8–13.7 N·m

Disconnect the stabilizer link from the front strut assembly after loosening the nut (A).
Tightening torque: 98.1 - 118 N·m

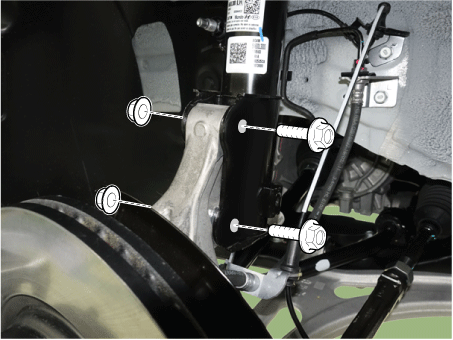
Remove the front strut assembly from the front axle by loosening the bolts and nuts.
Tightening torque: 196.1–216 N·m
Disassembly
Remove the insulator dust cover (A).

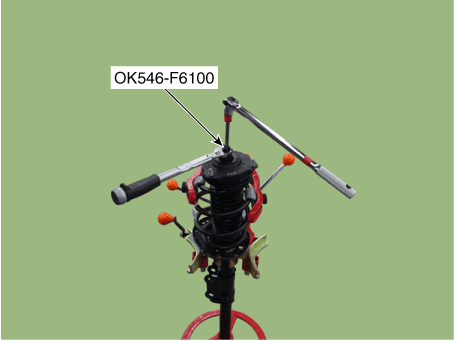
Using a spring compressor, compress the coil spring (A).
Do not compress the spring more than necessary.

Using SST (0K546-F6100), loosen the self-locking nut.
Remove the insulator, spring seat, coil spring and dust cover from the strut assembly.
Inspection
Inspect the strut bearing for wear and damage.
Inspect the upper and lower spring seats for damage and wear.
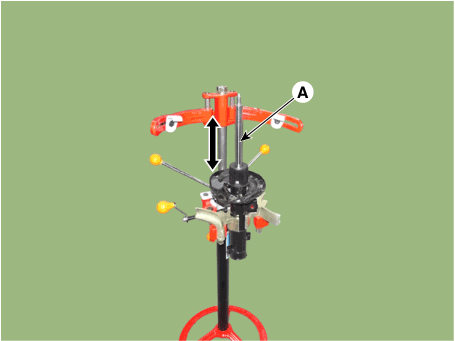
Compress and extend the piston rod (A) and check for abnormal resistance or unusual noise during operation.
Disposal
Fully extend the piston rod.
Drill a hole in section A to release the gas from the cylinder.

Installation
Install the insulator, spring seat, coil spring and dust cover on the strut assembly.
Compress and extend the piston rod (A) and check for abnormal resistance or unusual noise during operation.
Using the special service tool (0K546-F6100), install the self-locking nut.
Tightening torque: 107.8–118 N·m
Install the insulator cap (A).
Installation
Install in the reverse order of removal.
Check the alignment.
(See Suspension System - Alignment)
Test yourself
A quick Kia Optima DL3 quiz: every answer comes with an explanation and a link to the manual page.