Restraints
Driver Airbag (DAB) Module and Clock Spring
In this manual: Restraints
22steps
~132min
5/5difficulty
Done 0 of 22
Description and Operation
Description
The Driver Airbag (DAB) is installed in the steering wheel and is electrically connected to the SRSCM through the clock spring. It protects the driver in the event of a frontal collision. The SRSCM determines deployment of the Driver Airbag (DAB).Components and Component Location
Components

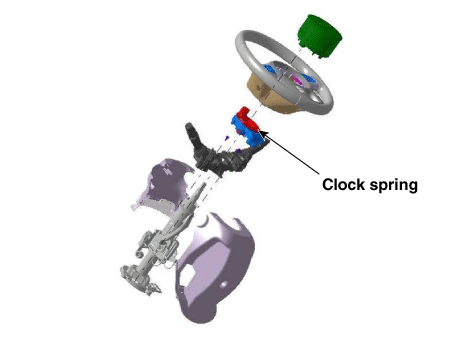
| 1. Driver Airbag (DAB) 2. Steering Wheel |
3. Clock Spring |
Repair Procedures
Removal
- Before installing the steering wheel, set the front wheels in the straight-ahead position.
- Disconnect the negative battery cable and wait at least 30 seconds before starting work.
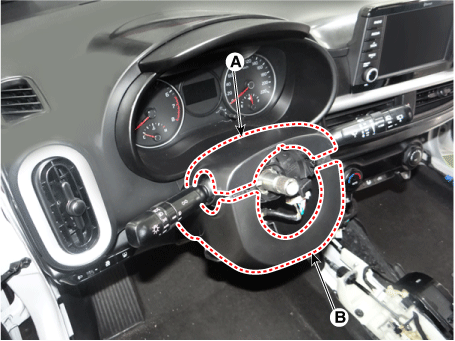
- While turning the steering wheel left and right, press the parts marked A (3 red circles) under the steering wheel, then remove the airbag module.

- Disconnect the horn connector (A) and the airbag connector (B).

- Remove the steering wheel. (Refer to Steering System - "Steering Wheel")
- Remove the upper steering column cover (A).
- Loosen the screws and remove the lower cover (B).
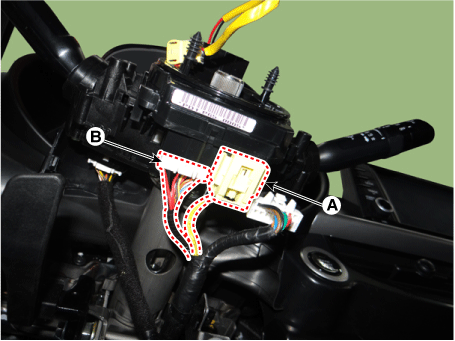
- Separate the clock spring harness connector (A) from the horn harness connector (B) on the clock spring.
Inspection
Airbag Module: If any unsuitable parts are found during the following inspection, replace the airbag module with a new one.- Inspect the pad cover for dents, cracks, or deformation.
- Inspect the airbag module for dents, cracks, or deformation.
- Inspect the hooks and connectors for damage, terminals for deformation, and the harness for pinching.
- Inspect the airbag inflator housing for dents, cracks, or deformation.
- If at least one malfunction is found in the following inspections, replace the clock spring with a new one.
- Inspect the connectors and protective tube for damage, and terminals for deformation.

Installation
- Before installing the steering wheel, set the front wheels in the straight-ahead position.
- Connect the clock spring harness connector and the horn harness connector to the clock spring.
- The clock spring factory setting is neutral.
- If the white cable is visible through the neutral position check window at 10 o'clock, the spring is in the neutral position.
- If the white cable is not visible through the 10-hour neutral position window, manually set the neutral position.
Neutral Check Window: Normal Neutral Check Window: Malfunction
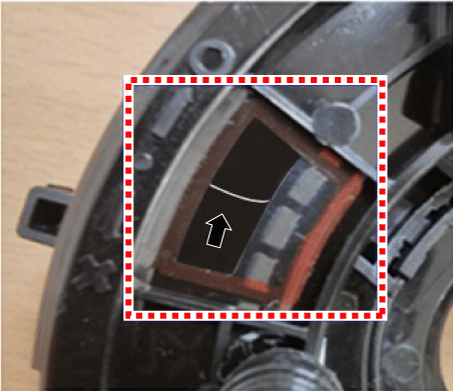
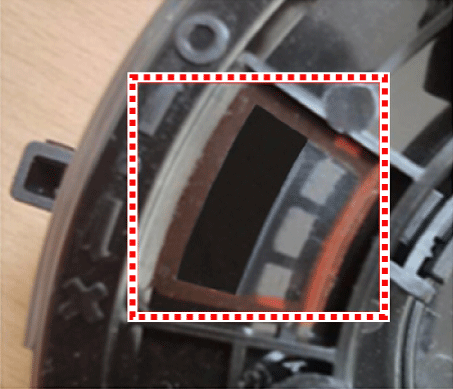
White cable is visible through the 10 o'clock neutral check window White cable is not visible through the 10 o'clock neutral check window
- Manual Neutral Position Adjustment Procedure of Clock Spring
- Press the automatic lock button located at the 6 o'clock position, and turn it clockwise until it stops.
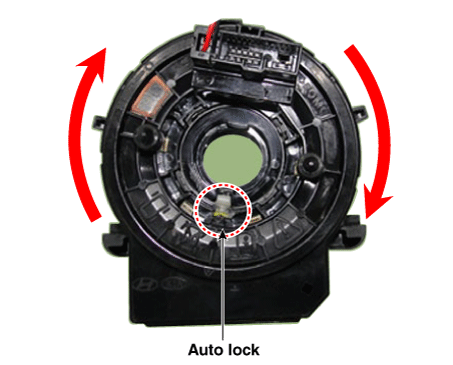
- Push the automatic lock button located at the 6 o'clock position, and turn it counterclockwise until the neutral mark (A) is aligned. (Refer to the table below for the required number of turns)
Part Number Rotation 93490 - G3130/G3240/G4230/X5100 3.2 93490 - G3030/X5000 3,9 - If the white cable is visible through the 10 o'clock neutral check window, the clock spring is in the neutral position.
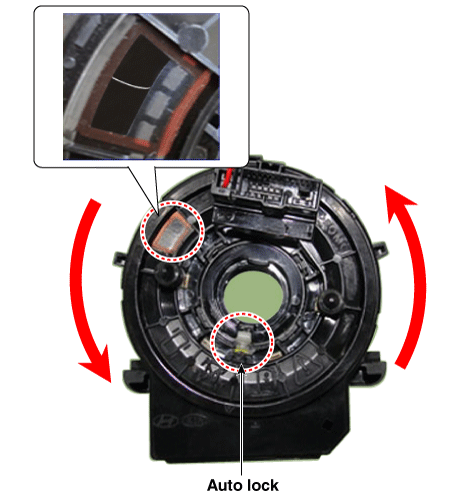
- Press the automatic lock button located at the 6 o'clock position, and turn it clockwise until it stops.
- Install the steering column cover and steering wheel. (Refer to Steering System - "Steering Wheel")
- Connect the driver airbag (DAB) module connector and the horn connector, then install the driver airbag (DAB) module on the steering wheel.
- Connect the negative battery cable.
- When installing the airbag module, check that the steering wheel remote control, airbag system and horn operate normally after fully turning the steering wheel to the left and right.
Test yourself
A quick Kia Picanto JA quiz: every answer comes with an explanation and a link to the manual page.
Was this page helpful?