Rear Axle with Torsion Beam
Components and Component Location
Components

1. Torsion Beam
Repair Procedures
Removal
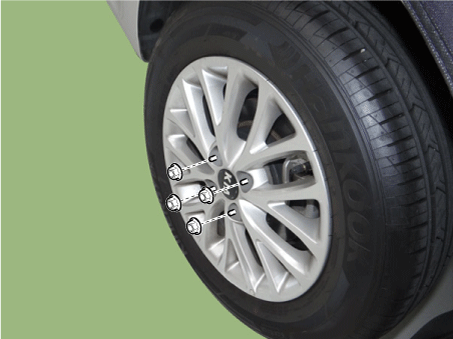
Remove the wheel nuts, rear wheel and tire from the rear hub.
Tightening torque: 107.9–128 N·m
Remove the rear axle assembly.
(Refer to Brake System - "Rear Disc Brake")
(Refer to Brake System - "Rear Drum Brake")
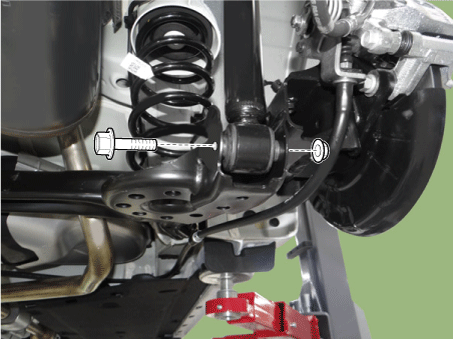
Loosen the lower shock absorber bolt.
Tightening torque: 98.0–118 N·m
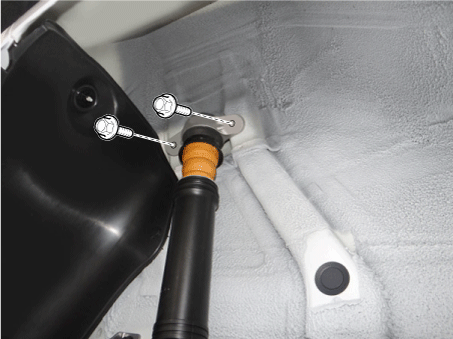
Loosen the bolts and remove the rear shock absorber.
Tightening torque: 49.0–64 N·m
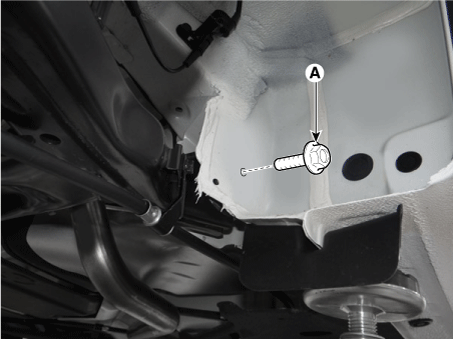
Loosen the bolts (A) and remove the torsion beam.
Tightening torque: 117.7–137 N·m
Install in the reverse order of removal.
Replacement
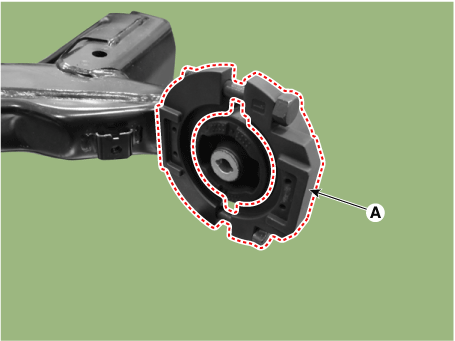
CTBA (Coupled Torsion Beam Axle) Bushing
Plastic Type
Using SST (09551-AL100), replace the CTBA (Coupled Torsion Beam Axle) bushing.
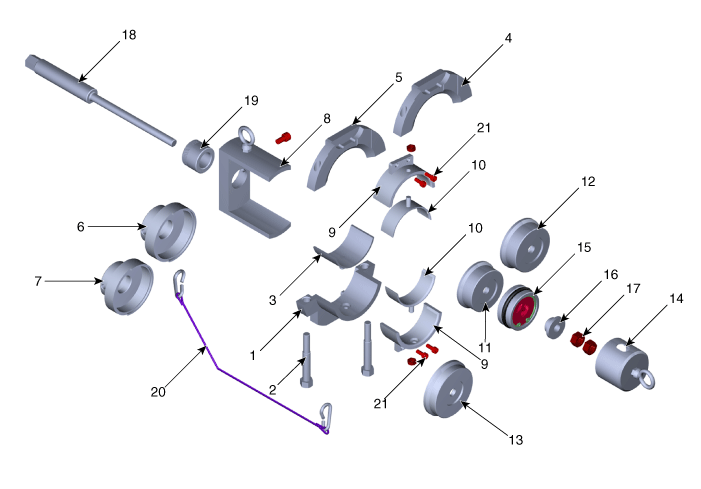
1. Beam Clamp A
2. Beam Clamp Bolt
3. Beam Clamp Adapter
4. Beam Clamp B
5. Beam Clamp C
6. Installer Adapter A
7. Installer Adapter B8. Beam Clamp Support
9. Bushing Guide A
10. Bushing Guide B
11. Remover Adapter A
12. Remover Adapter B
13. Installer Adapter C
14. Protective Cap15. Bearing
16. Bearing Washer
17. Nut
18. Main Bolt
19. Main Nut
20. Lock Wire
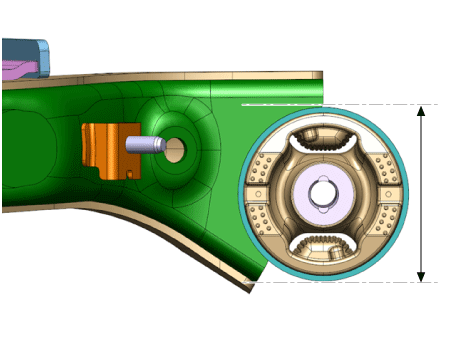
21. Bushing Guide BoltMeasure the outer diameter of the torsion beam axle.
The outer diameter of the torsion beam axle is 78 mm (3.0709 in) or 84 mm (3.3071 in), depending on the type.
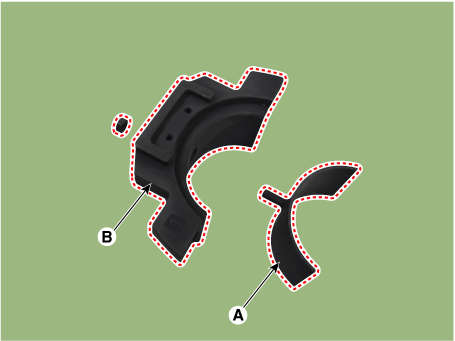
Install the beam clamp adapter (A) onto beam clamp A (B).
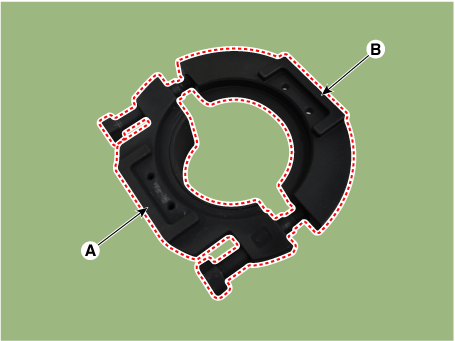
Temporarily install beam clamp A (A) and beam clamp C (B) with the bolt.
Assemble the bolt after installing the beam clamp (A) onto the beam tube accurately.
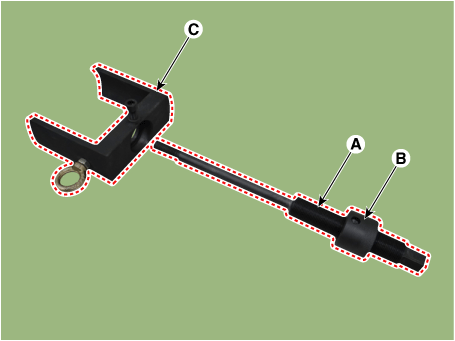
Assemble the main bolt (A) and main nut (B), then insert them into the beam clamp support (C).
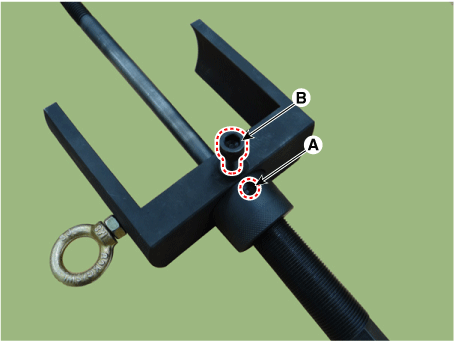
Align the hole of the main nut (A) and the bolt (B) precisely, then assemble them.
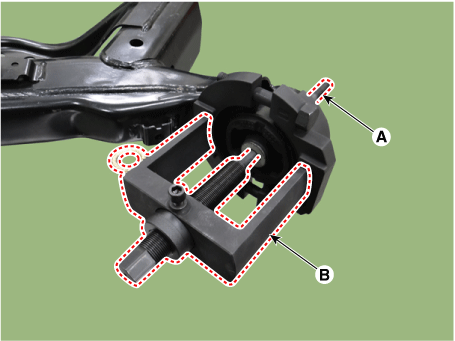
Insert the main bolt (A) into the bushing hole, then assemble the beam support (B) and the beam clamp guide, aligning them.
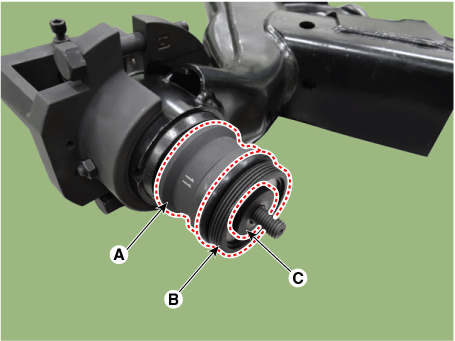
Install the remover adapter A (A), bearing (B) and washer (C) onto the main bolt in that order.
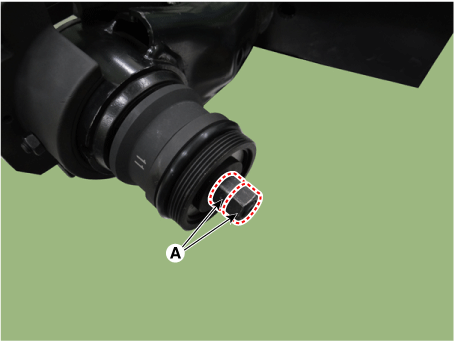
Temporarily install 2 nuts (A).
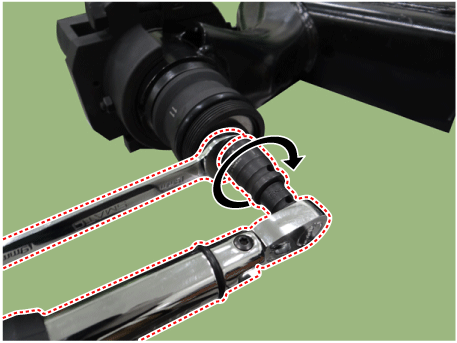
Install using the double nut method with a wrench and a torque wrench.
Tightening torque: 49 N·m
Install the SST properly by turning the main bolt (A) counterclockwise.

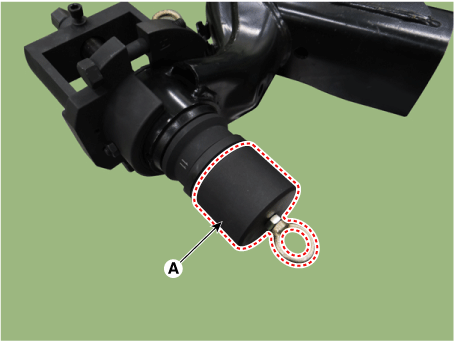
Install the protective cap (A).
Connect the lock wire (A) by wrapping it once around the torsion beam axle.
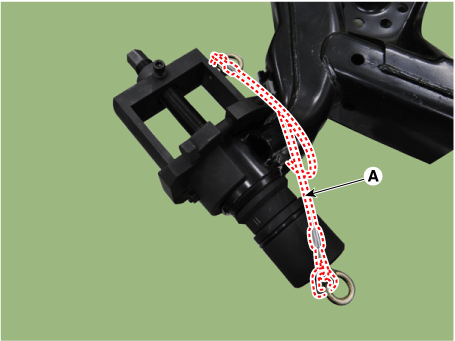
Remove the bushing by turning the main bolt (A) counterclockwise using an air impact wrench.
In this procedure, visually check through the cover hole (B) whether the nut is loosening. If the nut is loosening, tighten it to the specified torque.

Disassemble the lock wire (A) after the bushing has been completely removed.

Remove the bushing and SST from the torsion beam axle.
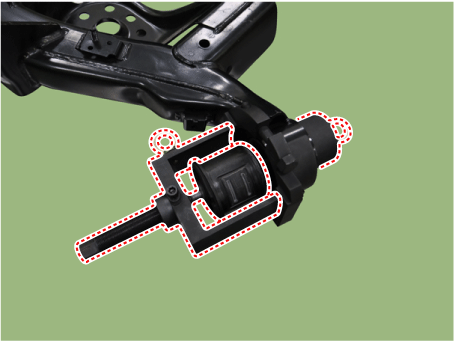
Remove the bushing (A) by disassembling the SST.
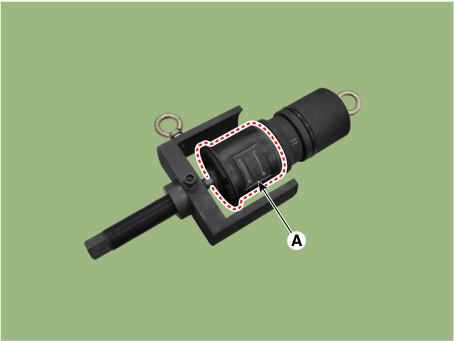
Install bushing guide B (B) onto bushing guide A (A).
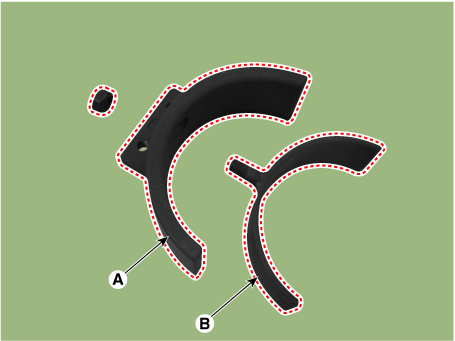
Install the bushing guide (A) onto the beam clamp.
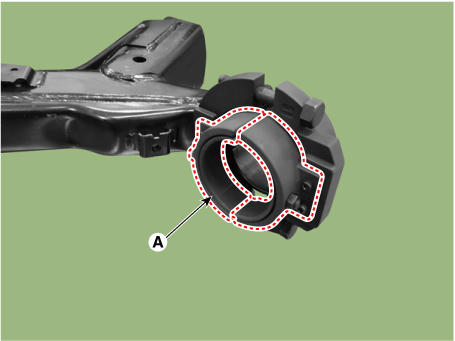
Perform this procedure after preheating the outside of the new bushing with a heat gun to approximately 40–60 °C.

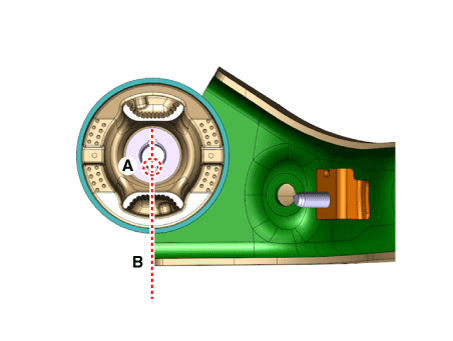
Install the new bushing by aligning the bushing groove (A) with the lower part (B) of the torsion beam axle.
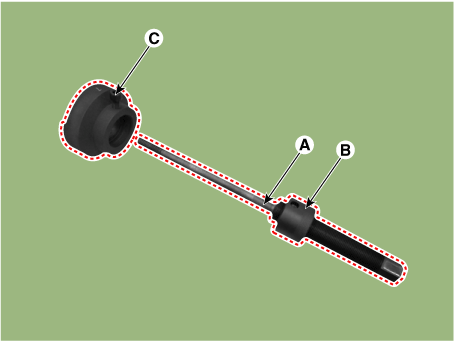
Assemble the main bolt (A) and main nut (B), then insert them into the Installer Adapter B (C).
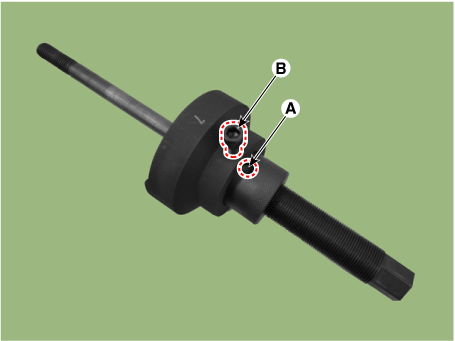
Precisely align the hole of the main nut (A) and the bolt (B), then assemble them.
Install the installer adapter (B) by inserting the main bolt (A) into the bushing hole.
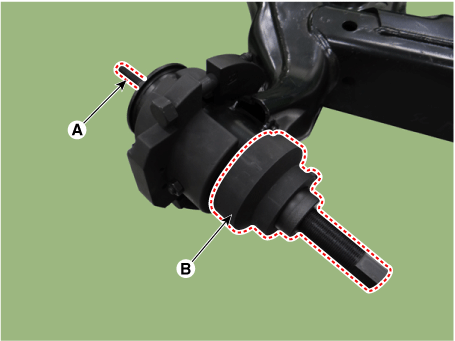
Install it onto the main bolt in the order of installer adapter C (A), bearing (B) and washer (C).
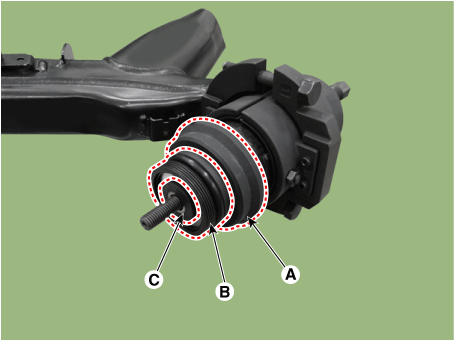
Pre-install the two nuts (A).
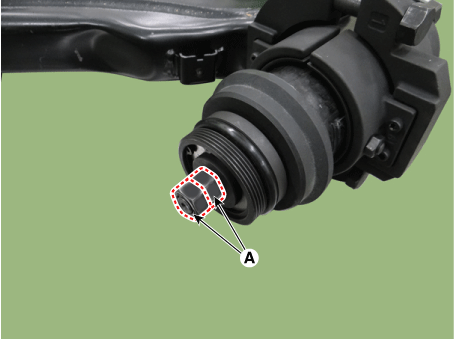
Install using the double nut method with a wrench and a torque wrench.
Tightening torque: 49 N·m
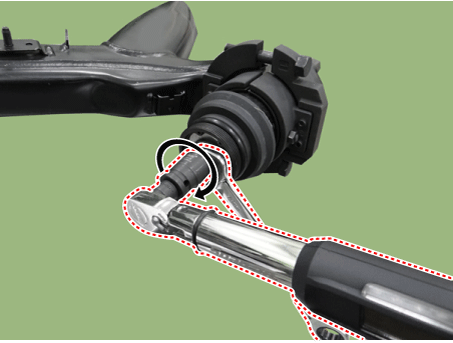
Install the SST properly by turning the main bolt (A) counterclockwise.
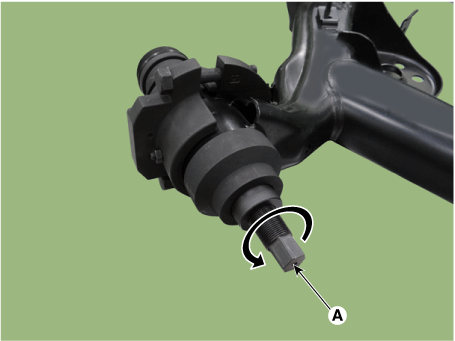
Install the protective cap (A).
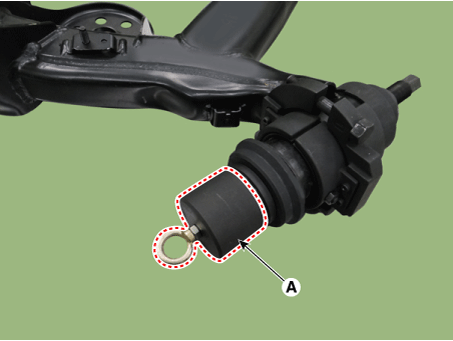
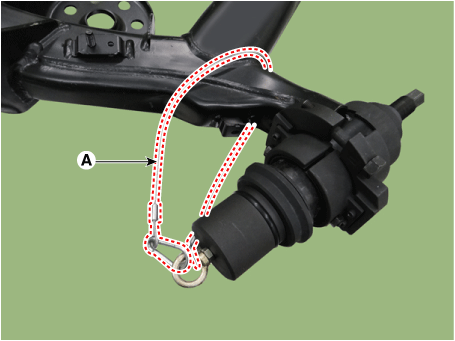
Connect the lock wire (A) by wrapping it once around the torsion beam axle.
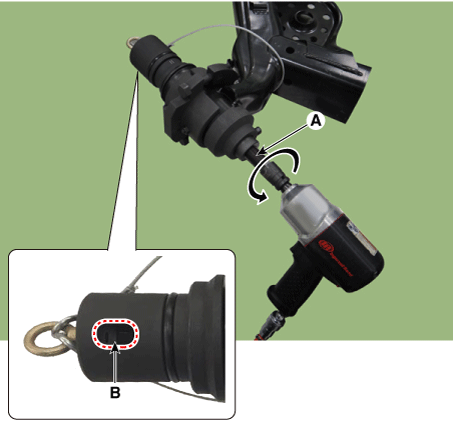
Install until a 10 mm (0.3937 in) gap remains between the bushing and the edge of the guide bushing, turning the main bolt (A) counterclockwise with an air impact wrench.
In this procedure, visually check through the cover hole (B) whether the nut is loosening. If the nut is loosening, tighten it to the specified torque.
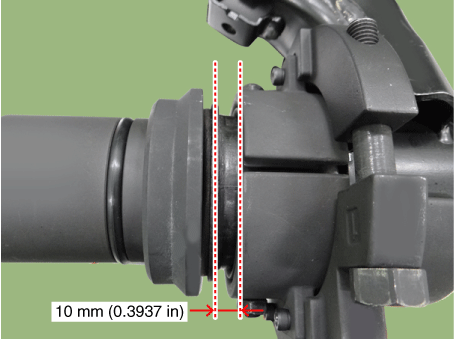
Remove the beam clamp (A).
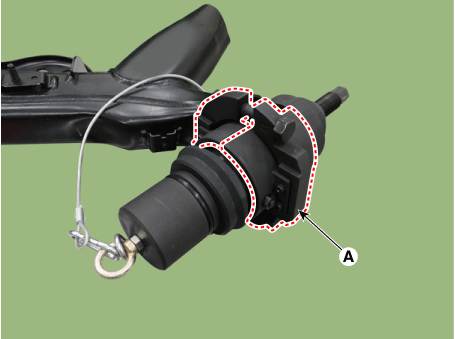
Install until a 5 mm (0.1969 in) gap remains between the bushing and the torsion beam, turning the main bolt (A) counterclockwise with an air impact wrench.
In this procedure, visually check through the cover hole (B) whether the nut is loosening. If the nut is loosening, tighten it to the specified torque.
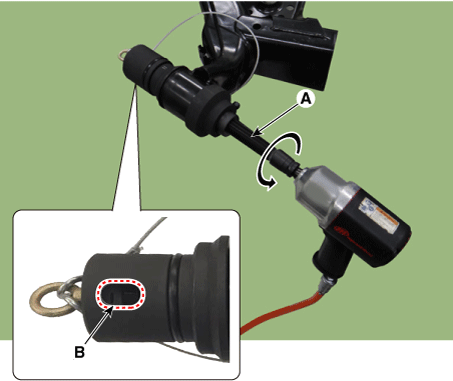
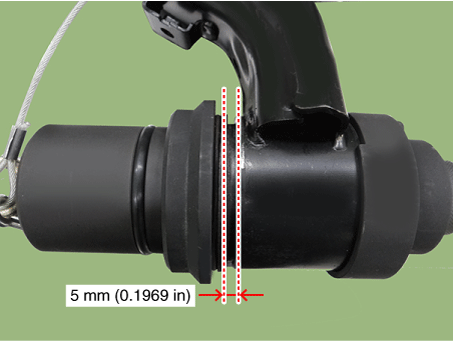
Turn the main bolt counterclockwise until the bushing and the end of the torsion beam are fitted together, using a hand wrench.
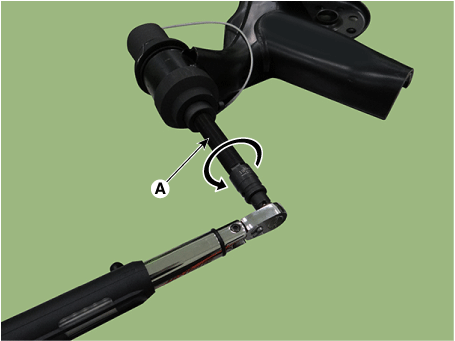
Release the pressurized tools by turning the main bolt (A) clockwise after the bushing is fully installed.
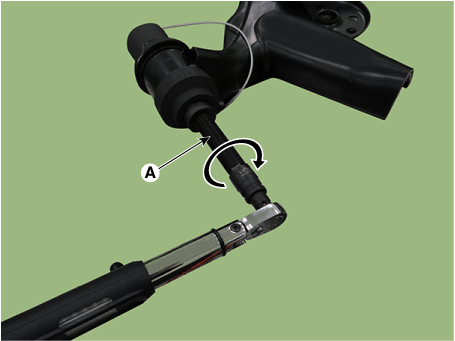
Remove the lock wire (A).
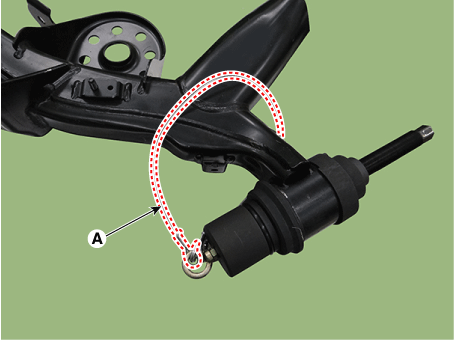
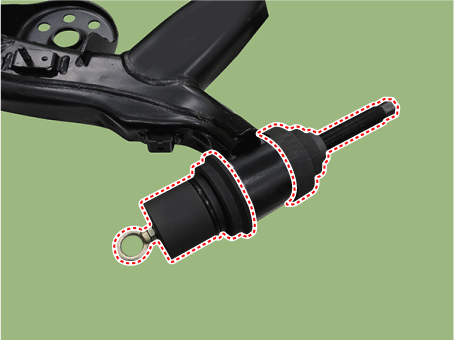
Remove the SST from the torsion beam axle.
Test yourself
A quick Kia Rio YB quiz: every answer comes with an explanation and a link to the manual page.