Barometric pressure (baro) sensor inspection
- Perform the following inspection only when directed.
- The following vacuum values are indicated by relative pressure from the barometric pressure sensor.
(WDS or equivalent) to the DLC-2.
2. Turn the ignition switch to ON.
3. Select BARO on the SSTs(WDS or equivalent).
4. Verify that the BARO PID (pressure) and barometric pressure are practically equal.
- If not as verified, perform the Circuit Open/Short Inspection.
- If there is no open or short circuit, replace the barometric pressure sensor.
- If as verified, go to next step.
- If not as verified, perform the Circuit Open/Short inspection.
Circuit Open/Short Inspection- If there is no open or short circuit, replace the barometric pressure sensor.
1. Disconnect the PCM connector. (See PCM REMOVAL/INSTALLATION.)
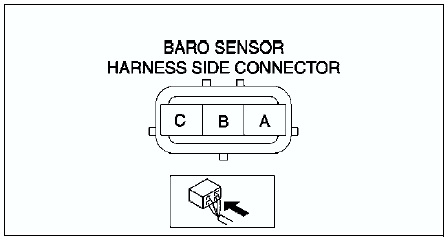
2. Inspect the following wiring harness for open or short. (Continuity check)
Open circuit- If there is no continuity, the circuit is open. Repair or replace the harness.
Short circuit- Barometric pressure sensor terminal A (harness-side) and PCM terminal 1G
- Barometric pressure sensor terminal B (harness-side) and PCM terminal 2H
- Barometric pressure sensor terminal C (harness-side) and PCM terminal 2K
- If there is continuity, the circuit is shorted. Repair or replace the harness.
- Barometric pressure sensor terminal C (harness-side) and power supply.
- Barometric pressure sensor terminal C (harness-side) and body GND.
- Barometric pressure sensor terminal A (harness-side) and power supply.
- Barometric pressure sensor terminal A (harness-side) and body GND
Test yourself
A quick Mazda 6 quiz: every answer comes with an explanation and a link to the manual page.