Timing belt
D7F engine
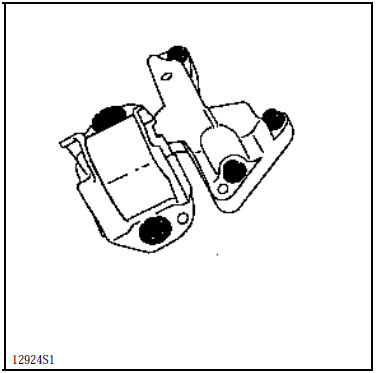
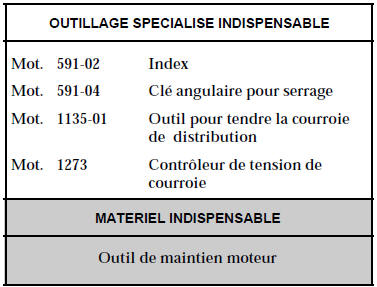
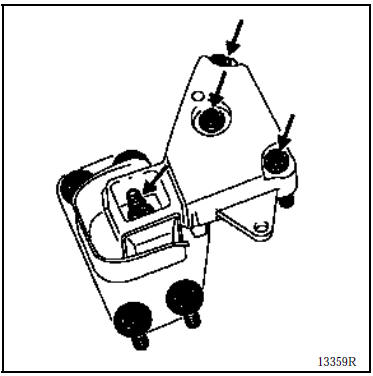
Remove the pendulum suspension.
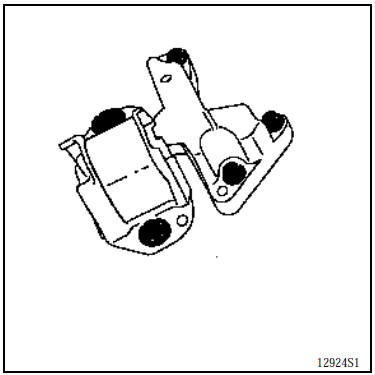
Remove the water pump and pendulum suspension timing covers from the cylinder head.
Turn the engine in its direction of rotation until the timing reaches its setting point (camshaft and crankshaft marks aligned), while inserting pin Tool 1054 into the flywheel.
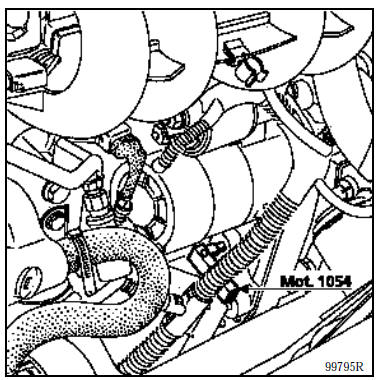
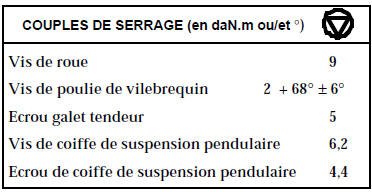
Remove the timing belt by loosening the nut (5).
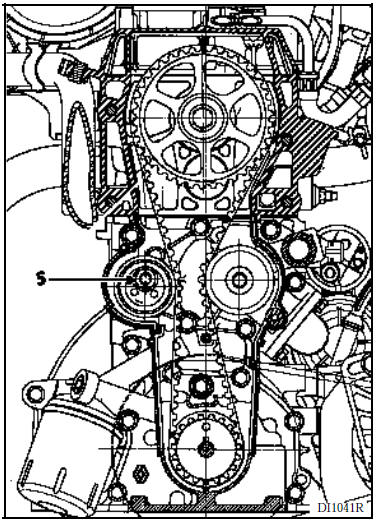
INSTALLATION
Align the timing belt marks with the camshaft and crankshaft sprocket marks.
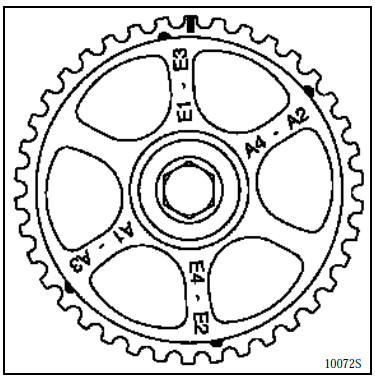
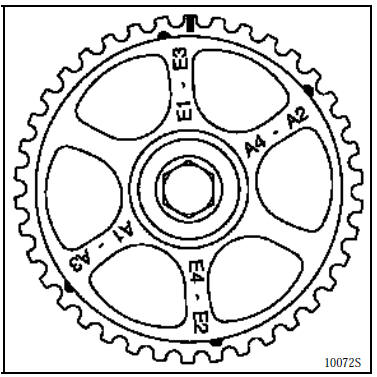
WARNING: the camshaft sprocket has five marks. Only the rectangular mark on the face of a tooth indicates Top Dead Centre (TDC); the other marks are used for adjusting the rockers.
TIMING BELT TENSIONING PROCEDURE
Remove locking pin Tool 1054.
Fit the spacer (1) from Tool 1386 and tighten the crankshaft sprocket bolt.
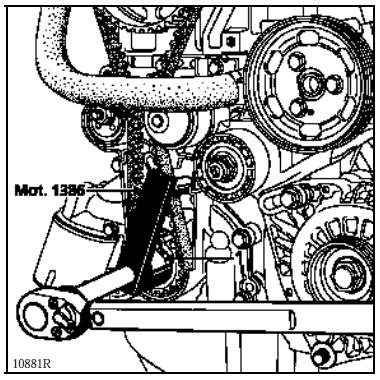
- Fit Tool 1273 and, using Tool 1135-01, turn the tensioner pulley anticlockwise until the reading reaches 20 US (turn the gauge knob until it trips, with three "clicks").
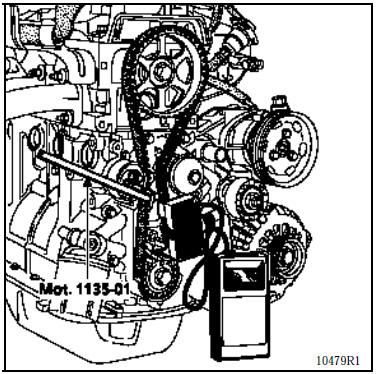
Tighten the tensioner pulley nut.
Turn the engine through at least two full revolutions (never turn it backwards).
Lock the engine at TDC, then remove the pin.
Check that the timing is correctly set on the crankshaft and camshaft sides.
Loosen the tensioner pulley nut and turn the pulley slightly clockwise with Tool 1135-01 until the two holes on the tensioner pulley are roughly horizontal.
Retighten the tensioner pulley nut.
- Turn the engine through at least two full revolutions (never turn it backwards).
Lock the engine at TDC, then remove the pin.
Apply a preload of 1 daN.m with Tool 1386 between the crankshaft sprocket and the water pump.
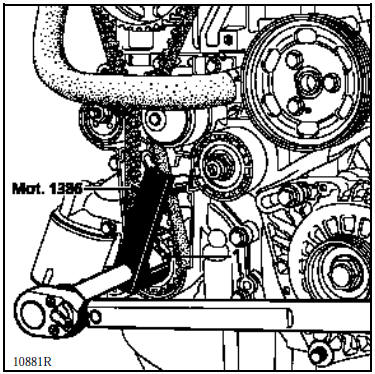
Fit Tool 1273 and read the tension value, which must be 20±3 US (fitting tension). Otherwise, adjust the tensioner pulley position using Tool 1135-01 and repeat the tensioning procedure from step b).
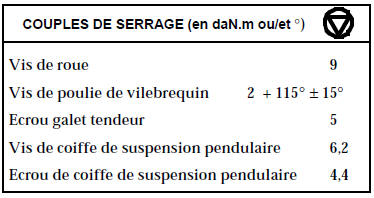
Tighten the tensioner pulley nut to 5 daN.m.
IMPORTANT
Turn the engine through at least two full revolutions after each change to the tensioner pulley position, before taking a tension reading.
Apply the 1 daN.m preload, which takes up all the slack in the belt.
Refit in the reverse order of removal.
Refit the pendulum suspension.
E7J Engine
REMOVAL
Position the vehicle on a two-post lift.
Disconnect the battery.
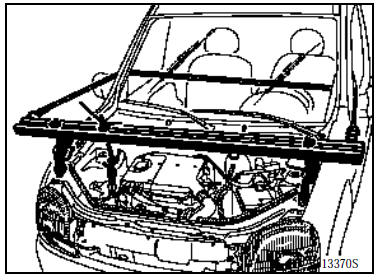
Fit the engine support tool.
Remove:
- the front right wheel and the mudguard,
- the pendulum suspension cover,
- the alternator and power steering pump belts,
- the crankshaft pulleys and the hub,
- the timing covers.
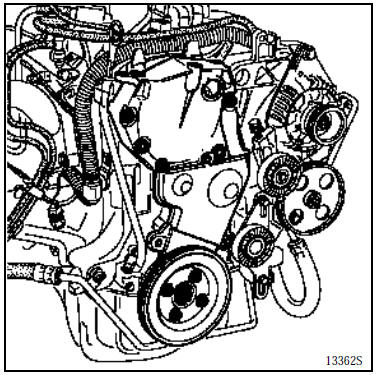
Set the engine to the timing setting point.
Align the crankshaft sprocket marks (L) with the fixed mark (M). The camshaft sprocket mark (N) must be in the position shown below.
Loosen the nut (O), release the tensioner pulley and remove the belt.
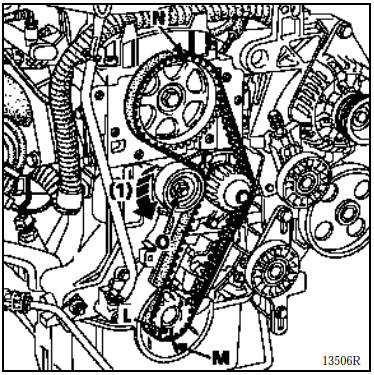
- Tensioner rotation direction
WARNING: the camshaft sprocket has five marks. Only the rectangular mark on the face of a tooth indicates Top Dead Centre (TDC); the other marks are used for adjusting the rockers.
INSTALLATION
An arrow painted on the back of the belt indicates the direction of rotation, and two marks indicate the timing.
Check that the engine is at the timing setting point.
Align the belt marks with those on the sprockets.
Observe the belt fitting direction and begin fitting it onto the crankshaft sprocket.
Tension the belt using Tool 1135-01 until the fitting value is reached (see chapter 07 "Timing belt tension").
Tighten the tensioner pulley nut (O) to 5 daN.m.
It is essential to tighten the tensioner pulley nut to 5 daN.m to prevent any loosening that could cause engine damage.
Refit in the reverse order of removal.
Refit the crankshaft pulley and tighten the bolt to 2 daN.m plus an angle of 68° ± 6°. This step is essential.
Refit the accessory belts and tension them (see chapter 07 "Accessory belt tension").
Do not refit a removed belt; replace it.
F8Q engine
REMOVAL
Position the vehicle on a two-post lift.
Disconnect the battery.
Remove:
the front right wheel and the mudguard,
the plastic protector on the pendulum support cover.
Fit the engine support tool.
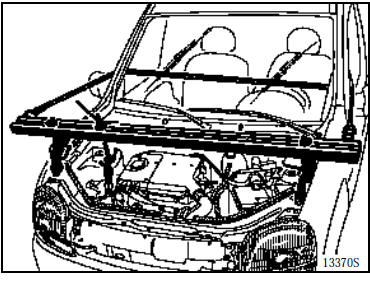
Remove:
the accessory belt,
the pendulum suspension cover.
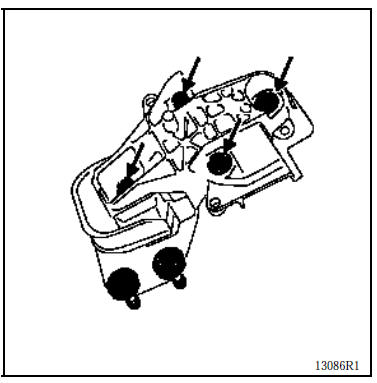
Timing setting
Turn the crankshaft to align the camshaft timing mark with the timing window.
Remove the TDC plug.
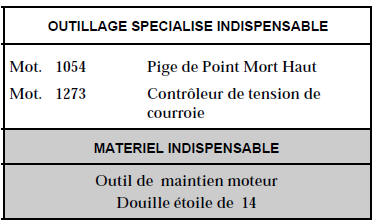
Fit the TDC locking pin Tool 1054.
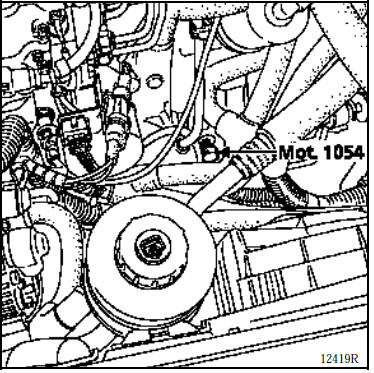
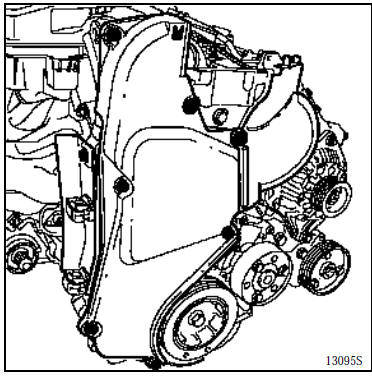
Remove:
the timing covers,
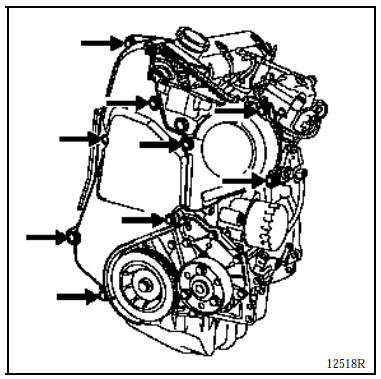
the crankshaft pulley.
Release the tensioner pulley and remove the belt.
NOTE: loosening the tensioner pulley nut by more than one turn may cause the pulley to disengage.
INSTALLATION
Check that pin Tool 1054 is in place.
Fit the timing belt, aligning the belt marks with those on the camshaft, injection pump and crankshaft sprockets.
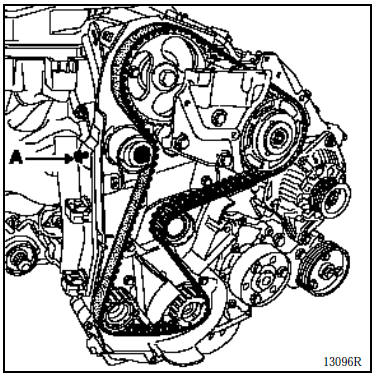
Tension the timing belt by screwing a bolt ( A ) into the inner timing cover.
Fit Mot. 1273 and tension the belt to the fitting value (see chapter 07 "Timing belt tension").
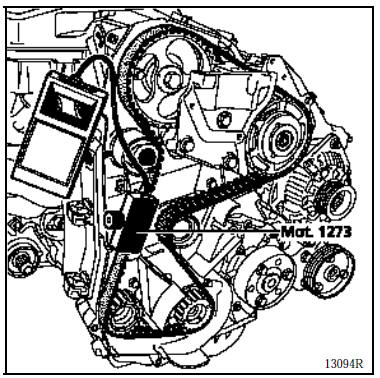
Tighten the tensioner pulley nut to 5 daN.m.
NOTE: it is essential to tighten the tensioner pulley nut to 5 daN.m to prevent any loosening that could cause engine damage.
Replace the crankshaft pulley bolt.
Refit the crankshaft pulley and tighten the bolt to 2 daN.m, then by an angle of 115° ± 15°.
Refit in the reverse order of removal.
Refit the accessory drive belt (see chapter 07 "Accessory drive belt tension").
NOTE: do not refit a removed belt; replace it.
Test yourself
A quick Renault Kangoo quiz: every answer comes with an explanation and a link to the manual page.