Axial ball joint
Place the vehicle on a two-post lift.
REMOVAL
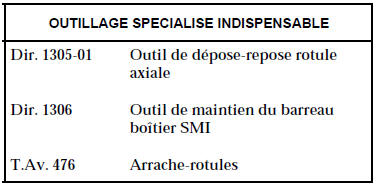
Disconnect the tie-rod end using tool T.Av. 476.
Loosen the track rod adjuster sleeve clamp bolt and unscrew the tie-rod end while holding the axial ball joint with an open-ended spanner.
Make a mark or count the number of thread turns engaged to pre-set toe when refitting.
Remove the plastic retaining clip from the boot and remove the boot.
Turn the wheels to disengage the rack teeth on the valve side.
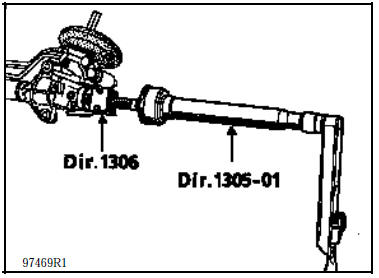
Fit tool Dir. 1306.
In this position, release the axial ball joint using tool Dir. 1305-01.
INSTALLATION
Always and IMPERATIVELY replace the assembly (2).
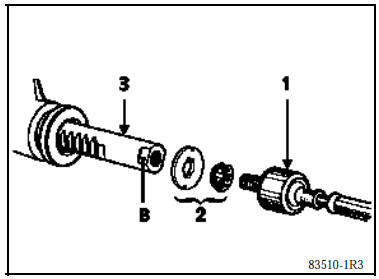
Refit on the steering rack (3):
- the stop washer assembled with the locking tab (2),
- the new axial ball joint (1), its thread having first been coated with LOCTITE FRENBLOC, applied sparingly so as not to block the air bleed hole.
Before finally tightening the axial ball joint with tool Dir. 1305-01, check that the tabs of the locking washer (2) properly engage the flats (B) on the steering rack.
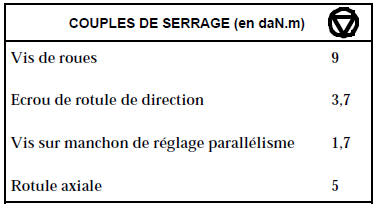
Tighten the axial ball joint to the specified torque.
Set the steering to the centre position to balance the air in the boots.
Refit a new boot and secure it with a new clamp (after greasing the boot seat on the axial ball joint).
Check: press lightly on the boot to check that the other boot inflates, confirming air is flowing correctly.
Test yourself
A quick Renault Kangoo quiz: every answer comes with an explanation and a link to the manual page.