Rear floor, rear section
TIGHTENING TORQUES |
|
| mounting 1 | 2.1 daN.m |
| mounting 2 | 2.1 daN.m |
| mounting 3 | 2.1 daN.m |
| mounting 4 | 2.1 daN.m |

Replacing this part is a complementary operation to the skirt for a rear collision. Removal and refitting is linked to an incident (poor sealing, for example).
It is a removable structural component made of pre-impregnated polyester composite plastic (SMC).
The method described below gives the operations to carry out for its complete replacement.
For bonding areas, use the reference adhesive: 77 01 423 330.
Information on related parts is covered in their respective sections (see contents).
REPAIR
For repair of the outer panel and the box section, see repair manual 502.
REPLACEMENT PART COMPOSITION
Part supplied alone.
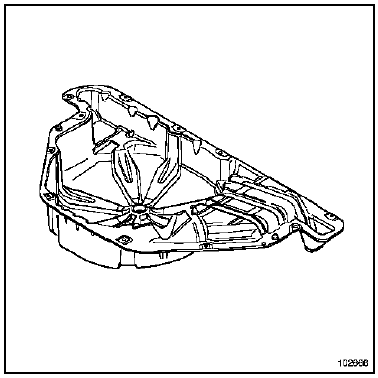
Complete replacement
REMOVAL
To access the floor mountings, it is necessary to carry out the following operations:
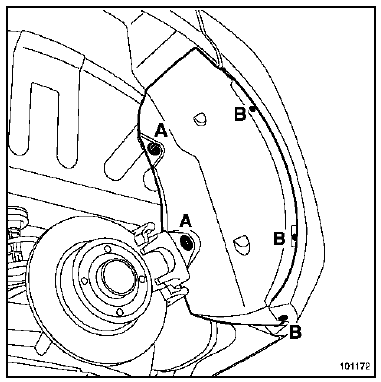
Remove the mudguards, mountings (A) and (B).
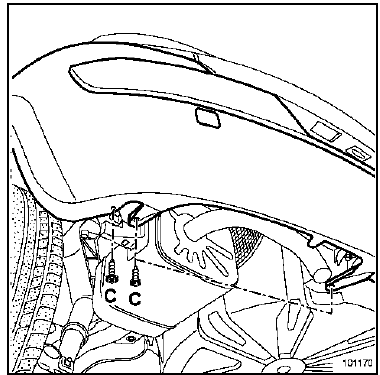
Remove the lower mounting screws (C) (one central mounting screw and two lateral mounting screws on each side).
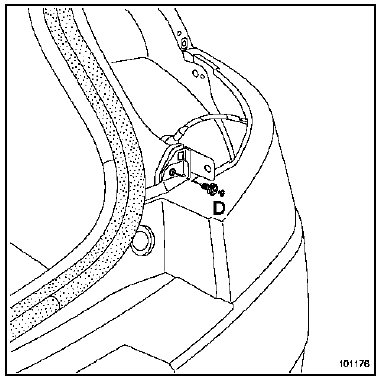
Remove the rear lights.
Remove the upper bumper clip (D).
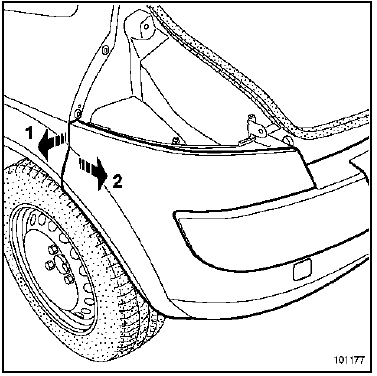
Unclip the bumper in the direction of arrow (1), then remove it (arrow (2)).
Removing the rear bumper requires a second operator.
Remove:
- the boot carpet,
- the spare wheel and the jack.
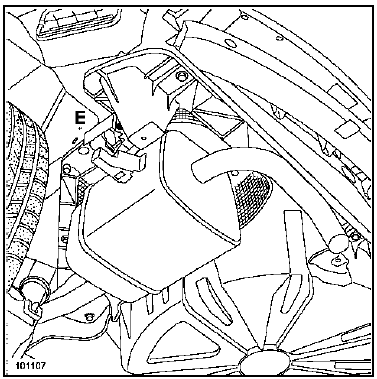
Remove the muffler mounting screw (E).
Lower the muffler to release it.
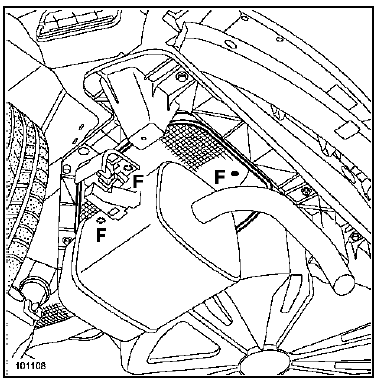
Remove the heat shield mounting screws (F).
Release the heat shield.
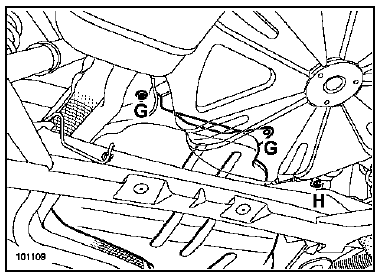
Remove the two fuel tank mounting screws (G) and the lower filler neck mounting screw (H).
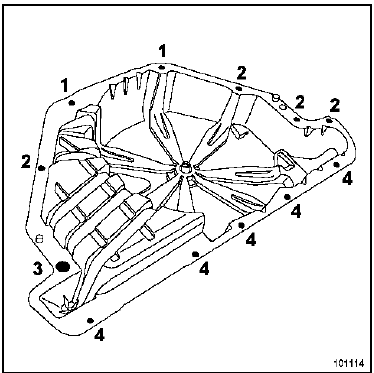
Remove all floor mountings (1 to 4).
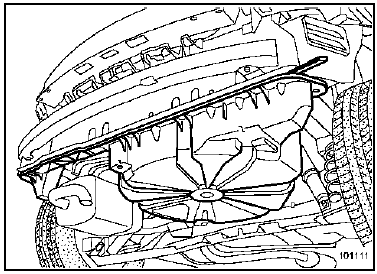
Insert a flat chisel at the rear right corner of the floor panel.
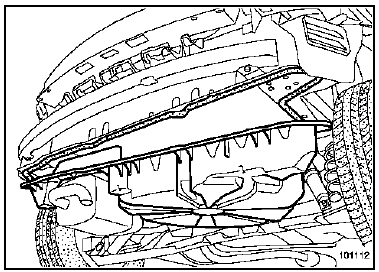
Use the flat chisel as a lever and carefully separate the floor panel.
Note: During this operation, cut the sealant bead with a sharp tool if removal offers too much resistance.INSTALLATION
Preparing the replacement part:
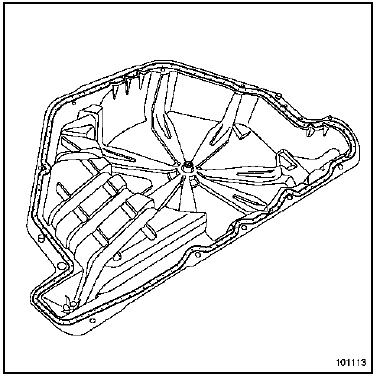
Remove the residual bead of adhesive.
Using a lint-free cloth, clean the bonding surfaces with heptane.
Apply the sealant as shown in the diagram.
Preparation on the vehicle:
Remove the residual bead of adhesive.
Using a lint-free cloth, clean the bonding surfaces with heptane.
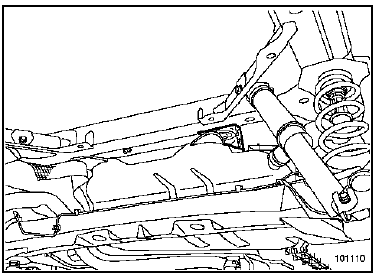
To avoid any risk of damaging the sealant bead and to make positioning the floor panel easier when refitting it, move the fuel tank aside using a wooden wedge.
Refit in the reverse order of removal.
This procedure requires two operators.
WARNINGRemove any excess sealant visible from inside or outside the vehicle.
Check that the floor panel is properly sealed from underneath.
Test yourself
A quick Renault Megane quiz: every answer comes with an explanation and a link to the manual page.